Windows Package Manager, or ‘winget’ is a command-line tool that allows us to search, install, upgrade, uninstall, and configure applications on Windows 10 and Windows 11 systems. In this blog post, we will explore how to install the Windows Package Manager and then delve into useful commands and switches that can be used with winget.
Table of Contents
Ways to Install Winget
There are various methods to install the Windows Package Manager or ‘winget’ command-line tool, which are listed below:
- Using Microsoft Store
- Using the Github Download link.
Using Microsoft Store
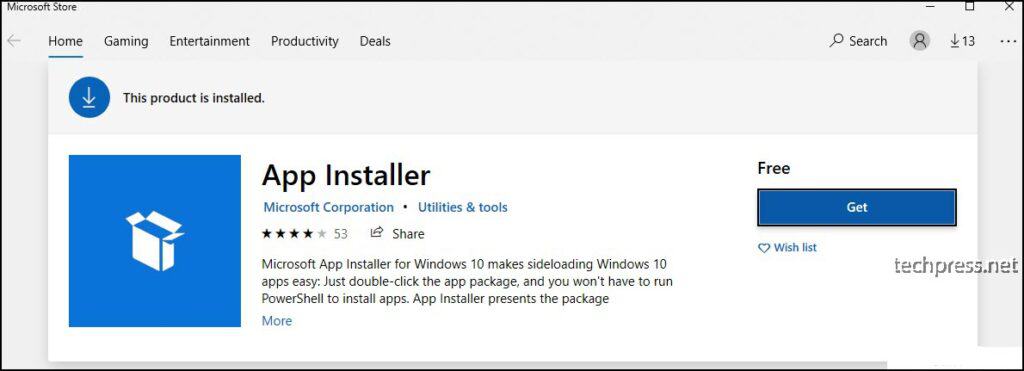
The ‘winget’ tool is included in the Windows App Installer, available for download from the Microsoft Store using this link: Windows App Installer. One significant advantage of installing ‘winget’ tools through the Store is that the app will be automatically updated.
- Once you click on Windows App Installer, Click on the Get button.

- After clicking Get, the local Microsoft Store app may launch. Once there, click ‘Get‘ again and proceed to install the app to acquire the ‘winget’ command-line tools.
Using the Github Download link
You can also download the ‘winget’ CLI from GitHub by following the steps below. One drawback of installing ‘winget’ tools using GitHub is that you will be responsible for updating the tools when a new version is released. Tools will not be automatically updated like it does when you Install them via the MS Store.
To know more about downloading winget tools using Github, Use the following link: https://github.com/microsoft/winget-cli/releases
How to Check Winget version?
To check the version of Winget, you can use the winget –version command or simply type ‘winget‘ in the command prompt. Both the Windows Command Prompt and PowerShell can be used for this purpose.
winget --version
winget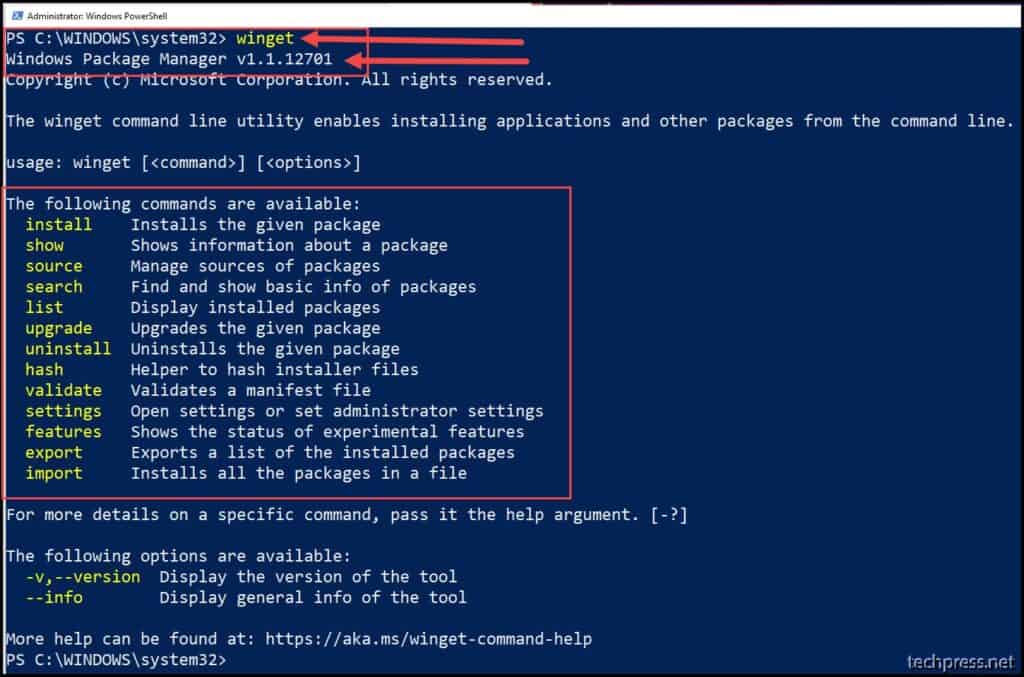
How to Search for an Application Using Winget?
Before installing an application on your system, you can search for it using the ‘winget‘ tool. The tool queries the source, and if the app is found, it displays the information on the console. Let’s explore how to search for applications using winget
We will search for a keyword called ‘foxit‘ and the search query should result in all the apps matching this name. The results will include useful information such as Name, ID, Version, and Source.
This information will be helpful when installing the application using the ‘winget’ tool. In the next section, we will explore how to install the Foxit PDF Reader application on Windows 10 or Windows 11 using winget.
winget search foxit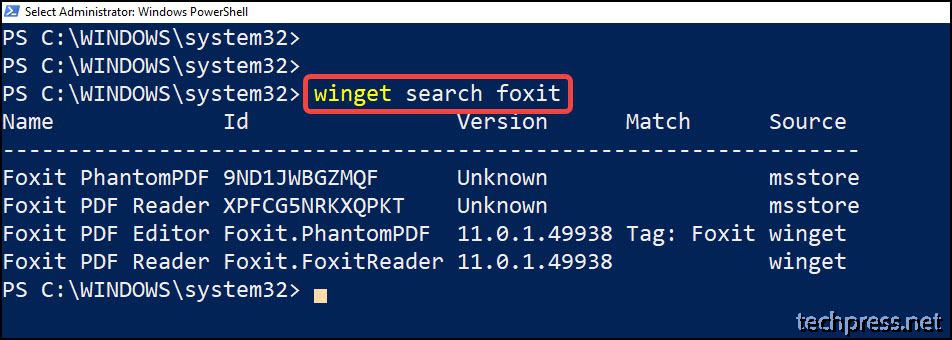
How to Install an Application Using Winget?
The winget install command is used to install applications on a Windows 10 or Windows 11 device. Please open the Command Prompt or PowerShell console as an administrator.
There are various options or switches available for use with the ‘winget install‘ command. It’s entirely optional to use command switches, but they allow you to customize the installation experience according to your requirements. Below, you’ll find the most useful ‘winget install’ commands along with their corresponding switches.
winget install <app name>
winget install <app name> --version <version number>
winget install --id <app id> --version <version number>
Let’s explore what happens when we attempt to install Foxit PDF Reader. Since we previously searched for the ‘Foxit’ app and found multiple listings for Foxit PDF Reader, it might not be possible to install the application using just the application name. Nevertheless, let’s proceed and see the output.
winget install "Foxit PDF Reader"
As anticipated, we encountered an error stating ‘Multiple packages found matching input criteria. Please refine the input‘ To address this, we need to be more specific when installing the app. We will use the application ID ‘Foxit.FoxitReader‘ to uniquely identify the app.
Winget install --id Foxit.FoxitReaderThe installation will be silent by default; however, you can include an option to make it interactive using ‘-i‘ or ‘–interactive‘ provided the application supports interactive mode.

Installation in Progress…
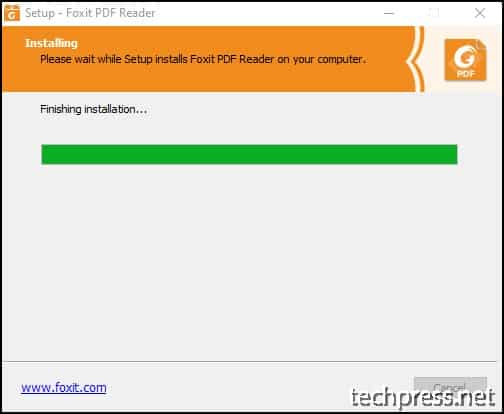
After the successful installation of the application on the machine, you will see a message on the Command Prompt or PowerShell console indicating that the application has been installed successfully.

If you wish to further verify the application installation, open ‘Programs and Features‘ from the Control Panel and look for the application you just installed.

| Tip |
|---|
| “You can also change the scope of the application installation using the ‘–scope‘ option or switch. This allows you to adjust the application installation scope to either user or machine scope. |
To ensure the application works correctly, launch it from the Start menu or desktop shortcut and check if it is functioning properly.
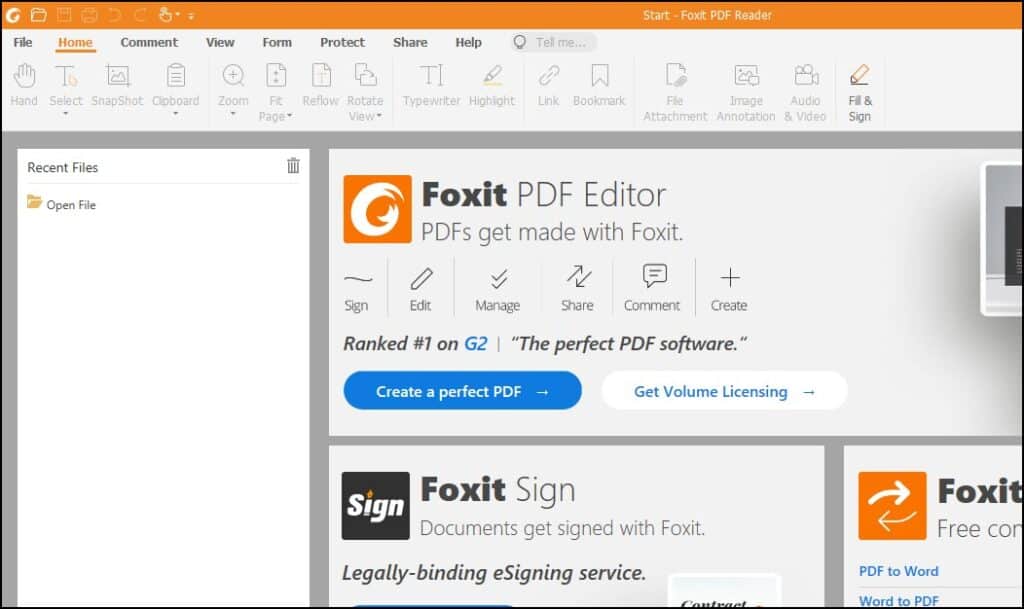
How to Upgrade an Application Using Winget?
To upgrade an application using the ‘winget‘ command, first, run ‘winget list‘ to check if an update is available. After confirming, use the ‘winget upgrade‘ command to proceed with the upgrade. Let’s go through the steps:
1. Winget List
Before upgrading any application, it’s important to check if an update is available. To do this, we will use the ‘winget list‘ command, which lists all the applications installed on your system, including those not installed using ‘winget.’ After running the ‘winget list‘ you will see a comprehensive list of all the apps and information about them.
winget listIdentify the application you wish to upgrade and check the ‘Available‘ column. If a version number is mentioned for the app in this column, you can proceed with the upgrade. Let’s observe ‘winget list‘ in action before using the ‘winget upgrade“.
In the screenshot below, the ‘winget list’ command displays all installed applications, including our recently installed application, Foxit PDF Reader. The ‘Available‘ column corresponding to the Foxit Reader app is empty, indicating that there are no updates available for this app at this time.
However, there is another application installed on this machine called Git, and the ‘Available‘ column shows that version 2.33.0.2 is available. I will use this application as an example to demonstrate how you can upgrade it using ‘winget’.

2. Winget Upgrade
Once again, we need to uniquely identify the app and use its information in the command to proceed with the upgrade. The application we will upgrade today is Git which has an App ID of Git.Git.
In the ‘Available’ column, we previously identified that a new version of this app, which is available for an upgrade, is 2.33.0.2. Now, let’s explore the command to update/upgrade this application.
winget upgrade --id Git.Git
How to Uninstall an Application Using Winget?
Finally, as Foxit PDF Reader is no longer needed, we will uninstall the application. To do this, we will use the ‘winget uninstall‘ command.
To uniquely identify the application, it’s best to use the Application ID, especially when there could be multiple applications with the same name, making it challenging to uninstall the correct one.
In the case of uninstalling Foxit PDF Reader, we have the Application ID information, which is ‘Foxit.FoxitReader‘. This is sufficient for us to proceed with the uninstallation.
winget uninstall --id Foxit.FoxitReader
Other Winget commands
The ‘winget show‘ command of the ‘winget’ tool displays details for the specified application. To show details about an application, you can use the following example: ‘winget show vscode‘.
More Information about Windows Package Manager
For additional information and further reading about Windows Package Manager, you can refer to the official documentation at the following URL: https://docs.microsoft.com/en-us/windows/package-manager/
