Continuing the Kubernetes home lab series, this is Part 2, where we proceed further with setting up the Kubernetes cluster. In Part 1, we downloaded and installed Ubuntu 24.04 Server and created three VMs for the lab based on the specifications below:
| Role | Hostname | vCPU | RAM | Disk | IP |
|---|---|---|---|---|---|
| Control plane | Kube-Master01 | 2 | 2 GB | 20 GB | 192.168.55.61 |
| Worker 1 | Kube-node01 | 2 | 2 GB | 20 GB | 192.168.55.193 |
| Worker 2 | Kube-node02 | 2 | 2 GB | 20 GB | 192.168.55.72 |
After installing the OpenSSH server, we verified remote connectivity to each node using SSH. With secure remote access in place, we can now proceed with the remaining steps to set up the Kubernetes cluster.
Contents
Step 4: Update /etc/hosts on all 3 Servers
In this step, we will create an entry for each server in the hosts file on all 3 Ubuntu servers. Update below code with the IP address and hostname of your home lab servers and run this command on all 3 servers.
sudo tee -a /etc/hosts > /dev/null <<EOF
192.168.55.61 Kube-Master01
192.168.55.193 Kube-node01
192.168.55.72 Kube-node02
EOF
Reboot All Servers
sudo reboot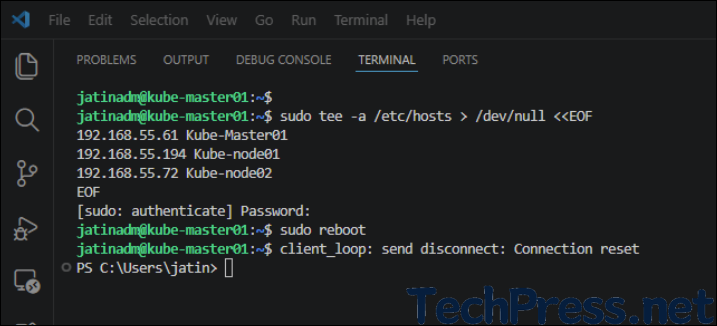
Step 5: Base OS Preparation on All 3 Servers
Run the commands below on all three servers, including the control plane and worker nodes, to prepare the base OS for the Kubernetes cluster.
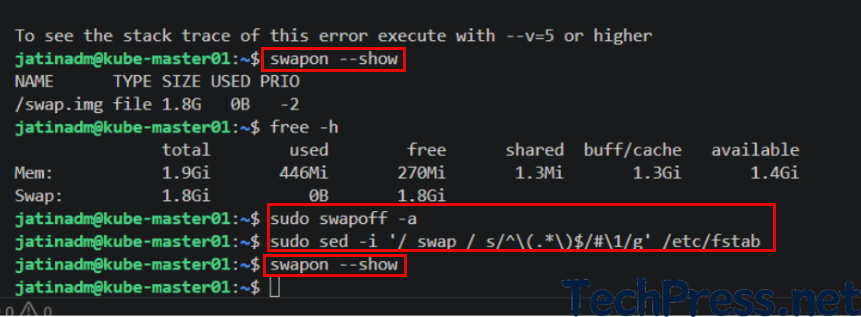
Disable Swap
Kubelet fails to start if swap is detected, so disabling swap is the standard path unless you explicitly configure swap tolerance.
sudo swapoff -a

sudo sed -i '/ swap / s/^\(.*\)$/#\1/g' /etc/fstab
swapon –show
free -h
sudo swapoff -a
sudo sed -i ‘/ swap / s/^\(.*\)$/#\1/g’ /etc/fstab
swapon –showImportant: Verify if swap if off
Load common kernel modules
Run this on on all 3 Servers.
cat <<EOF | sudo tee /etc/modules-load.d/k8s.conf
overlay
br_netfilter
EOF

sudo modprobe overlay
sudo modprobe br_netfilter
sudo sysctl --system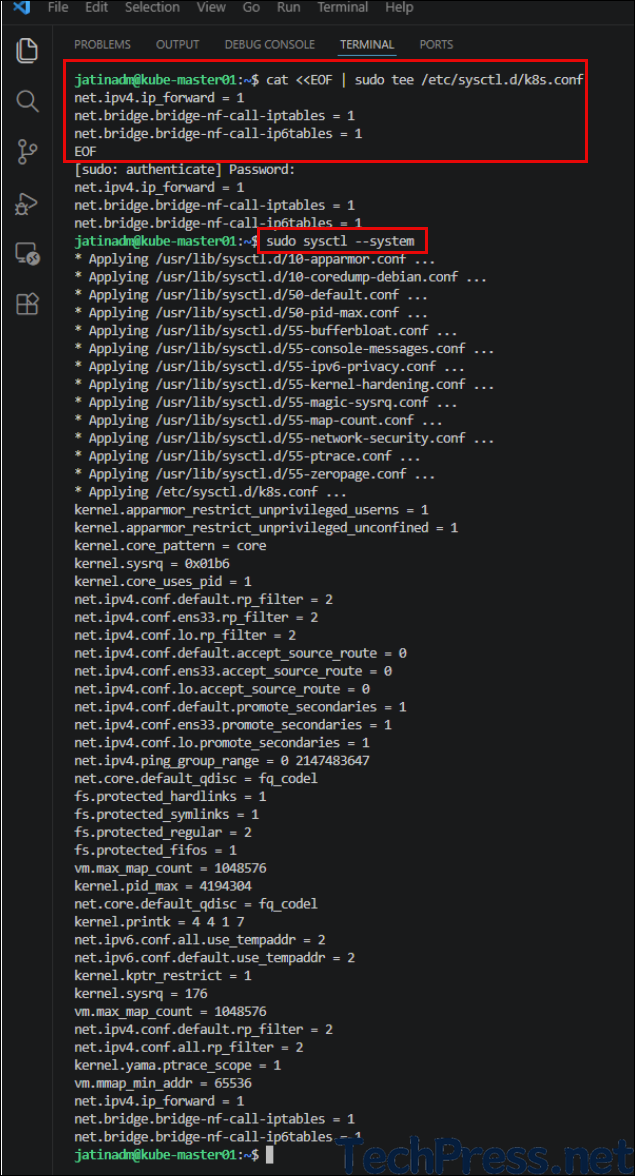
Install Containerd on all 3 Servers
I will be using containerd as a container runtime for my home lab. Install containerd on all the servers, including the control plane and all worker nodes. For learning more about containerd, refer to the page Container Runtimes | Kubernetes.
sudo apt update
sudo apt install -y containerd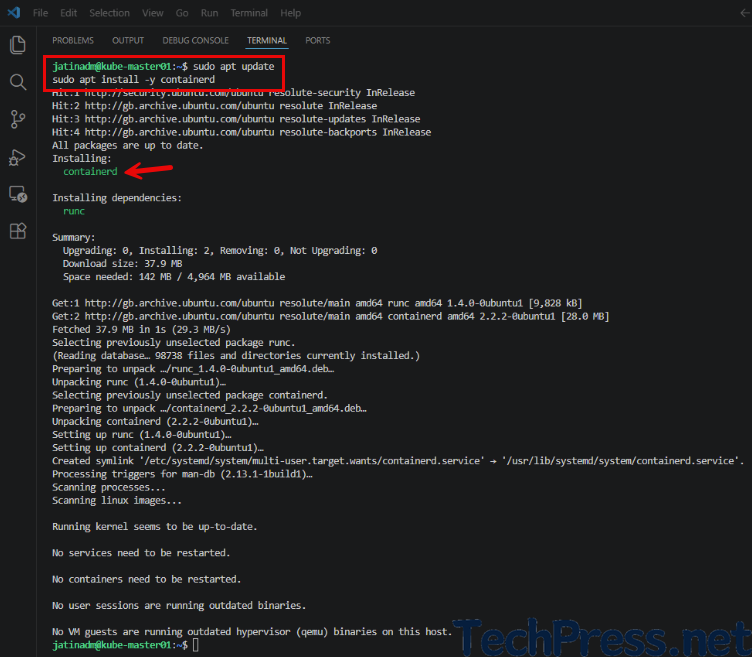
Create a default config file
sudo mkdir -p /etc/containerd

sudo containerd config default | sed 's/SystemdCgroup = false/SystemdCgroup = true/' | sudo tee /etc/containerd/config.toml > /dev/null
Verify if systemdCgroup is now set to true
cat /etc/containerd/config.toml | grep -i SystemdCgroup -B 50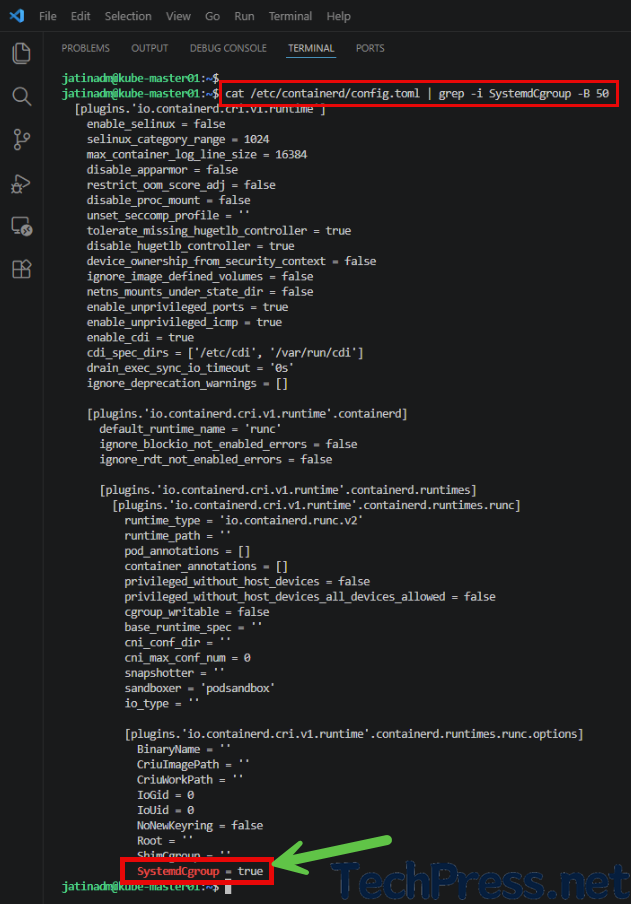
Check that cri is not disabled
cri should not be in the disabled plugins list. Check using the below command.
grep disabled_plugins /etc/containerd/config.toml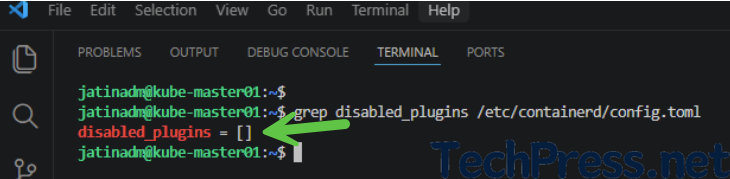
If cri is showing in the disabled plugins list, then remove it by editing config.toml.
sudo nano /etc/containerd/config.tomlRestart Containerd and check its status
sudo systemctl restart containerd
sudo systemctl status containerd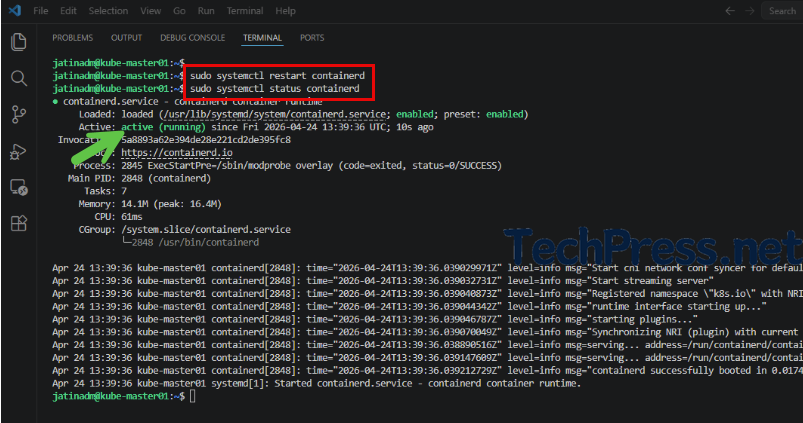
Step 6: Install kubeadm, kubelet, and kubectl on all 3 Servers
Now, install kubeadm, kubelet, and kubectl on all servers, including the control plane node.
Install repo prerequisites
sudo apt-get update
sudo apt-get install -y apt-transport-https ca-certificates curl gpg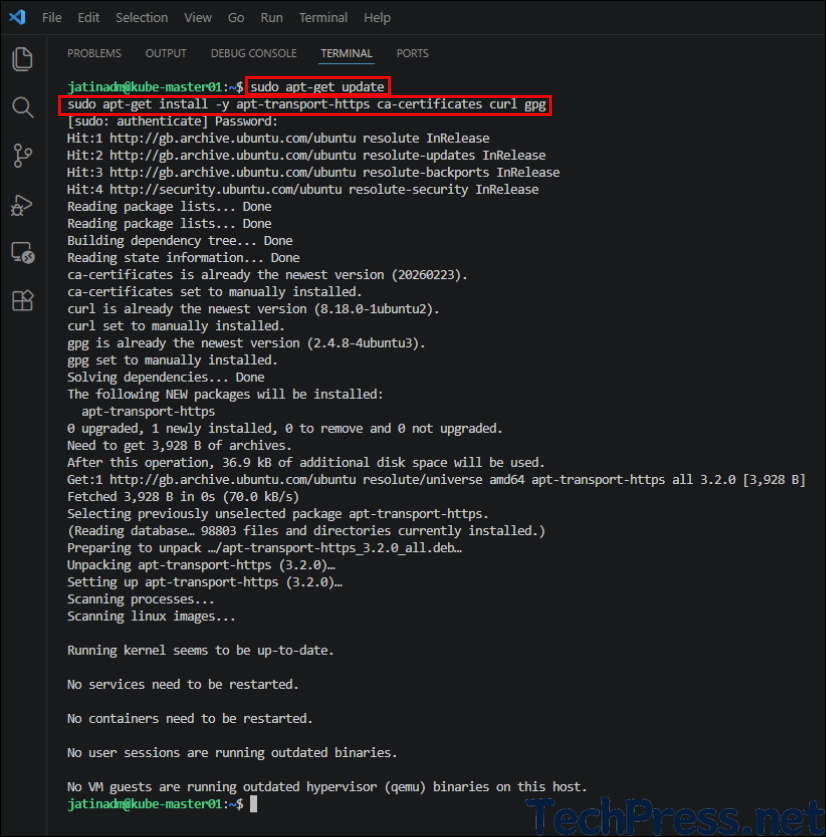
Add the Kubernetes signing key
sudo mkdir -p -m 755 /etc/apt/keyrings
curl -fsSL https://pkgs.k8s.io/core:/stable:/v1.36/deb/Release.key | sudo gpg --dearmor -o /etc/apt/keyrings/kubernetes-apt-keyring.gpg
Add the Kubernetes v1.36 repo
I am using the v1.36 repo for installing kubeadm, which is the latest as of now. Be sure to verify the version and update it if needed.
echo 'deb [signed-by=/etc/apt/keyrings/kubernetes-apt-keyring.gpg] https://pkgs.k8s.io/core:/stable:/v1.36/deb/ /' | sudo tee /etc/apt/sources.list.d/kubernetes.list
Install Kubernetes Packages
Run below commands on all servers to install kubelet, kubeadm, and kubectl.
sudo apt-get update
sudo apt-get install -y kubelet kubeadm kubectl
sudo apt-mark hold kubelet kubeadm kubectl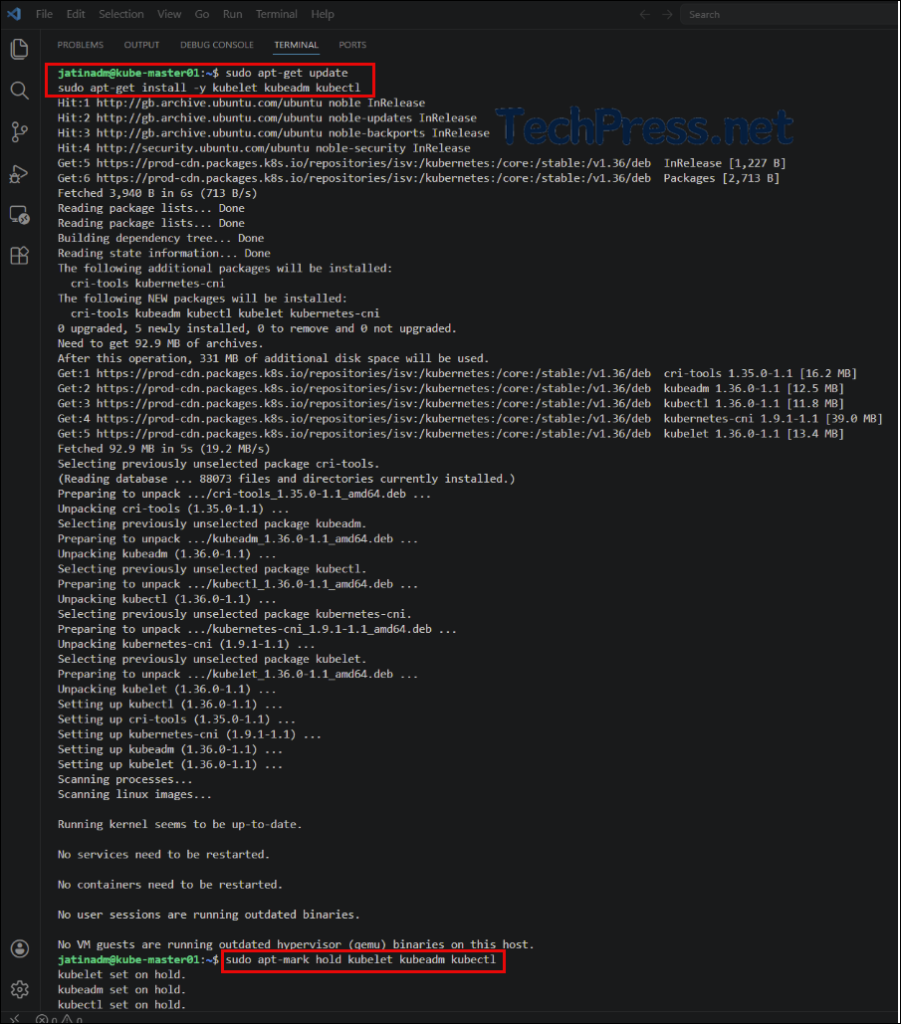
Verify Kubeadm version
kubeadm version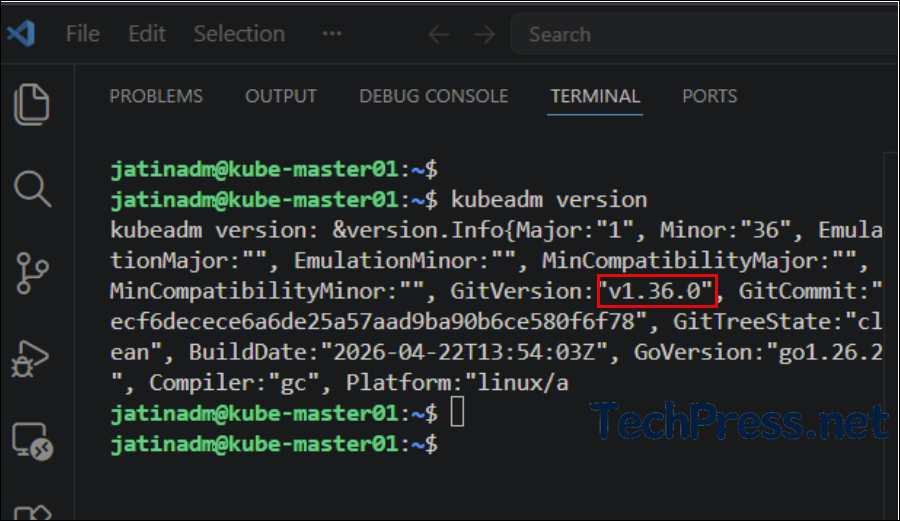
Kubernetes Home Lab Series
- Kubernetes Home Lab Setup [Step-by-Step] – Part 1.
- Kubernetes Home Lab Setup [Step-by-Step] – Part 3.