In this blog post, I will demonstrate the steps on how to setup folder redirection in Citrix. Folder redirection is setup to minimize network load and enhance user logon performance. You can redirect user profile folders, such as Documents, Downloads, Desktop, Picture etc. to a network share or to OneDrive.
The choice between using a network share folder or OneDrive for the folder redirection depends on your environment. If all users are using OneDrive, migrating known folders to OneDrive is easier and better approach.
However, if you have not yet enabled OneDrive, you can also redirect folders in users profile to a network share using a Group policy.
Combining Folder redirection with the Citrix Profile Management solution enhances the end-user experience. This integration not only accelerates profile loading times but also ensures a smoother sign-in and sign-out process.
The following step-by-step guide outlines how to configure folder redirection in Citrix using a shared folder on a file server. This configuration example is demonstrated using a single domain controller, which also functions as a file server.
Contents
Overall Steps:
- Create a Network Share: Create a network share and configure share and NTFS permissions.
- Create a GPO to configure folder redirection.
Step 1: Create a Network Share and Configure Permissions
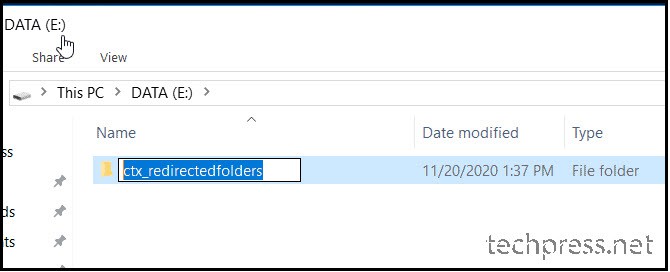
- Login to the File server and identify a drive with enough space to hold redirected folders data. Create a new folder (e.g., ctx_redirectedfolders).
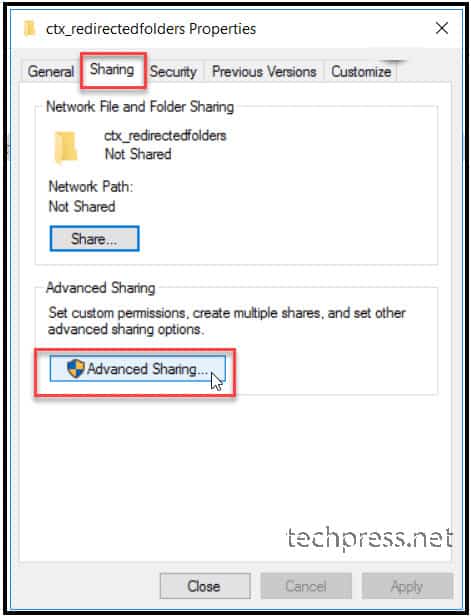
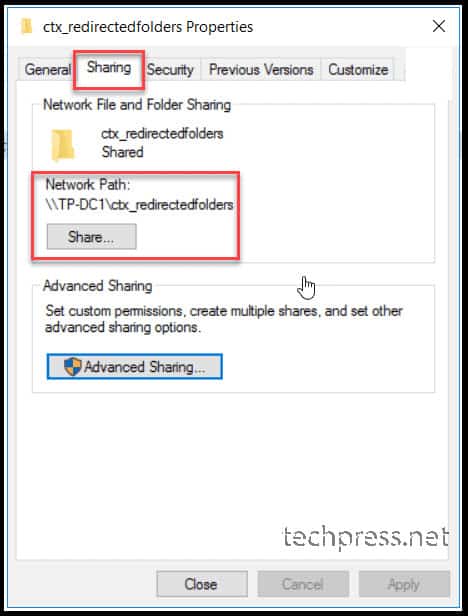
- Right-click on the folder and select Properties.
- Go to the Sharing tab, then click on Advanced Sharing.
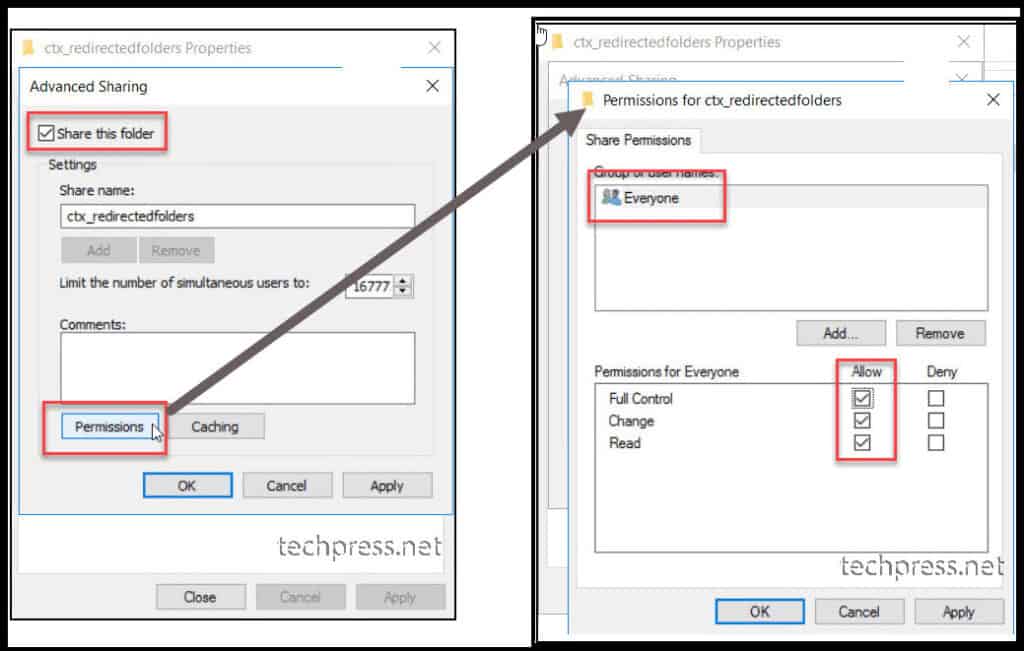
- Select the checkbox for Share this folder and click on the Permissions button. Set Everyone with Full Control Share Permissions. Click OK to save.
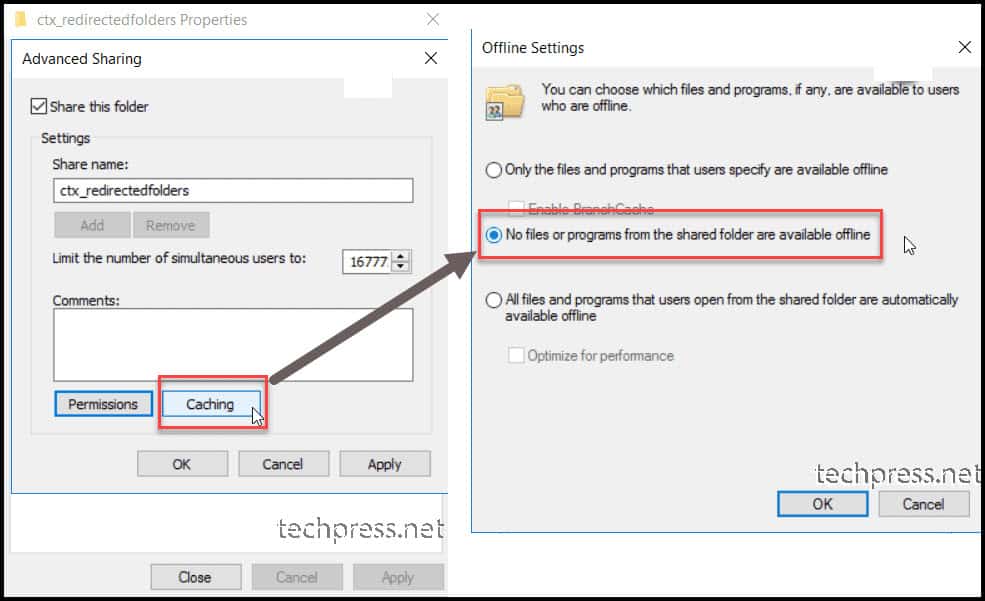
- Click on Caching button. Select the option No files or programs from the shared folder are available offline. Click on OK.
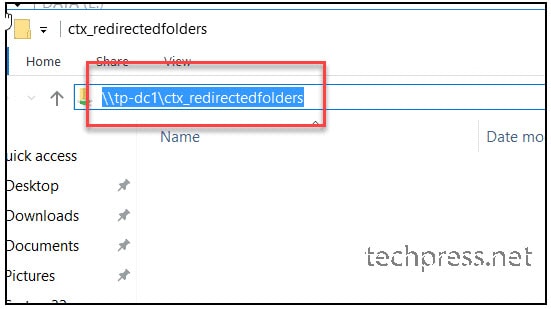
- Folder is now shared. Copy the UNC path which will be required during the configuration of group policy.
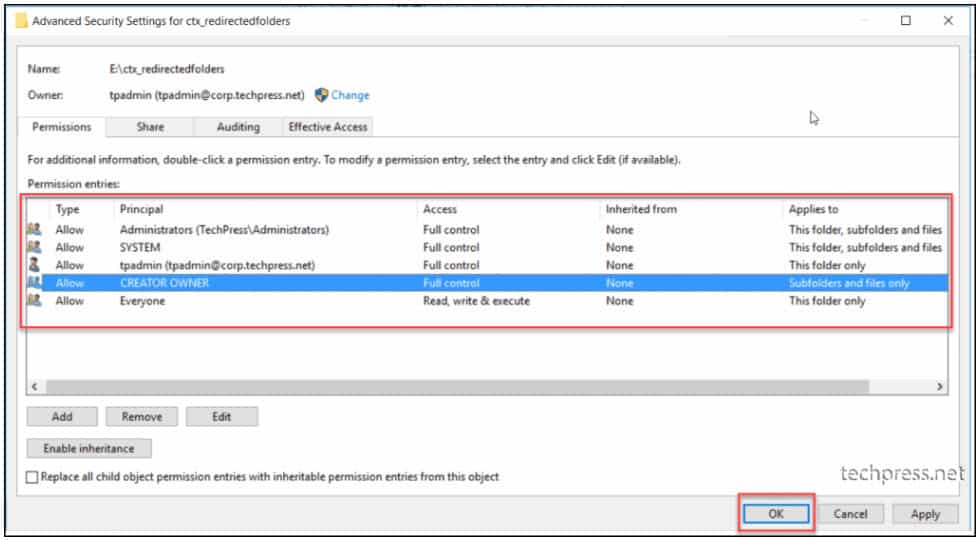
- Configure NTFS Permissions for the shared folder. Click on the Security tab, and then click on the Advanced button.
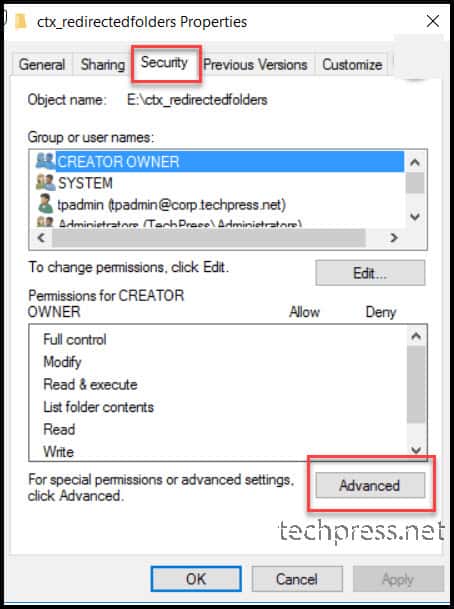
- Click on Disable inheritance to disable permission inheritance on this folder and select Convert inherited permissions into explicit permissions on this object.

- Now, click on the Add button to add the permissions.
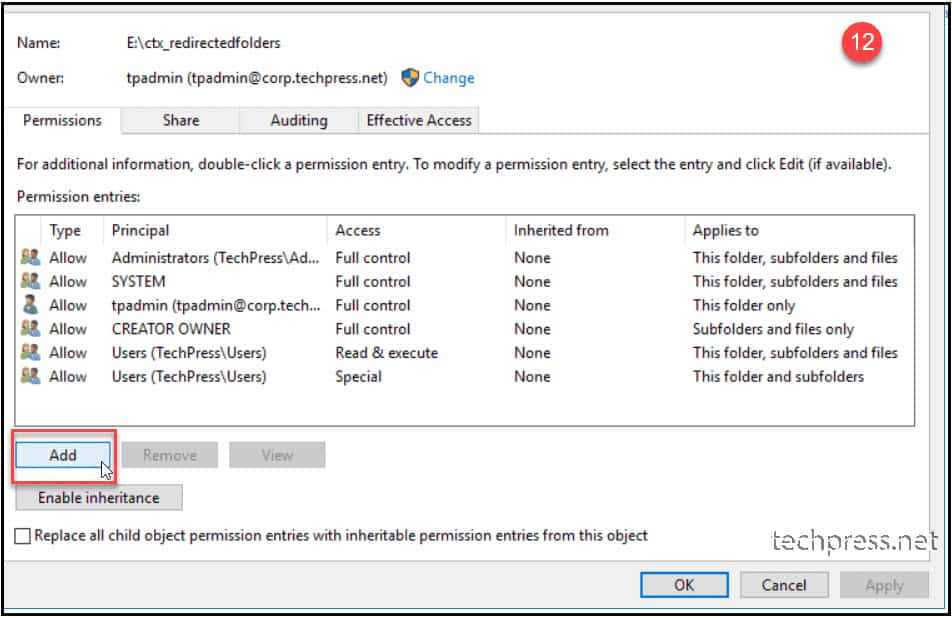
- Click Select a principal and select Everyone or add <yourdomainname>\users then click OK. I will be adding Everyone here.
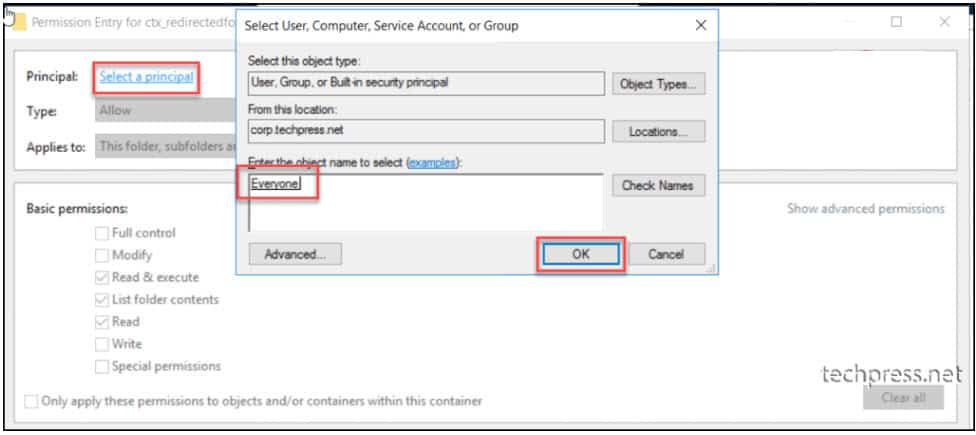
- Ensure that applies to is set to This folder only to prevent users from getting permissions on other user’s redirected folders.
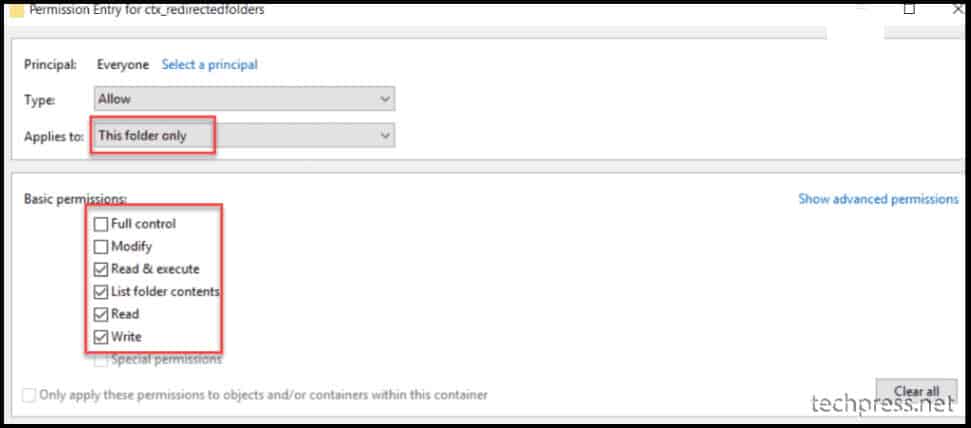
- Configure the NTFS permissions as shown in below screenshot.
- Ensure you can access the folder using the UNC path.
Step 2: Create a Group Policy Object for Folder redirection
After creating a shared folder and configuring Share and NTFS permissions, the next step is to create a Group Policy in Active Directory. Let’s check the steps:
- Log in to one of the Domain controllers.
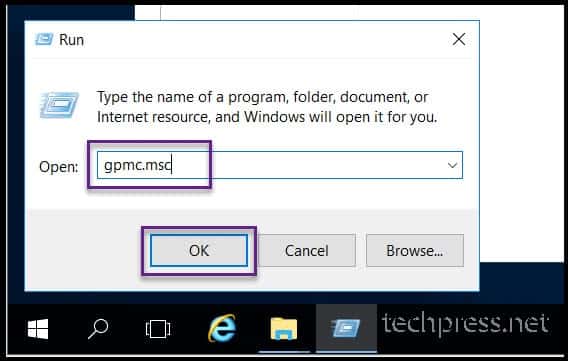
- Click on Start > Run > type
gpmc.mscto open the Group Policy Management Console.
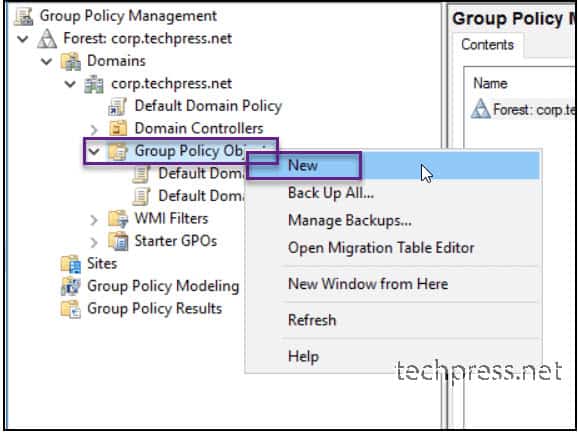
- Right-click on Group Policy Objects and click New to create a new Group Policy Object.
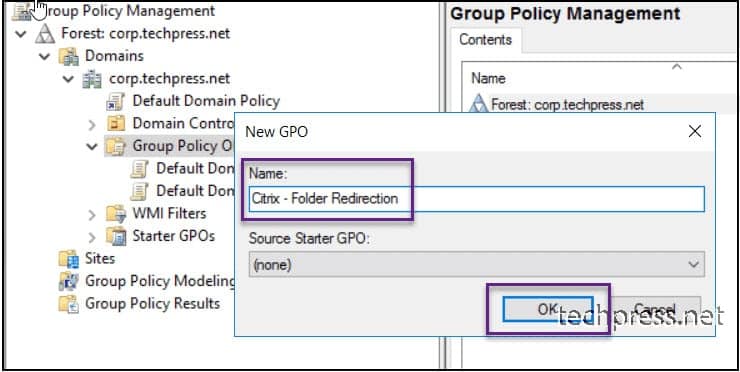
- Provide a name for the GPO, for example, Citrix – Folder Redirection and click OK to create.
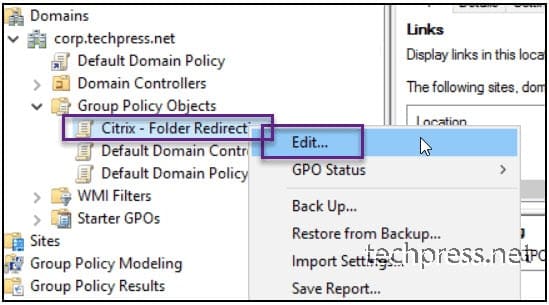
- Right-click on the Citrix – Folder Redirection GPO and click on Edit to configure the Group Policy settings.
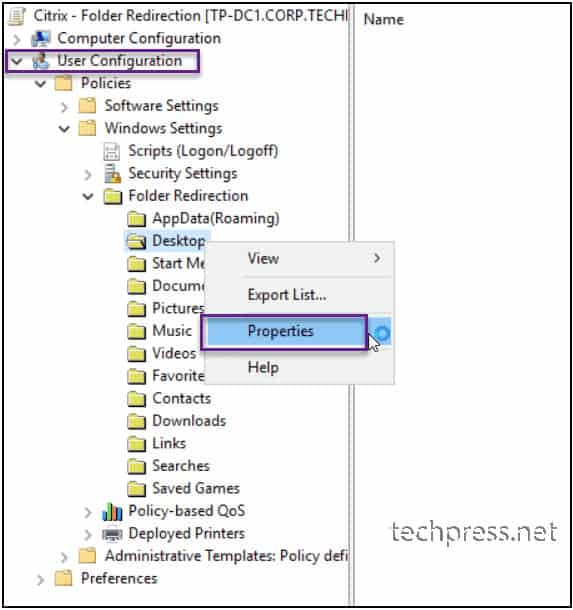
- Navigate to User Configuration > Policies > Windows settings > Folder Redirection. Here, you will find all the folders which can be redirected. In the next steps, we will configure redirection of these folders to a network share.
If you want to redirect the AppData folder, thoroughly test all applications after its redirected. AppData redirection can potentially cause issues such as slowness in the application or other application-related issues. In this setup, I have not included AppData folder redirection and have retained this folder at its original location.
Note
Following folders can be redirected:
- AppData(Roaming)
- Desktop
- Start menu
- Documents
- Pictures
- Music
- Videos
- Favorites
- Contacts
- Downloads
- Links
- Searches
- Saved Games
- Right-click on Desktop folder and select Properties.
Configuration of Desktop Folder redirection
- Target Tab
- Setting: Basic – Redirect everyone’s folder to the same location.
- Target folder location: Create a folder for each user under the root path.
- Root Path: This is the UNC path of the shared folder we created in the previous section, that is \\tp-dc1\ctx_redirectedfolders.
- Settings Tab
- Uncheck Grant the user exclusive rights to Desktop, so that administrator have rights to manage the redirected folder in case of any issues.

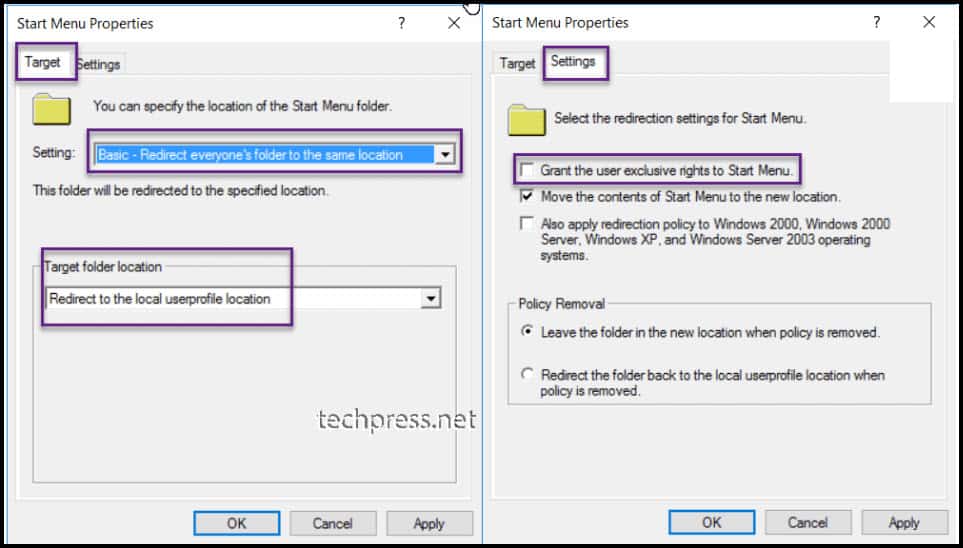
Configuration of Start Menu, Music, Video, and Pictures Folder Redirection
Below screenshot shows the folder redirection configuration for Start menu. We will maintain exactly the same folder redirection configuration settings for Music, Video, and Pictures folders as configured for Start Menu folder redirection.
You can configure the redirection of Music, Video, and Pictures in the same way as configured for Start menu.
- Target Tab
- Setting: Basic – Redirect everyone’s folder to the same location.
- Target folder location: Redirect to the local userprofile location.
- Settings Tab
- Uncheck Grant the user exclusive rights to Desktop.
Configuration of Documents Folder Redirection
- Target Tab
- Setting: Basic – Redirect everyone’s folder to the same location.
- Target folder location: Create a folder for each user under the root path.
- Root Path: This is the UNC path of the shared folder we created in the previous section, that is \\tp-dc1\ctx_redirectedfolders.
- Settings Tab
- Uncheck Grant the user exclusive rights to Desktop.

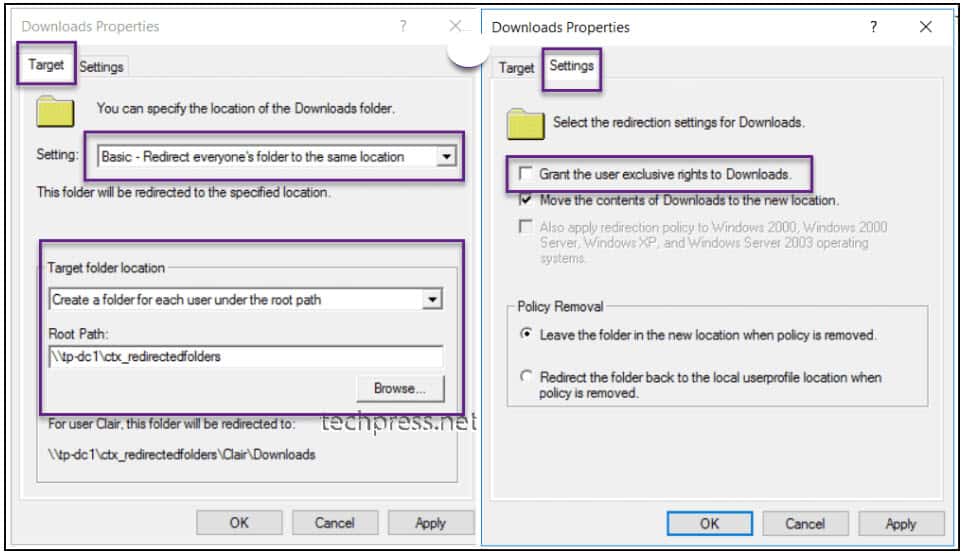
Configuration of Downloads Folder Redirection
- Target Tab
- Setting: Basic – Redirect everyone’s folder to the same location.
- Target folder location: Create a folder for each user under the root path.
- Root Path: This is the UNC path of the shared folder we created in the previous section, that is \\tp-dc1\ctx_redirectedfolders.
- Settings Tab
- Uncheck Grant the user exclusive rights to Desktop.
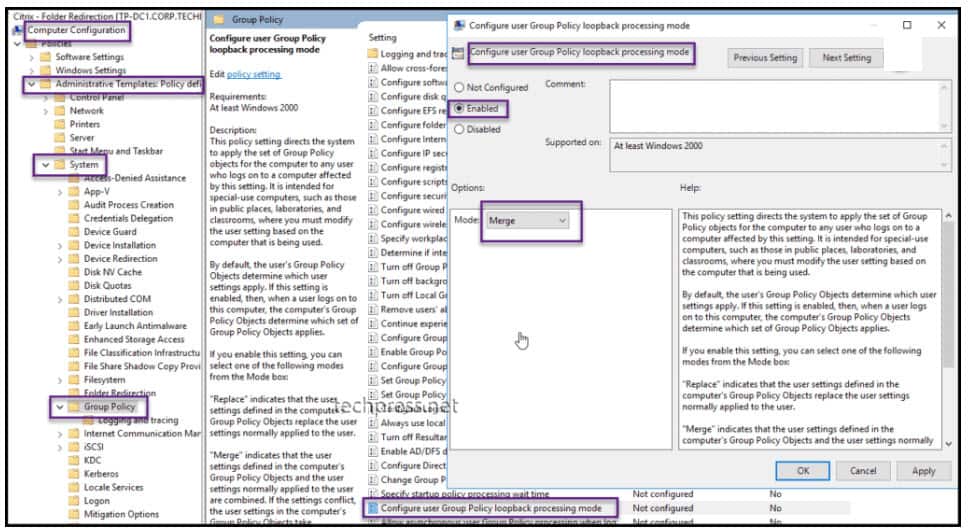
Configure Loopback Processing Mode
We will need to configure loopback processing mode as we will be applying a GPO with User configuration on computers (Citrix servers). To make sure that the policy is applies successfully, we will need to configure the Loopback processing mode to Merge.
In the same group policy where folder redirection is configured (e.g., Citrix – Folder Redirection), configure Loopback Processing Mode using the following steps:
- Navigate to Computer Configuration > Administrative Templates > System > Group Policy.
- Locate the setting named Configure user Group Policy loopback processing mode.
- Set it to Enabled and change the Mode to Merge.
Link the GPO with Citrix Servers OU
Once the GPO has been created, link it to the OU containing Citrix servers.
Verify If Folder Redirection Is Working
- After establishing a session on the Citrix server, navigate to the redirected folder. Right-click on the folder and select Properties. In the Properties window, go to the Shortcut tab and check the Target field. If the field displays a redirected path, folder redirection is working correctly.
- Also, go to your folder redirection file share (e.g., \\tp-dc1\ctx_redirectedfolders) and monitor this location. You will notice a user folder along with redirected folders being created. If you do not see the folders immediately, you may need to log off and log in once or twice for the folders to appear at the specified redirection location.
You can also run gpupdate /force command on Citrix servers to speed up the process of applying the policy. After that run
Notegpresultcommand to check if the list of applied GPOs on the server.