When installing or upgrading from Windows 10 to Windows 11, you may have got the error message PC doesn’t meet the minimum system requirements during Windows 11 setup. You can also get a similar error message when you use PC Health Check app: This PC doesn’t currently meet Windows 11 system requirements.
Most likely, this error will occur when you are not meeting CPU, TPM 2.0 or Secure boot requirements. Ensure that these requirements along with the requirements mentioned in the following section of this post are met before you continue with the Installation process.
If your device has hardware or software limitation, and you cannot meet CPU, TPM 2.0 or secure boot requirements, you can bypass these checks by creating registry key values.
Microsoft does not recommend installing or upgrading to Windows 11 on a device which does not meeting minimum system requirements. You can use the registry key values to bypass these checks in your lab or test environment.
Note
Contents
Requirements for Installing Windows 11
Ensure that your system meets below minimum system requirements for Installing Windows 11. You can also refer to the Microsoft link for more Information: Windows 11 minimum requirements.
| Processor | 1 gigahertz (GHz) or faster with 2 or more cores on a compatible 64-bit processor or System on a Chip (SoC). |
| RAM | 4 gigabytes (GB). |
| Storage | 64 GB or larger storage device Note: See below under “More information on storage space to keep Windows 11 up-to-date” for more details. |
| System firmware | UEFI, Secure Boot capable. Check here for information on how your PC might be able to meet this requirement. |
| TPM | Trusted Platform Module (TPM) version 2.0. Check here for instructions on how your PC might be enabled to meet this requirement. |
| Graphics card | Compatible with DirectX 12 or later with WDDM 2.0 driver. |
| Display | High definition (720p) display that is greater than 9” diagonally, 8 bits per colour channel. |
| Source Microsoft Link | https://www.microsoft.com/en-gb/windows/windows-11-specifications?r=1 |
Ways to Fix this Error
- Use PC Health Check app to get a detailed report on Windows 11compatibility check.
- Enable TPM 2.0 and Secure Boot in BIOS.
- Upgrade from TPM 1.2 to TPM 2.0 (If TPM is enabled and compatible with TPM 2.0).
- Reg keys to Bypass CPU and TPM checks.
- Additional Reg Keys to Bypass SecureBoot check, TPM 2.0 and RAM check.
- Upgrade the hardware or get a compatible PC for Windows 11 OS.
1. Use PC Health Check App for Compatibility Check
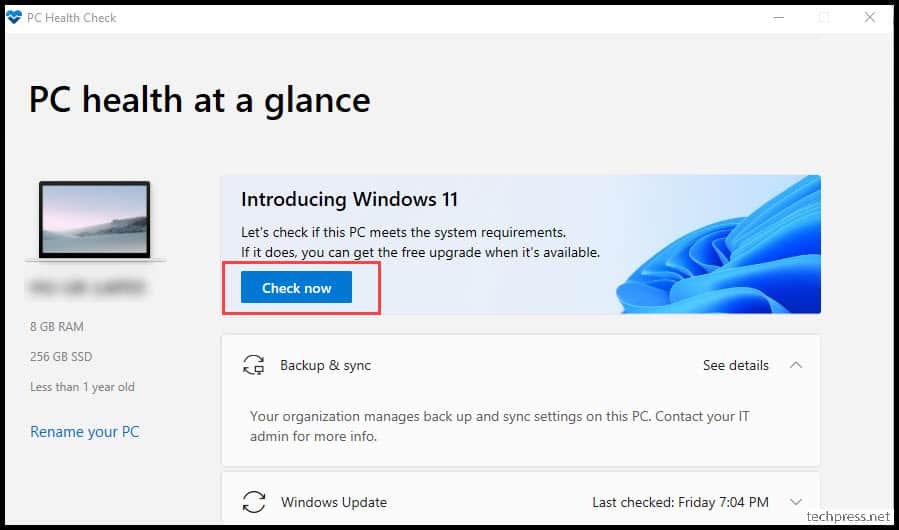
PC Health Check app can be used to check if your PC meets the requirement for Installing Windows 11. Download and Install PC Health Check App, then click on Check now button.
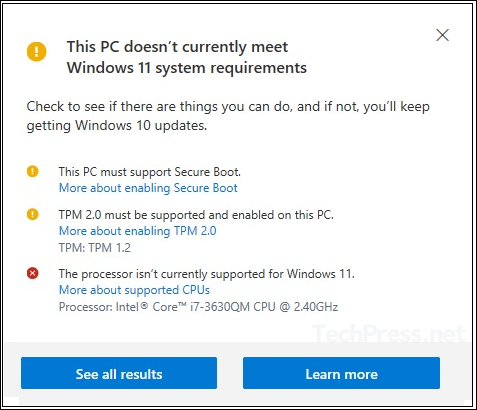
If your PC does not meet the criteria, then you may get a pop-up message, This PC doesn’t currently meet Windows 11 system requirements. Click on See all results to know which specific requirement is not met.
2. Enable TPM 2.0 on your PC
If TPM itself is disabled on your computer, then you can refer to the link: #enable TPM to enable it first and then use this link #Enable TPM 2.0 to enable TPM 2.0.
3. Upgrade From TPM 1.2 to TPM 2.0 and Enable Secure Boot
If your PC is running TPM 1.2 but is compatible with TPM 2.0, you can upgrade it through the BIOS security settings. Before proceeding with the upgrade, make sure to disable BitLocker and decrypt your drive if your local drives are encrypted. It’s also advisable to back up any important files to prevent data loss in case of any issues during the upgrade process.
I would be performing these steps on a Lenovo laptop. If you are using any other make and model laptop, the steps might be slightly different. You can follow the manufacture’s guide on entering BIOS mode and making changes w.r.t. TPM and Secure boot.
Note
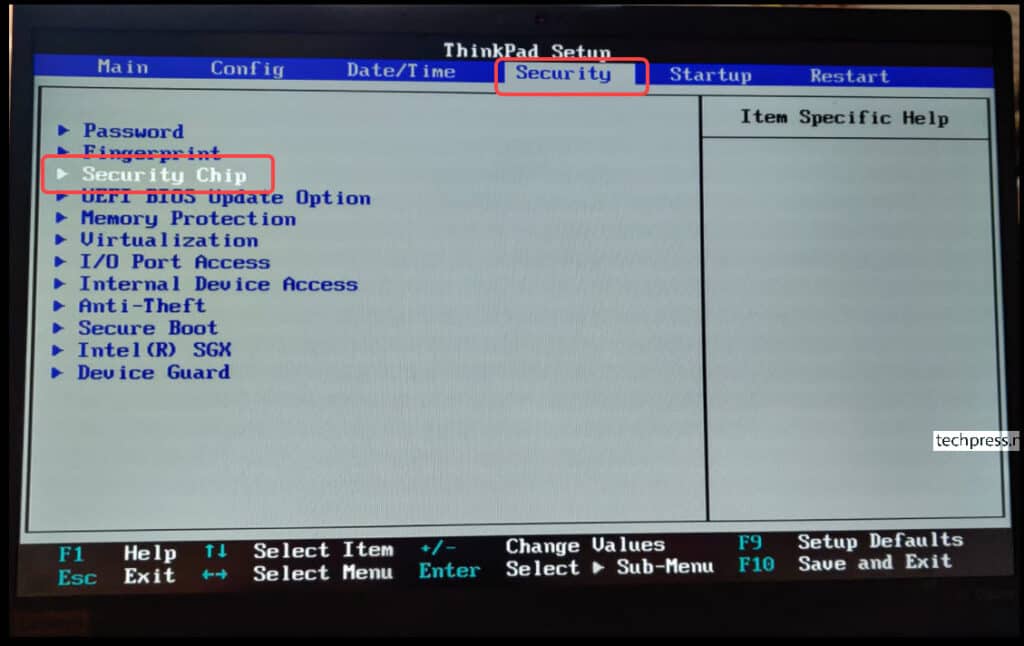
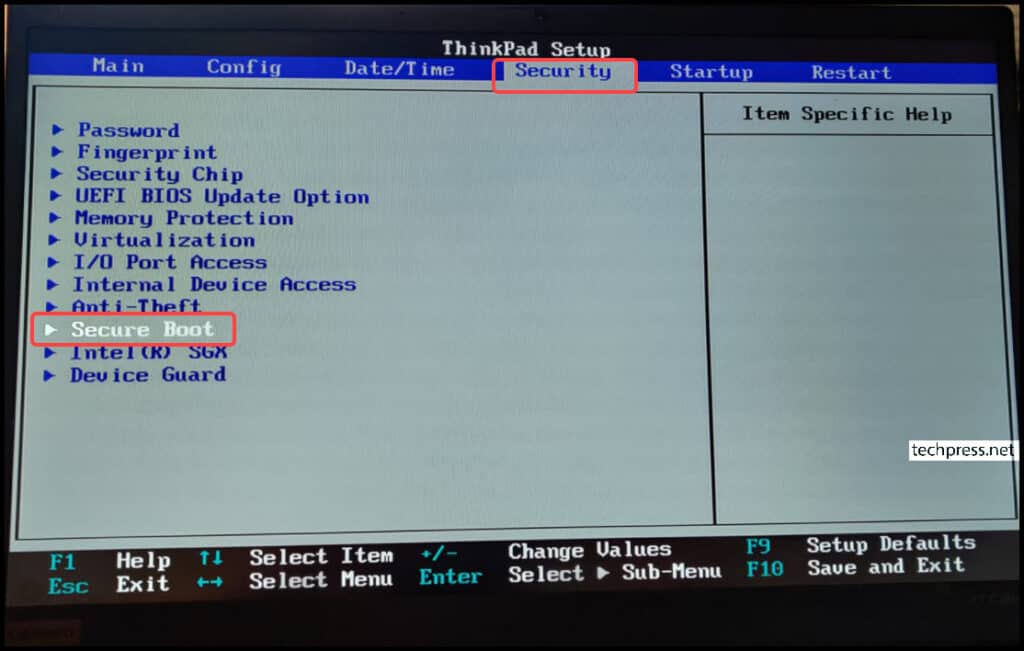
- Restart the device and press F1 to enter the BIOS mode. Navigate to the Security tab, and using your keyboard, select Security Chip then press Enter.
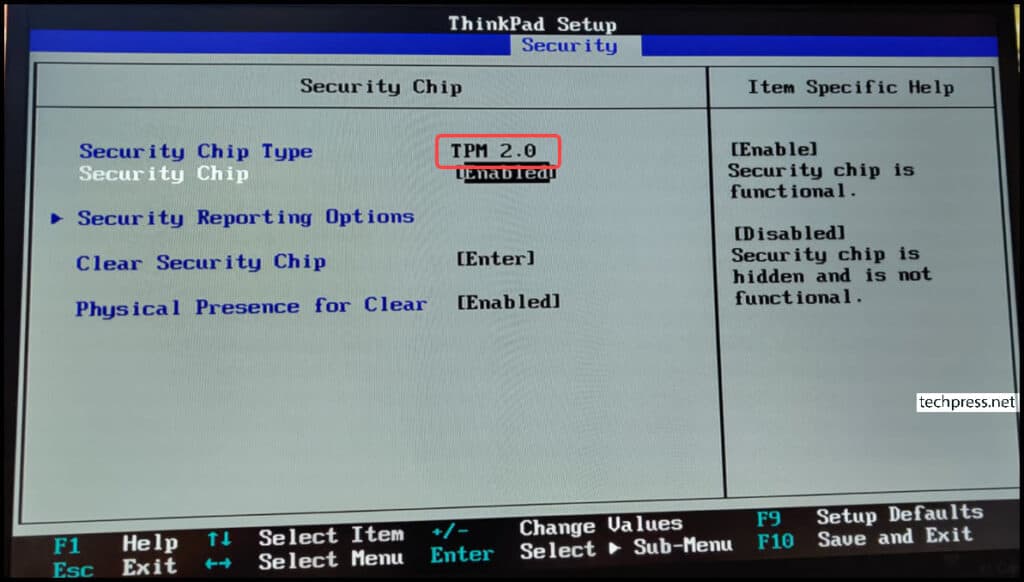
- Check the Security Chip Type to see if you can change the TPM level from 1.2 to TPM 2.0. On my laptop, it was set to TPM 1.2 which I updated to TPM 2.0.
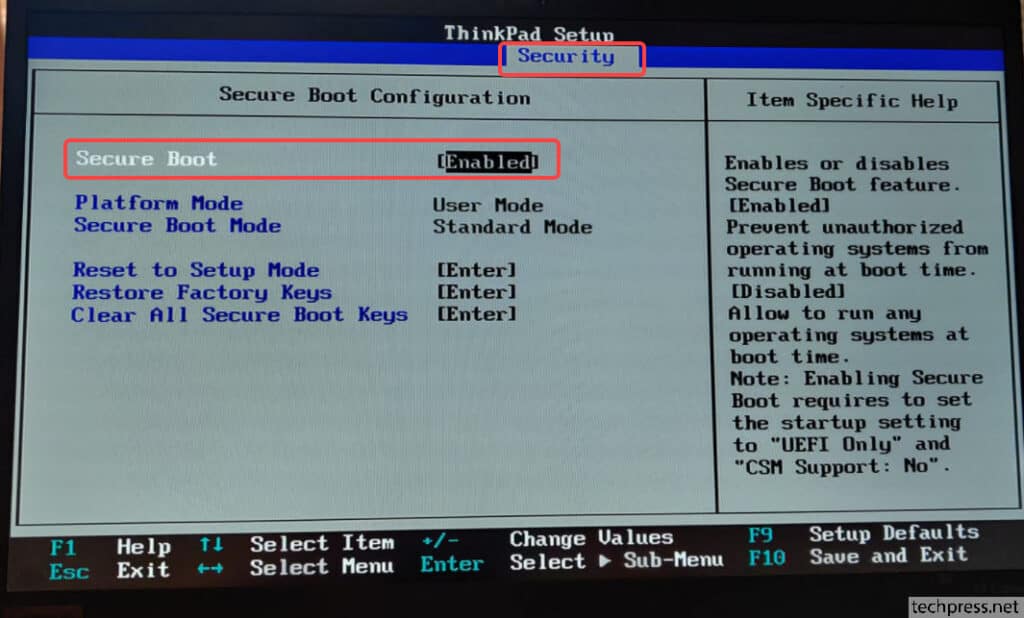
- To check Secure Boot, go to the Security tab, select Secure Boot, and press Enter.
- Ensure that Secure Boot is Enabled.
4. Create Registry Entry and Bypass TPM and CPU Requirements
If you do not meet the TPM 2.0 or CPU requirements for the upgrade, you can create the following registry entry to bypass the TPM or CPU checks. However, it’s important to note that you will still require at least TPM 1.2 to proceed with the installation.

- Click on Start and search for Registry Editor.
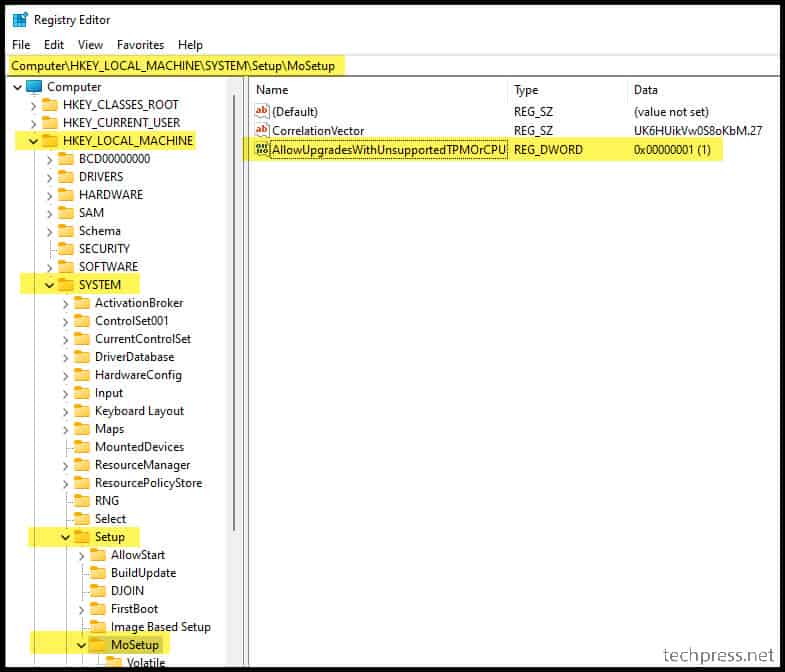
- Navigate to HKEY_LOCAL_MACHINE\SYSTEM\Setup\MoSetup.
- Create a REG_DWORD registry entry AllowUpgradesWithUnsupportedTPMOrCPU and set its value to 1.
If you are Installing Windows 11 from scratch, and you get an error, This PC can’t run Windows 11. You can’t click on Start and go to registry editor as the OS is not installed yet.
To open the registry editor and create the registry key values, you can press Shift + F10 on the window showing the error during the setup. This will open a command prompt in Admin mode. Type
regeditand press Enter to open Registry editor to make necessary changes.
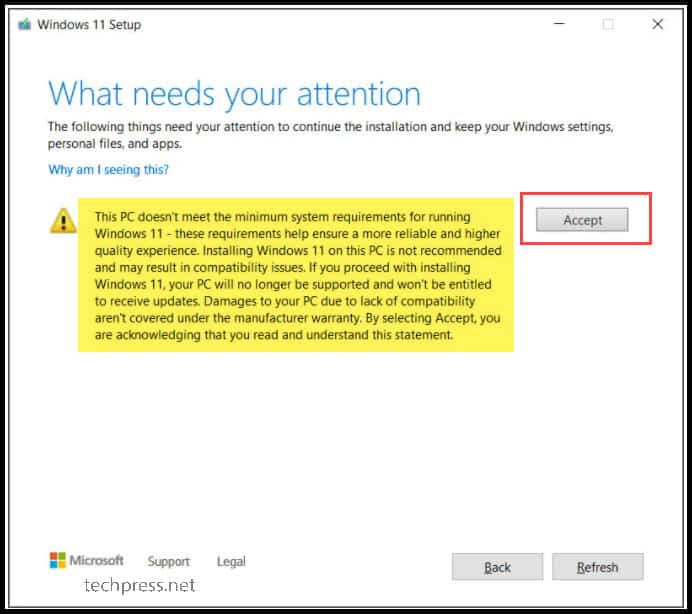
- If you now launch Windows 11 setup on your computer, it will display a warning message. Click on Accept to proceed with the Installation process.
5. Reg Keys to Bypass SecureBoot, TPM 2.0 and RAM Check
There are additional registry keys which can be created to bypass SecureBoot, TPM and RAM checks during the Windows 11 Setup.
- Click on Start and search for Registry Editor.
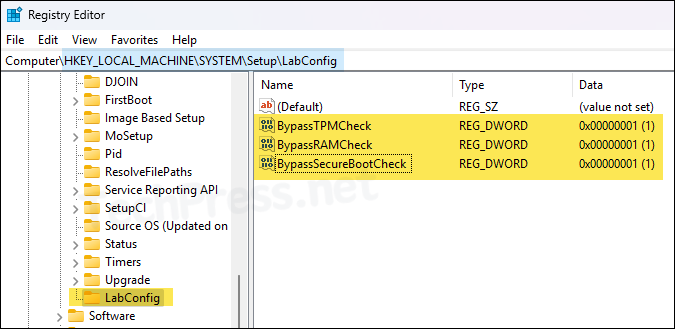
- Navigate to HKEY_LOCAL_MACHINE\SYSTEM\Setup and create a new registry key called LabConfig.
- Create new registry DWORD entries under LabConfig called BypassRAMCheck, BypassSecureBootCheck and BypassTPMCheck and set their value to 1.
If you are Installing Windows 11 from scratch, and you get an error, This PC can’t run Windows 11. You can’t click on Start and go to registry editor as the OS is not installed yet.
To open the registry editor and create the registry key values, you can press Shift + F10 on the window showing the error during the setup. This will open a command prompt in Admin mode. Type
regeditand press Enter to open Registry editor to make necessary changes.
6. Buy a Compatible Hardware to Install Windows 11
If are unable to Install Windows 11 even after performing above steps. Then your device might be very old, and you may need to buy a new upgraded hardware which is compatible with Windows 11. This way, you can ensure that Windows 11 installs and runs smoothly without any issues.