Public preview and Developer preview offer early access to unreleased features in Microsoft Teams app. This allows you to test new features before they become generally available (GA).
Preview features can be enabled on a per-user basis or for the entire organization. To enable the preview feature setting, users must have the ability to upload custom apps.
By default, Public preview options are not available in the Teams app. The location of manage preview setting is different for New Teams app and Teams Classic app.
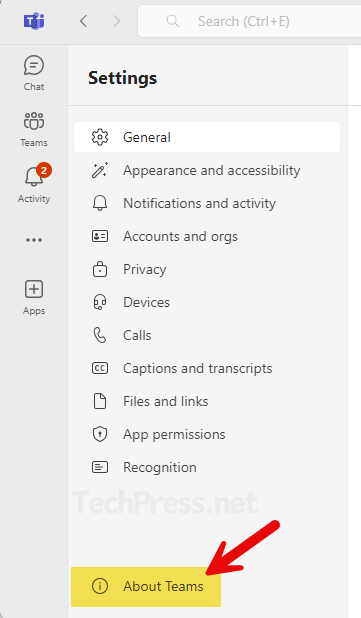
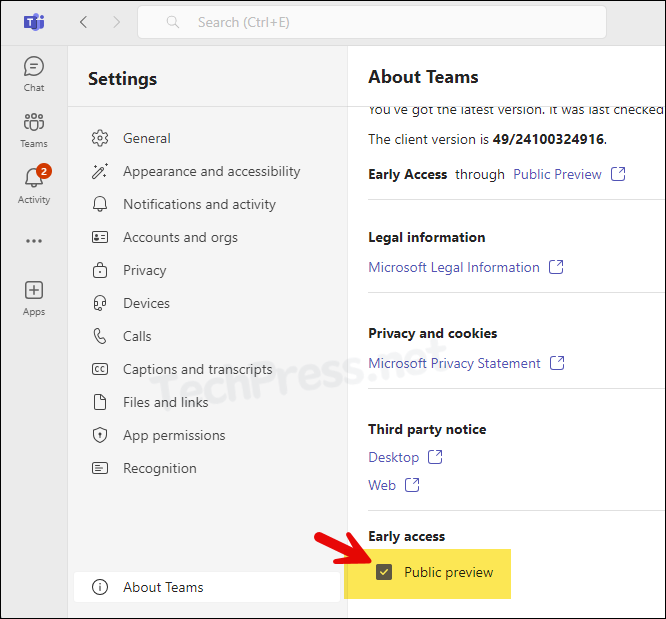
For New Teams App, click on three dots next to the picture > Settings > About Teams > Public preview.
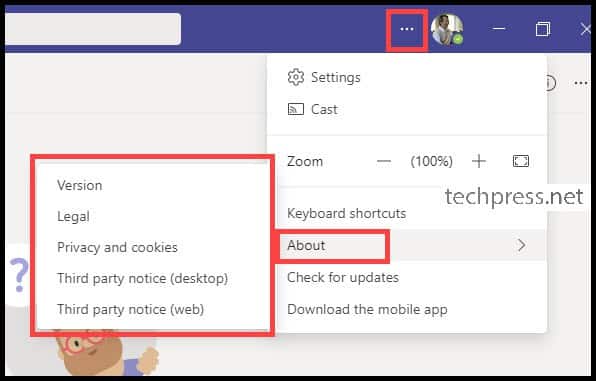
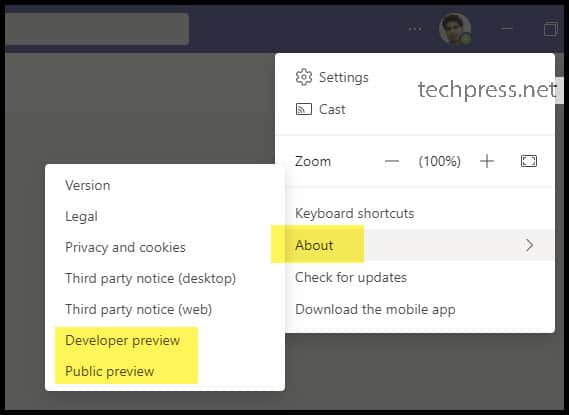
For Teams Classic App, click on three dots next to the picture > About > You will find Public preview and Developer preview options. Click on it to enable or disable.
Below screenshot is from Teams classic app, where it shows that Developer and Public preview options are not yet available to users. Hence, it’s not showing under in the About menu.
Follow below steps to provide preview options in New Teams app and Teams Classic app.
Contents
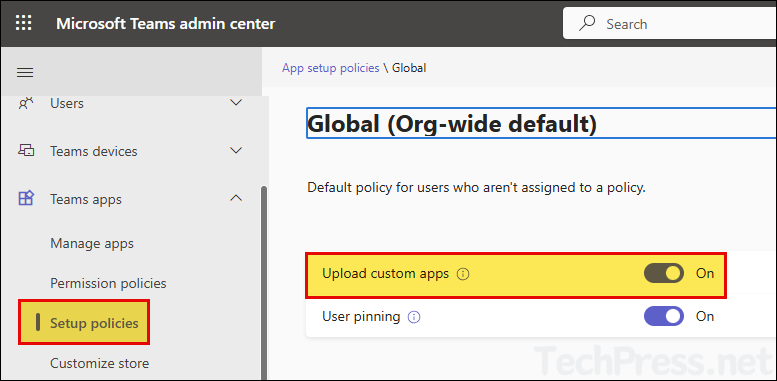
1. Allow Upload of Custom Apps
To enable Public and Developer preview in Teams, Users must be able to upload custom apps. Please follow below steps to enable this setting.
- Sign in to the Teams admin center.
- Teams apps > Setup policies.
- Either select Global (Org-wide default) policy or if you are using a custom App setup policy then select that one. I would be using a Global (Org-wide default) policy which applies to all users in my organization.
- Move the toggle to On for Upload custom apps.
2. Configure Teams Update Policy
Next step is to configure a Teams update policy, which will show/enable Preview features option in the Teams app. You can either use the Global (Org-wide default) policy or create a custom policy and assign it to specific users.
- Sign in to the Teams admin center.
- Teams > Teams update policies.
- Click on the Teams update policy to configure.
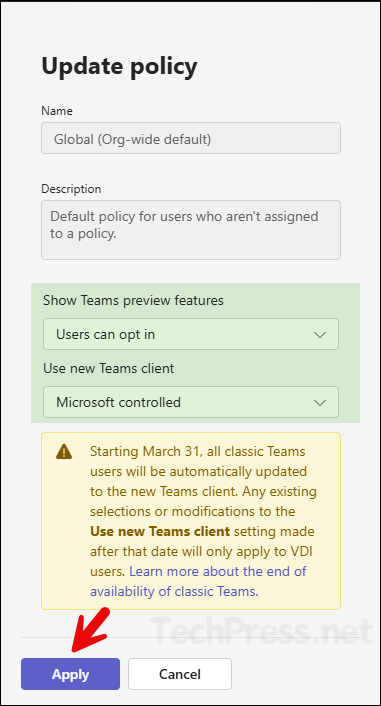
Teams Update Policy
- Show Teams preview features: Use the drop-down to select one of the 4 options:
- Off: Teams public preview options are not available to users.
- Users can opt in: Teams preview options are not enabled by default, users can turn on preview option in their Teams app.
- On for users in Current Channel (Preview): This is the default setting in Teams update policy. This option will enable Public preview option for all users who are enrolled in Office Current Channel (Preview). Users will not be able to turn off teams public preview.
- On for everyone: This option will turn on Teams public preview for everyone who will get this policy. Users who will get this policy will not be able to turn it off.
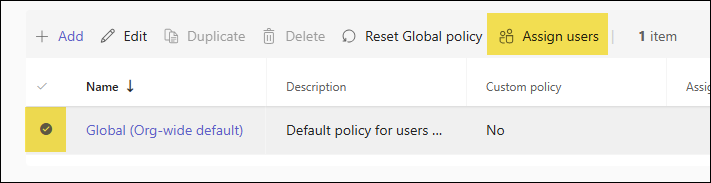
- Ensure that the policy is assigned to the users. Generally, the Global (Org-wide default) policy will be assigned to all users. If you have created a custom Teams update policy, you can select the policy and click on Assign users to assign the policy to users.
Verify Teams Preview Options
It may take some time for Teams update policy to apply. Users may have to sign out and sign back in to the app, and then follow below steps to check if the Preview option is available.
New Teams App
- Open New Teams app, click on three dots next to the picture > Click on Settings.
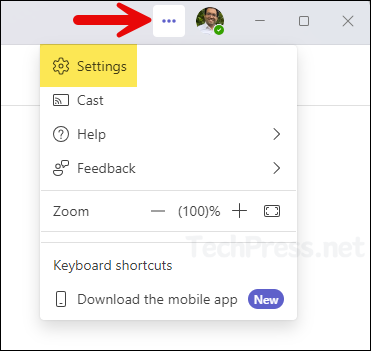
- Click on About Teams.
- Enable the checkbox for Public preview. If you don’t see this option yet, check with the administrator if the Teams update policy (which enables Preview features) is applied to you. If it’s applied recently, you may have to wait for a couple of hours to see this option.
For Teams Classic App
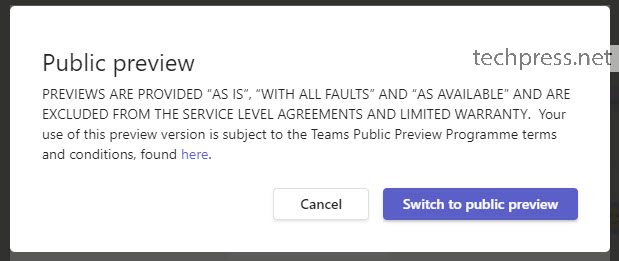
If you are using Teams classic, Open Teams classic app > Click on three dots next to your picture > About > Click on Public preview or Developer preview option.
You can click on these options to enable it. After you click on it, you will get below pop-up message. Click on Switch to public preview.
Now, go back to the Teams classic app > three dots > About > Verify if Developer Preview and Public Preview options are enabled.
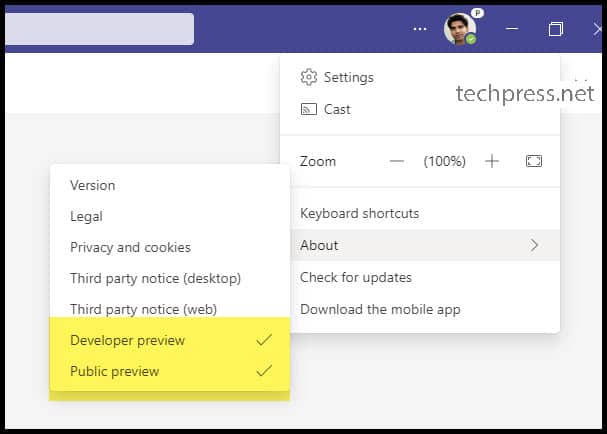
Once it’s enabled, P symbol will appear next to your profile picture to indicate that public preview options are enabled.
