Tags in Azure provide a way to logically structure and categorize your resources. A tag in Azure consists of a name and value pair, and you can apply them either through the Azure portal or PowerShell.
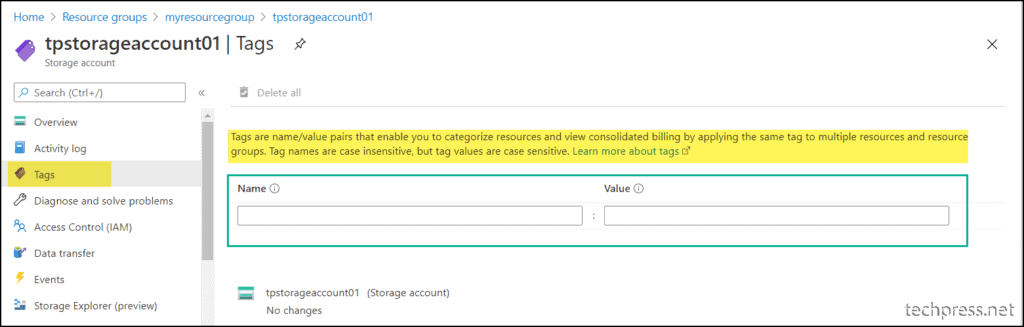
If you have a limited number of resources to manage, using the Azure admin portal approach is suitable. You can access this by selecting each resource, then clicking on Tags in the left-hand pane, and entering the details for the Name/Value Pair, as shown in below screenshot.
It’s a best practice to apply resource tags during the resource creation process. This ensures that each resource is tagged according to business requirements. It’s easy to skip tagging resources, which is why using Azure Policy to enforce tags is recommended. This approach enforces the addition of tags during resource creation, preventing the resource creation if tags are not applied during the validation step.
Add Specified Tags on All Azure Resources in a Resource Group Using PowerShell
We will use a PowerShell script to add tags on Azure resources. First install Az PowerShell module on your device using below commands:
Install Az PowerShell Module
if ($PSVersionTable.PSEdition -eq 'Desktop' -and (Get-Module -Name AzureRM -ListAvailable)) {
    Write-Warning -Message ('Az module not installed. Having both the AzureRM and ' +
      'Az modules installed at the same time is not supported.')
} else {
    Install-Module -Name Az -AllowClobber -Scope CurrentUser
}
We will utilize Update-AzTag cmdlet from Az PowerShell module to update tags on all azure resources. We will also be using Merge switch with this command which will not overwrite existing tags applied on the resources, instead the new tags will be appended to the existing ones, preserving the existing tags.
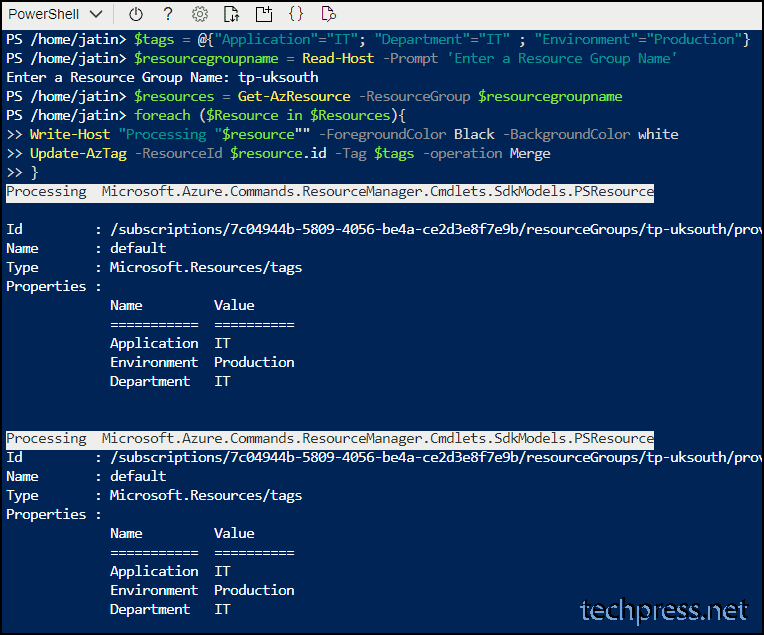
As an example, below PowerShell script will append three tags Application=IT; Department=IT; Environment=Production on all resources in the specified resource group.
- $tags – Provide the tags you want to append to the existing tags on a resource.
- $resourcegroupname – When you execute below PowerShell code, it will prompt for a resource group name on the console. Provide a resource group name. The script will go through all resources within this resource group and add the given tags.
- $resources – This will get all azure resources in a resource group.
Add_tags_to_All_Az_resources_v1.ps1
$tags = @{"Application"="IT"; "Department"="IT" ; "Environment"="Production"}
$resourcegroupname = Read-Host -Prompt 'Enter a Resource Group Name'
$resources = Get-AzResource -ResourceGroup $resourcegroupname
foreach ($Resource in $Resources){
Write-Host "Processing "$resource"" -ForegroundColor Black -BackgroundColor white
Update-AzTag -ResourceId $resource.id -Tag $tags -operation Merge
}

Version 2 of the Script with Error Handling
Add_tags_to_All_Az_resources_v2.ps1
$tags = @{"Application"="IT"; "Department"="IT"; "Environment"="Production"}
$resourcegroupname = Read-Host -Prompt 'Enter a Resource Group Name'

# Check if the resource group exists
$resourcegroup = Get-AzResourceGroup -Name $resourcegroupname -ErrorAction SilentlyContinue
if (-not $resourcegroup) {
    Write-Host "Resource group '$resourcegroupname' does not exist." -ForegroundColor Red
    exit
}

$resources = Get-AzResource -ResourceGroupName $resourcegroupname
if ($resources.Count -eq 0) {
    Write-Host "No resources found in the resource group '$resourcegroupname'." -ForegroundColor Yellow
} else {
    foreach ($resource in $resources) {
        try {
            Write-Host "Processing $($resource.Name)" -ForegroundColor Black -BackgroundColor White
            Update-AzTag -ResourceId $resource.ResourceId -Tag $tags -Operation Merge
            Write-Host "Tags updated successfully for $($resource.Name)" -ForegroundColor Green
        }
        catch {
            Write-Host "Failed to update tags for $($resource.Name): $_" -ForegroundColor Red
        }
    }
}
Add Tags on a Specific Resource in a Resource group
Below PowerShell script will add tags on a specific resource in a resource group.
Add_tags_to_Specific_Az_resources_v3.ps1
$tags = @{"Application"="IT"; "Department"="IT"; "Environment"="Production"}
$resourcegroupname = Read-Host -Prompt 'Enter a Resource Group Name'
$resourcename = Read-Host -Prompt 'Enter the Resource Name'

# Check if the resource group exists
$resourcegroup = Get-AzResourceGroup -Name $resourcegroupname -ErrorAction SilentlyContinue
if (-not $resourcegroup) {
    Write-Host "Resource group '$resourcegroupname' does not exist." -ForegroundColor Red
    exit
}

# Retrieve the specific resource within the resource group
$resource = Get-AzResource -ResourceGroupName $resourcegroupname -ResourceName $resourcename -ErrorAction SilentlyContinue
if (-not $resource) {
    Write-Host "Resource '$resourcename' does not exist in the resource group '$resourcegroupname'." -ForegroundColor Red
    exit
}

# Apply tags to the specified resource
try {
    Write-Host "Processing resource '$($resource.Name)' in resource group '$resourcegroupname'" -ForegroundColor Black -BackgroundColor White
    Update-AzTag -ResourceId $resource.ResourceId -Tag $tags -Operation Merge
    Write-Host "Tags updated successfully for '$($resource.Name)'" -ForegroundColor Green
}
catch {
    Write-Host "Failed to update tags for '$($resource.Name)': $_" -ForegroundColor Red
}