In this blog post, we will demonstrate the steps to connect with SharePoint online using PowerShell and an app registration in Entra ID. You can use this approach to establish connection with SharePoint online in unattended PowerShell scripts.
We will also be creating a self-signed certificate and use Connect-PnPOnline cmdlet. You can either store the certificate on your local computer (less secure) or an Azure KeyVault (more secure).
Contents
1. Create a Self-Signed Certificate
We will create a 2048-bit Self-signed certificate using New-PnPAzureCertificate cmdlet. This cmdlet is a part of PnP.PowerShell module, which no longer works with PowerShell 5.1. You will need to Install PowerShell 7.2 or later version to work with this module. Refer to this link for downloading and Installing PowerShell 7.x.
You can also create a Self-Signed certificate using a Microsoft provided PowerShell script. For more details and steps, refer to the link: Create a Self-signed Certificate.
Another way to create a Self-signed certificate
- Open PowerShell 7.2 or later console.
- Install PnP.PowerShell module using below command:
Install-Module -Name PnP.PowerShell -Force -AllowClobber- Use the following PowerShell code to create a self-signed certificate. Replace the variables in the code according to your requirements and execute the code to generate a certificate.
Create_Self_Signed_Cert.ps1
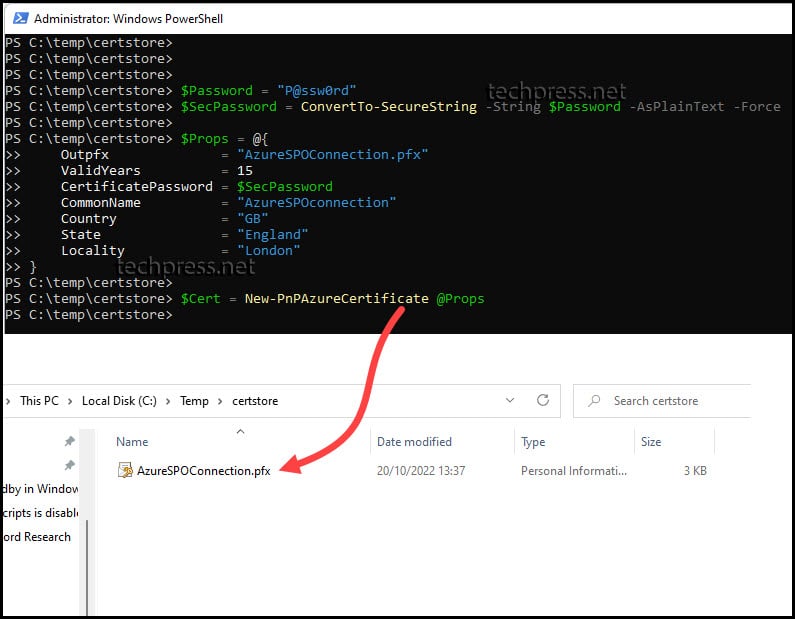
$Password = "P@ssw0rd"
$SecPassword = ConvertTo-SecureString -String $Password -AsPlainText -Force
$Props = @{
    Outpfx              = "AzureSPOConnection.pfx"
    ValidYears          = 15
    CertificatePassword = $SecPassword
    CommonName          = "AzureSPOconnection"
    Country             = "GB"
    State               = "England"
    Locality            = "London"
}
$Cert = New-PnPAzureCertificate @Props- Once you execute these commands, a certificate named AzureSPOConnection.pfx will be created at the location specified in the outpfx parameter.
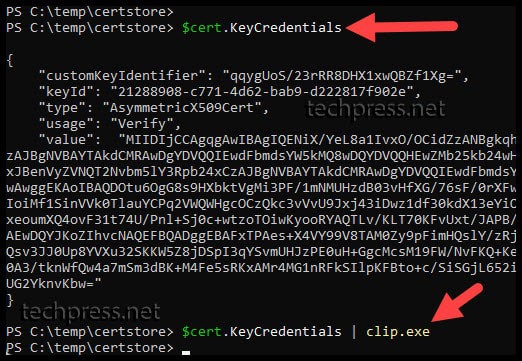
- Run the command $cert.KeyCredentials | clip.exe and paste the value to a notepad or another location. We will need this value later during the App registration configuration in Entra ID.
2. Create an Entra App Registration
- Sign in to the Entra admin center > Identity > Applications > App registrations.
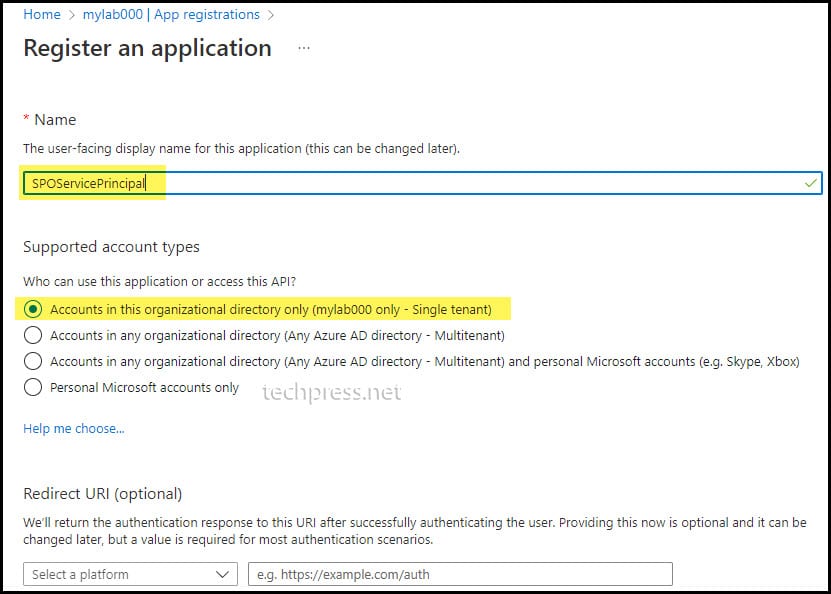
- Click on New registration.
- Provide the display name of the application and select Accounts in this organizational directory only (<tenant> only -Single tenant). Click Register.
3. Add API Permissions
- Open the App registration.
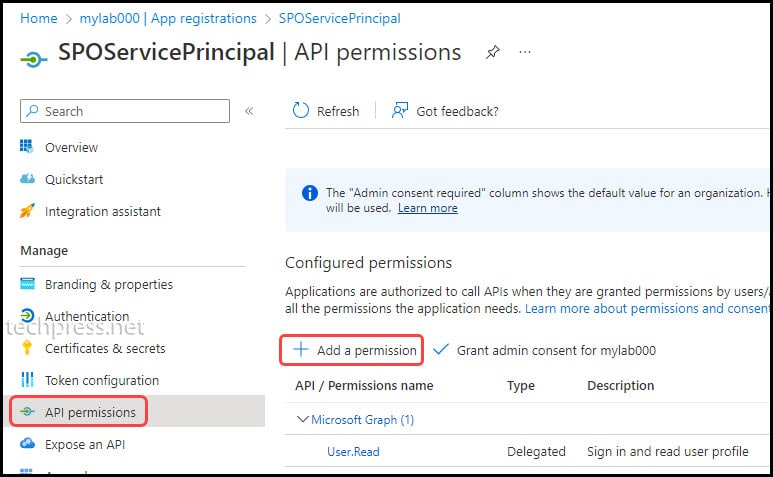
- Click on API permissions under Manage.
- Click on + Add a permission under Configured permissions.
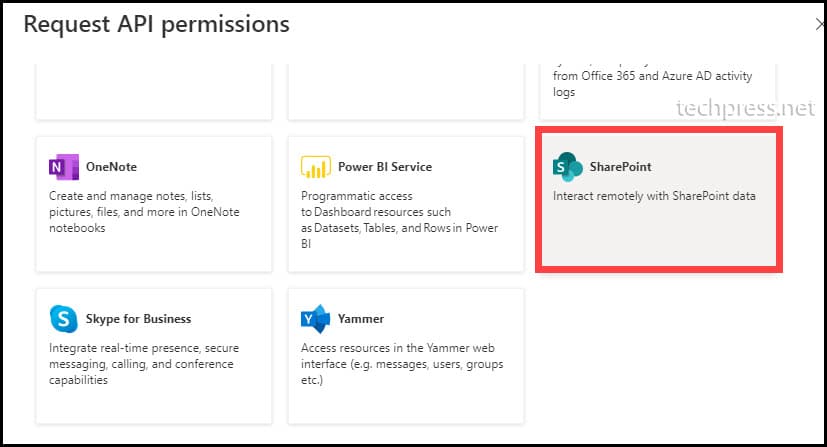
- From the Request API permissions pane, under Microsoft APIs, scroll down to find SharePoint and click on it.
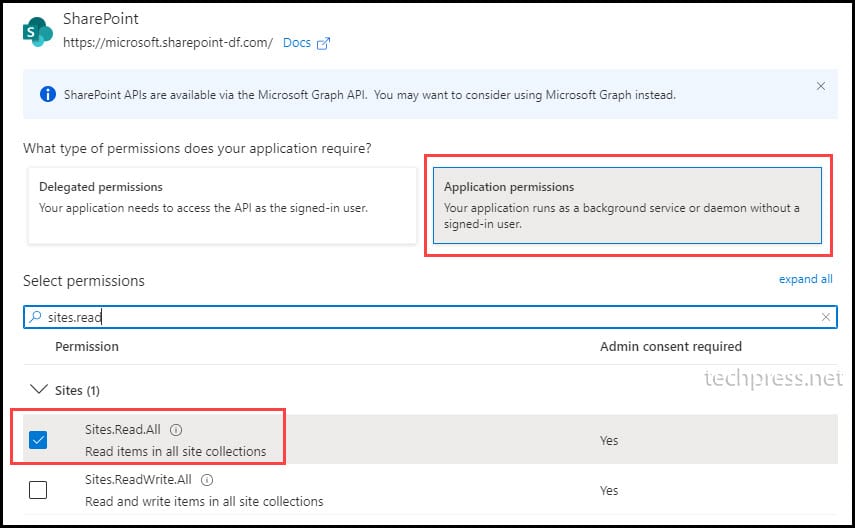
- As an example, Select Application permissions and select Sites.Read.All to provide read-only access on all SharePoint sites. Click on Add permissions to add the permission.
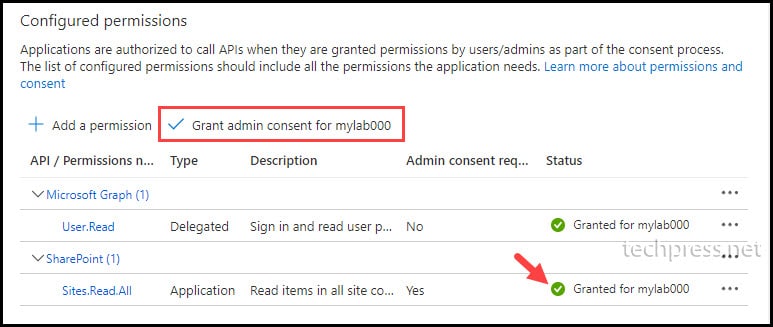
- Click on Grant admin consent for <yourorg>. If prompted, click the Yes button. Ensure that the status displays a green tick to confirm that admin consent has been granted.
4. Upload Self-Signed Certificate
You can either upload the Self signed certificate to the application registration or update KeyCredentials value in the Manifest file. An easier way is to upload the certificate using below steps. You don’t have to do both.
Upload Certificate
- Sign in to the Entra admin center > Identity > Applications > App registrations.
- Open SPOServicePrincipal app registration we created earlier.
- Click on the Certificates & Secrets > Click on Certificates tab > Upload certificate.
- Browse to the location where self-signed certificate are generated. We only need to upload .cer file here. Click on Add to add the certificate.
Update KeyCredentials value directly
When you upload the certificate using above steps, it will automatically update KeyCredentials value. If there are issues uploading the certificate using above method, you can update the manifest file directly as well using below steps:
- Navigate to the app registration.
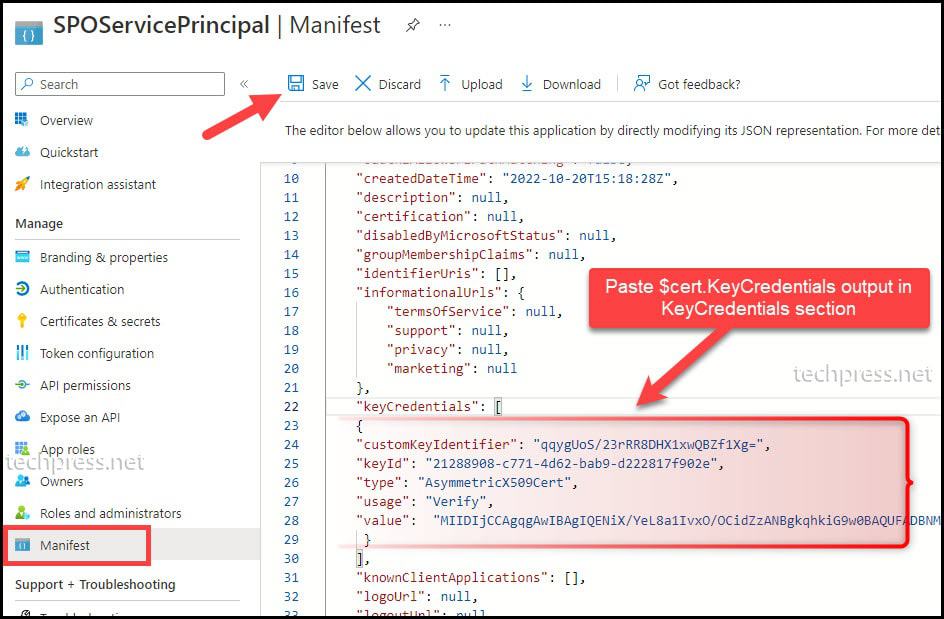
- Click on Manifest under Manage.
- Paste the $cert.KeyCredentials output in the KeyCredentials[ ] section between square brackets.
Connect to Sharepoint Online using Connect-PnPOnline
As mentioned earlier, PnP PowerShell module requires PowerShell version 7.2 or later. PnP.PowerShell module is no longer works on PowerShell 5.1 version. You will need to Install PowerShell 7.2 or later version to work with this module. Refer to this link for downloading and Installing PowerShell 7.x.
- Open PowerShell 7.2 or later console as an administrator and execute below command.
Install PnP.PowerShell module
Install-Module -Name PnP.PowerShell -Force -AllowClobberWe will need below information with Connect-PnPOnline cmdlet. Gather these details and use it in the following command.
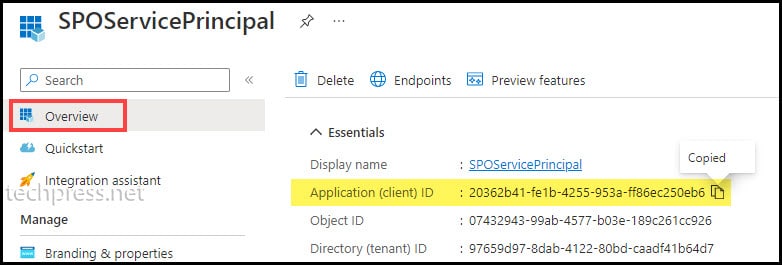
- $ClientId: Copy the Client ID from the App registration.
- $CertPath: Provide the location of the certificate PFX file generated earlier.
- $CertPwd: Provide the password for the certificate PFX file.
- $tenantname: Provide the tenant name. You can find the tenant name either using the Entra admin center or from the Microsoft 365 admin center.
- $SiteUrl: Provide a SharePoint site URL to connect.
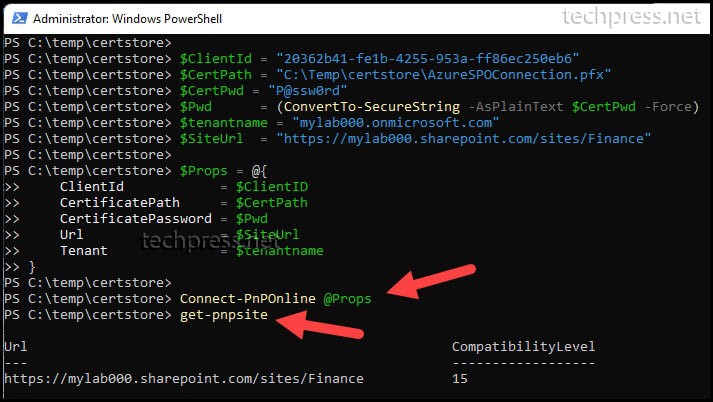
Connect to Sharepoint Online using Connect-PnPOnline
$ClientId     = "20362b41-fe1b-4255-953a-ff86ec250eb6"
$CertPath     = "C:\Temp\certstore\AzureSPOConnection.pfx"
$CertPwd      = "P@ssw0rd"
$Pwd          = (ConvertTo-SecureString -AsPlainText $CertPwd -Force)
$tenantname   = "mylab000.onmicrosoft.com"
$SiteUrl      = "https://mylab000.sharepoint.com/sites/Finance"
$Props = @{
    ClientId            = $ClientID
    CertificatePath     = $CertPath
    CertificatePassword = $Pwd
    Url                 = $SiteUrl
    Tenant              = $tenantname
}
Connect-PnPOnline @Props
After verifying the connectivity, you can use the code in your unattended PowerShell scripts to connect to SharePoint Online and perform various tasks. As an example, you can:
- Get the list of all SharePoint sites.
- Retrieve all the files in a particular SharePoint site.
- Check if SharePoint Document library files follow the company naming convention.
- If you have provided Read/Write permission to the service principal, you can add or remove a file from the SharePoint site or delete a SharePoint site, etc.
Conclusion
In this blog post, we have explored how to connect to SharePoint Online using the Connect-PnPOnline command with an app registration and a self-signed certificate.