When a user leaves an organization, the first step is to block their sign-in through the Microsoft 365 admin center. This prevents the user from logging in and restricts access to Microsoft 365 services, such as Outlook, signing in to their MDM device, and accessing documents stored in OneDrive or SharePoint Online.
Once you block a user’s sign-in in Microsoft 365, they will be automatically signed out of all Microsoft services within 60 minutes. It’s a best practice to regularly monitor active users in Microsoft 365, including those whose sign-ins have been blocked.
In this blog post, we will explore how to check and export all Microsoft 365 disabled/blocked users to a CSV file.
Contents
Find a Disabled User on Microsoft 365 admin center
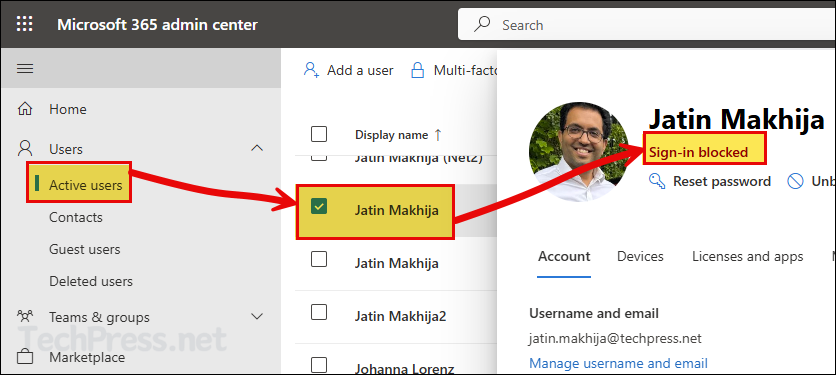
- Sign in to the Microsoft 365 admin center > Users > Active users.
- Click on a user and find its status under the name.
- If Sign-in blocked shows under the username. The account is in disabled state.
Export Disabled Users Report from Microsoft 365 admin center
You can also download a report of all users, which includes information on whether a user’s sign-in is blocked. Here are the steps to export this report:
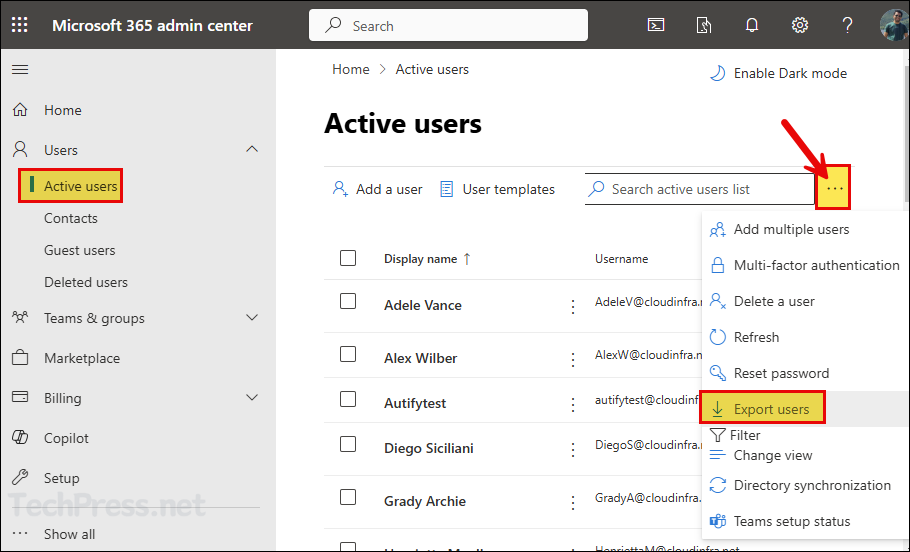
- Sign in to the Microsoft 365 admin center > Users > Active users.
- Click on three dots and then click on Export users.
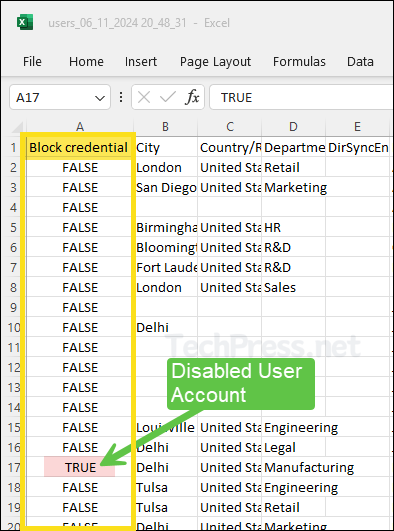
- Here’s a snippet of exported report. The first column is Block credential, which shows if a user account is disabled or blocked. If it’s showing as True, it means that the user account is disabled.
Check if a Microsoft 365 User is Disabled using PowerShell
To check if a single Microsoft 365 user is disabled using PowerShell. We will need to Install Microsoft Graph PowerShell module on the computer and then use Connect-MgGraph to connect with Microsoft 365. Let’s check the steps.
# Install Microsoft Graph module
Install-Module Microsoft.Graph -Scope CurrentUser# Import Microsoft Graph module
Import-Module Microsoft.Graph# Connect to Microsoft Graph with required permissions
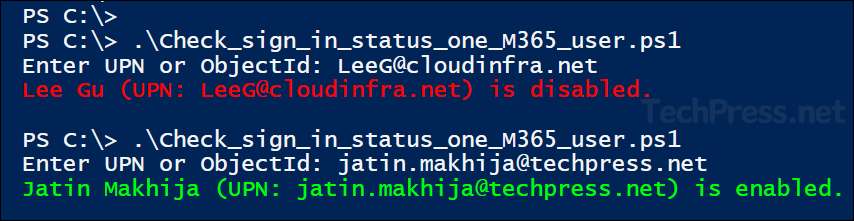
Connect-MgGraph -Scopes "User.Read.All"- You can use the below PowerShell script to check Sign-in status of a single M365 user account. Ensure that you are connected to Microsoft graph using Connect-MgGraph -Scopes “User.Read.All” command before executing the script.
Check_sign_in_status_one_M365_user.ps1
$userPrincipalName = Read-Host "Enter User's UPN or Object ID"
try {
    $user = Get-MgUser -UserId $userPrincipalName -Property "UserPrincipalName, DisplayName, AccountEnabled"

    # Check if user exists
    if ($user) {
        # Check if the user is disabled or enabled
        if ($user.AccountEnabled -eq $false) {
            Write-Host "$($user.DisplayName) (UPN: $($user.UserPrincipalName)) is disabled." -ForegroundColor Red
        } else {
            Write-Host "$($user.DisplayName) (UPN: $($user.UserPrincipalName)) is enabled." -ForegroundColor Green
        }
    } else {
        Write-Host "The user with UPN/ObjectId '$userPrincipalName' does not exist." -ForegroundColor Yellow
    }
}
catch {
    Write-Host "An error occurred: $_" -ForegroundColor Red
}
Export All Disabled/Blocked Users from Microsoft 365 Using PowerShell
Instead of checking disabled or blocked status for each user individually, you can export a report of all blocked users in a CSV file using below PowerShell script.
# Connect to Microsoft Graph with required permissions
Connect-MgGraph -Scopes "User.Read.All"Export_all_blocked_users_to_CSV_M365.ps1
Get-MgUser -Filter "accountEnabled eq false" -All | Select-Object UserPrincipalName, DisplayName, @{Name="SignInStatus"; Expression={"Blocked"}} | Export-Csv -Path "C:\temp\BlockedUsers.csv" -NoTypeInformation -Encoding UTF8