In this blog post, I will demonstrate the steps to deploy Universal Print printer using Intune. Universal Print is a Microsoft 365 cloud-based printing solution that eliminates the need for any on-premises infrastructure or printer driver dependencies.
You can register printers with Universal Print and share them with users. When a printer is shared, users can discover and install the assigned printer on their computers. This creates a self-service printer installation model, where you train users and provide them with the installation steps.
By deploying a printer through Intune, you eliminate the steps users would otherwise need to take to discover and install printers on their devices themselves. Universal Print CSP is available for Windows 11 which allows provisioning of Universal Print printers. Below are the details of the Settings catalog policy which we will use to deploy Universal Print printers using Intune.
| Profile type | Category | Setting | Comments |
|---|---|---|---|
| Settings Catalog | Printer Provisioning | Printer Shared ID (User) Printer Shared ID (User) Cloud Device ID (User) Install (User) Printer Shared Name (User) Shared ID (User) | Keep the Printer Share ID, Cloud Device ID, Printer Share Name, and Shared ID information readily available for policy creation. |
Contents
Collect Printer Details
Before creating an Intune policy to deploy the Universal Print–registered printers, we need to gather few printer details from Universal Print in Azure.
- Sign in to Microsoft Azure portal using Global administrator or Print administrator rights.
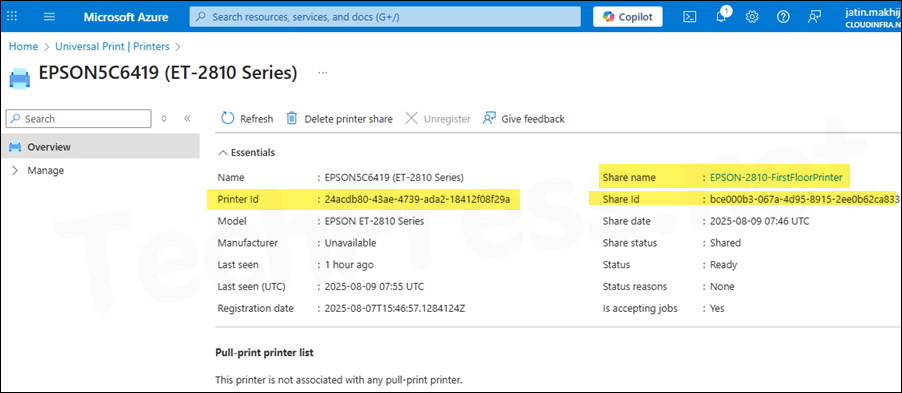
- Navigate to Universal Print > Printers. Click on each Printer you want to deploy using Intune. From the Overview page, copy the Printer Id, Share name and Share Id. This is all we need to deploy printers via Intune.
You can also retrieve ShareName, PrinterId, and ShareId for all printers using UniversalPrintManagement PowerShell module. Install UniversalPrintManagement PS module, Connect to Universal Print using Connect-UPService and execute below code. For more details, refer to the link: Manage Universal Print using PowerShell.
Get-UPPrinter
Get-UPPrinter |
    Select-Object -ExpandProperty Results |
    Where-Object { $_.IsShared -eq $true } |
    ForEach-Object {
        foreach ($share in $_.Shares) {
            [PSCustomObject]@{
                ShareName = $share.DisplayName
                PrinterId = $_.Id
                ShareId   = $share.Id
            }
        }
    } |
    Format-Table -AutoSize
Deploy Universal Print Printer Policy
Use the following steps to create an Intune policy for Universal Print printer(s) deployment:
- Sign in to Intune admin center > Devices > Windows > Configuration > Create > New Policy.
- Platform: Windows 10 and later
- Profile type: Settings catalog
- Click Create.
- On the Basics tab, provide a Name and Description of the policy and click Next.
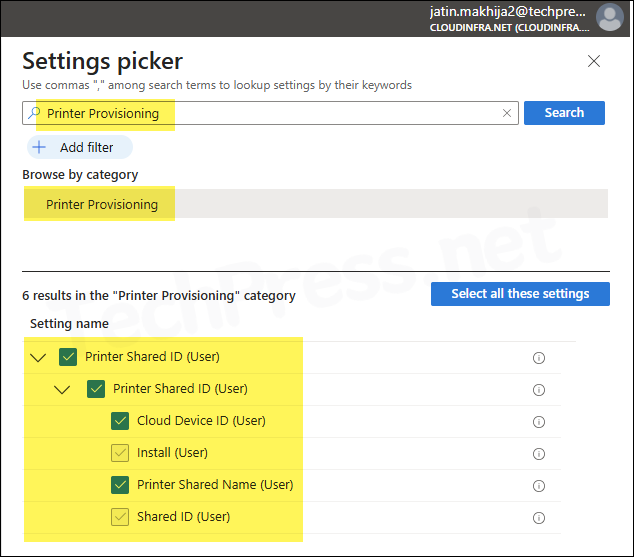
- On Configuration settings tab, click on + Add settings and use the Settings picker to search using Printer Provisioning keyword and select Printer Provisioning category. Select Printer Shared ID (User) and all its sub-settings.
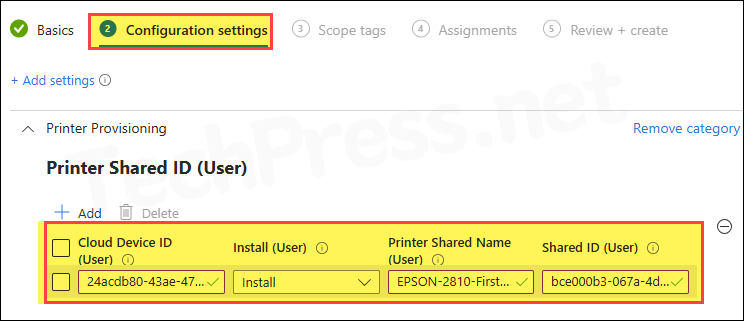
- Populate Cloud Device ID (Printer Id), Printer Shared name (User), and Shared ID (User) information as copied from Universal Print in Azure.
- Scope tags: Click Next
- Assignments: Assign this policy to an entra security group containing users. It’s a best practice to test the policy on a few users first. If it’s working fine, then extend it to other users.
- Review + create: Review the policy settings and click on Create.
Monitoring Intune Policy
- Sign in to the Intune admin center > Devices > Configuration.
- Select the Device Configuration profile you want to work with, and at the top of the page, you’ll see a quick view of the Success, Failure, Conflict, Not Applicable, and In Progress status.
- Click on View report to access more detailed information.
Sync Intune Policies
The device check-in process might not begin immediately. If you’re testing this policy on a test device, you can manually kickstart Intune sync from the device itself or remotely through the Intune admin center.
Alternatively, you can use PowerShell to force the Intune sync on Windows devices. Restarting the device is another way to trigger the Intune device check-in process.
End User Experience
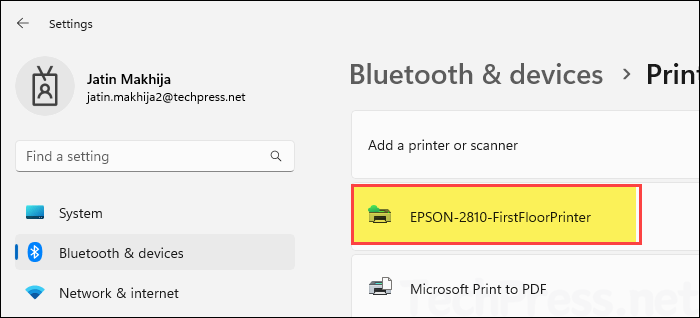
Once Intune policy is applied successfully, you can check and confirm if the Printer is mapped. Open the Settings app and go to Bluetooth & devices > Printers & scanners. You will find that the printer is automatically installed by Intune policy (notice the printer icon with a cloud).
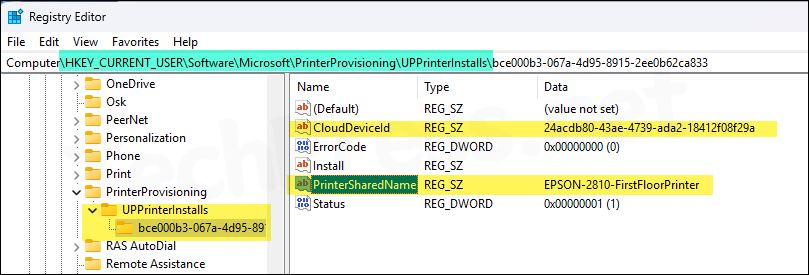
Registry Editor: Open the registry editor and navigate to HKEY_CURRENT_USER\Software\Microsoft\PrinterProvisioning\UPPrinterInstalls to find information about the Universal Print printers installed on your device.
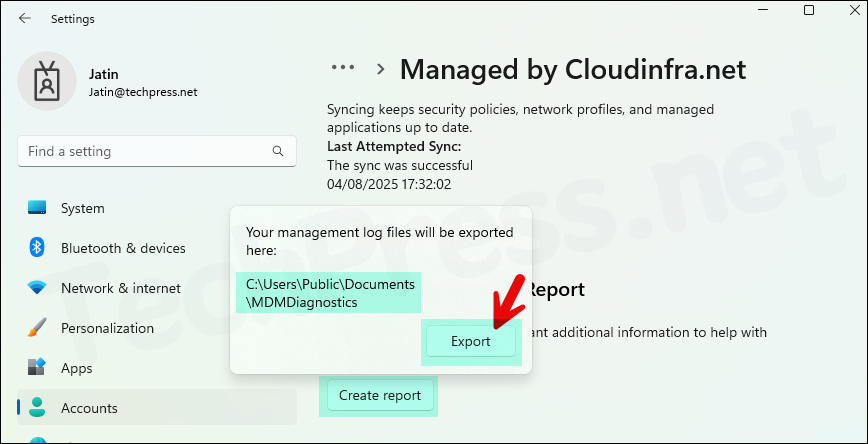
MDM Diagnostic log: To generate MDM diagnostic log on a client device, Go to Settings > Accounts > Access work or school > Select your work or school account > Click Info button > At the bottom of the Settings page, select Create report.
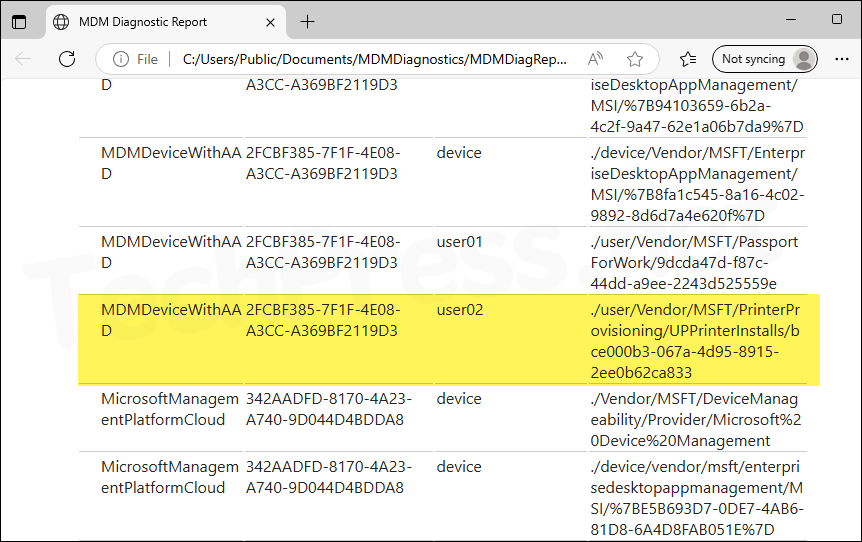
You will find an entry for the Universal Print printer installation in MDM diagnostics logs as well. For my printer, it shows: ./user/Vendor/MSFT/PrinterProvisioning/UPPrinterInstalls/bce000b3-067a-4d95-8915-2ee0b62ca833
Troubleshooting
- If any of the Printer information is incorrect in the Intune policy, printer will not be deployed.
- Universal Print license must be assigned to the users, otherwise an error will be shown on Intune corresponding to that user.
- If any printer or printer share is removed from Universal Print in Azure, users who have mapped that printer will experience issues when attempting to use it.