In this post, I’ll demonstrate how to connect to Microsoft Graph PowerShell using certificate. Certificate-based authentication is one of several methods available for connecting to Graph. You can also connect using other options, such as a client Secret or a Managed identity. For details and examples on these methods, refer to the post: Using Connect-MgGraph PowerShell Cmdlet. For Microsoft Graph PowerShell installation guide, see: Install Microsoft Graph PowerShell Module.
Use this method for unattended jobs or services or when running CI/CD pipelines in azure. This method requires a valid X.509 certificate pair and an app registration in Entra admin center. You can either create a self-signed certificate or bring your own certificate from an internal certificate authority. I will be creating and using a self-signed certificate to establish a connection with Graph.
Contents
Step 1: Create a Self Signed certificate
Create a self-signed certificate on your computer, export the public key to upload it to the app in Azure, and securely store the private key either locally or in a protected location such as Azure Key Vault.
Create a self-signed cert in CurrentUser\My
$cert = New-SelfSignedCertificate -Subject "CN=GraphAppCert" -KeyAlgorithm RSA -KeyLength 2048 -HashAlgorithm SHA256 -CertStoreLocation Cert:\CurrentUser\My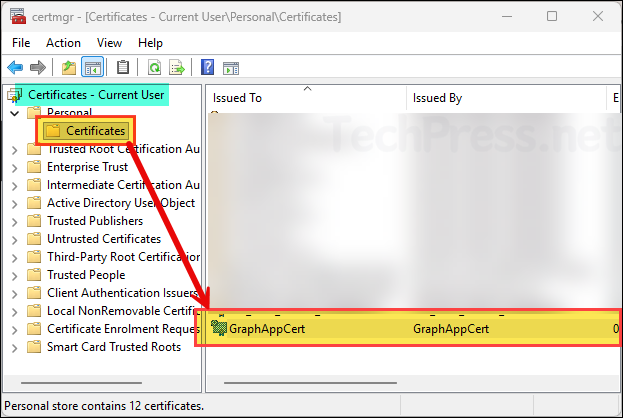
Export *public* cert to upload in Entra (no private key)
Export-Certificate -Cert $cert -FilePath "C:\temp\GraphAppCert.cer" | Out-NullStep 2: Create an App Registration
After you have created and exported the certificate, the next step is to create an app registration in the Entra admin center.
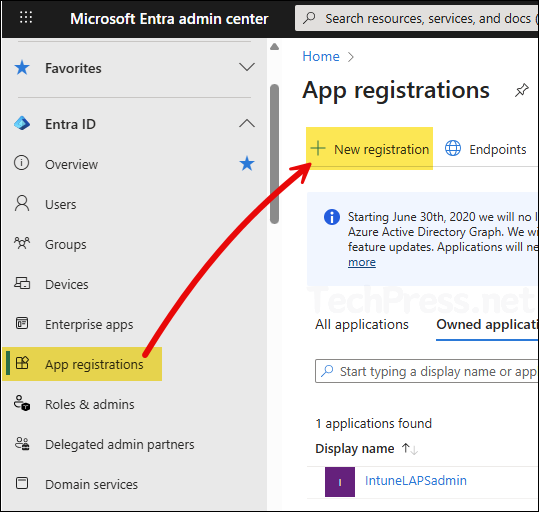
- Sign in to the Entra admin center > Expand Entra ID > App registrations. Click on + New registration.
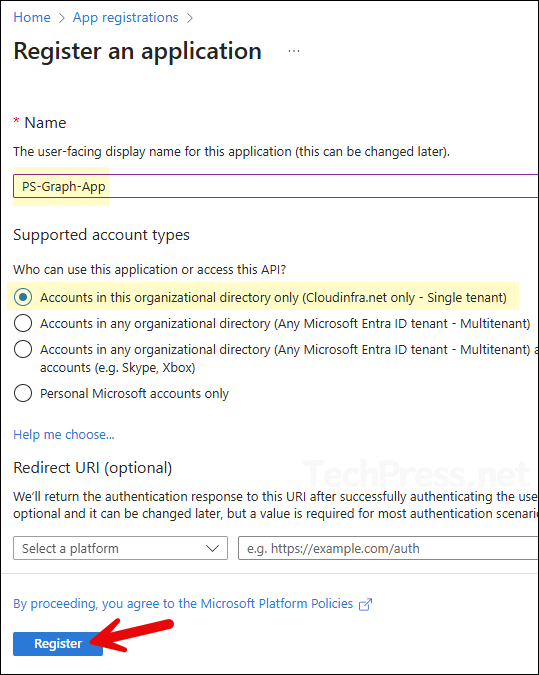
- Provide a Name of the app and select the Supported account types. I have given a name of the app as PS-Graph-App and selected Accounts in this organization directory only. Leave the Redirect URI as blank.
- After the app is created, you’ll find it listed under App registrations. Open the app, then go to API permissions > + Add a permission, and select Microsoft Graph.
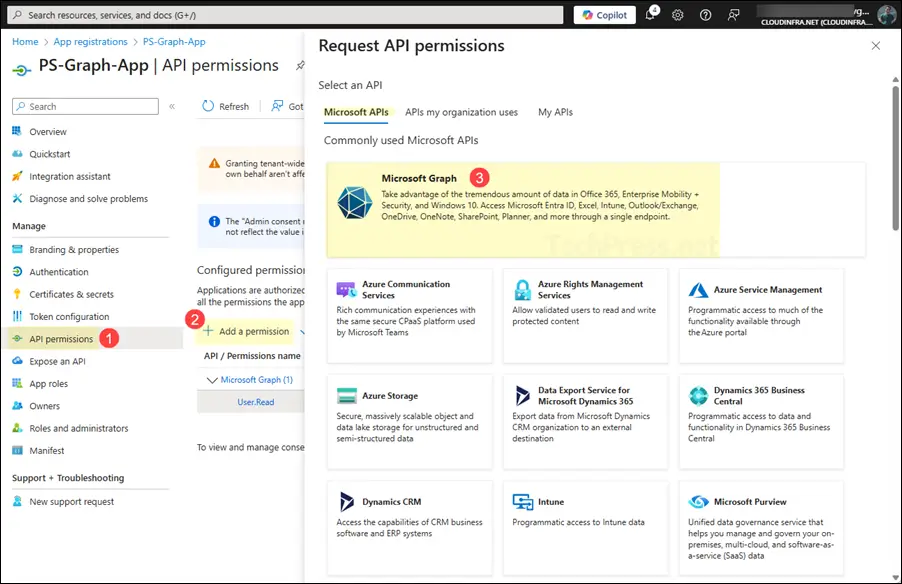
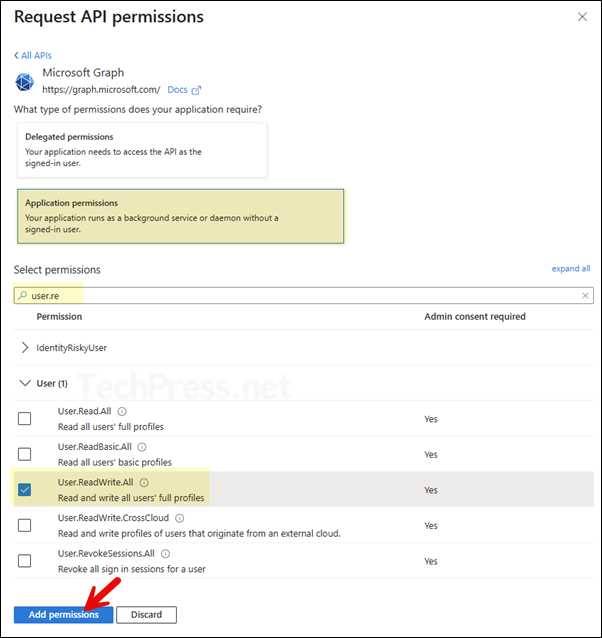
- Select Application permissions and search for the permissions you want to add to this app. Select the requirement permissions and once all the permissions are selected, click on Add permissions.
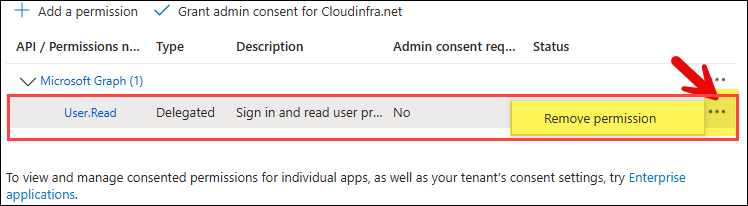
- Remove the default User.Read delegated permission.
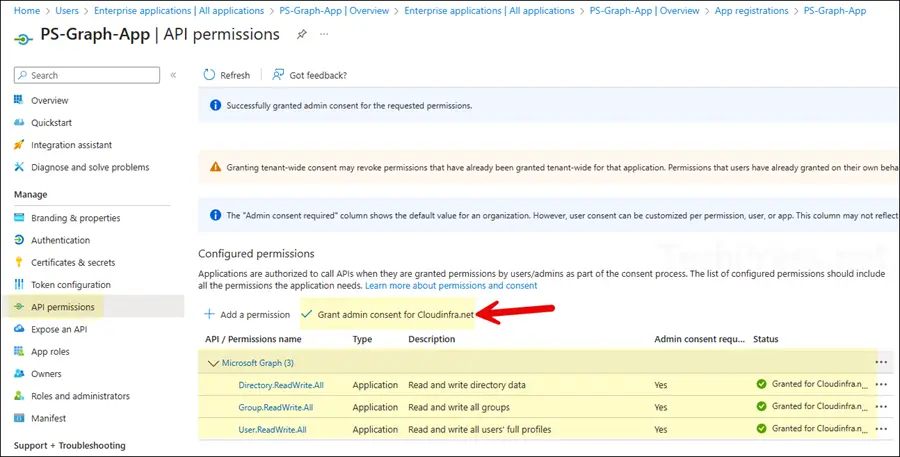
- You must grant admin consent for the API permissions added to the app. To do this, click Grant admin consent for <your org>. Once consent is granted, the status column will show a green check for each permission.
Step 3: Upload Certificate
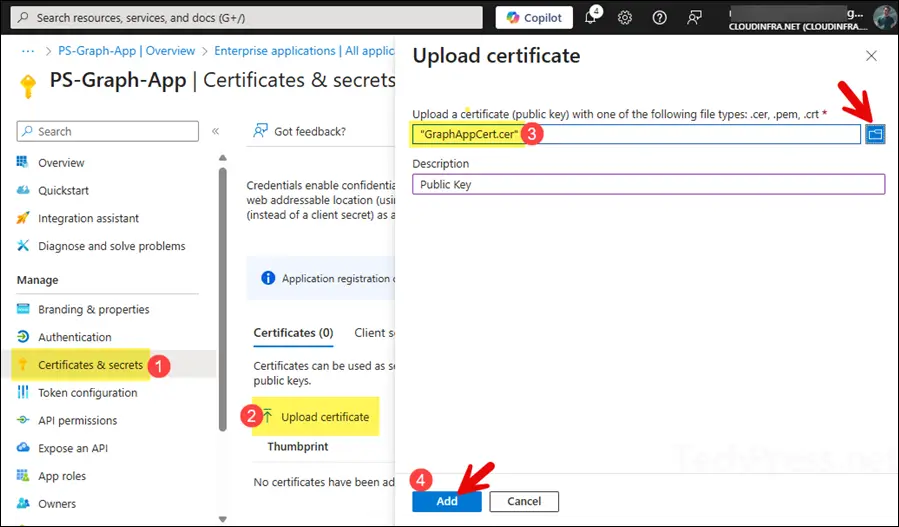
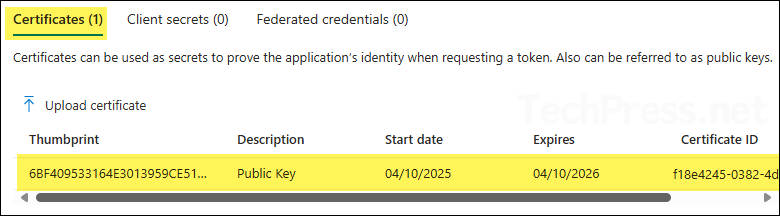
In this step, you’ll upload the public key of the certificate you created in Step 1. To do this, go to the App > Certificates & secrets, then under the Certificates tab, click Upload certificate. Browse to the public key (GraphAppCert.cer) file and select Add.
- Certificate public key has been uploaded to the app. You can verify its Thumbprint, certificate expiry date and certificate ID information.
Step 4: Copy Client ID, Tenant ID and Certificate Thumbprint
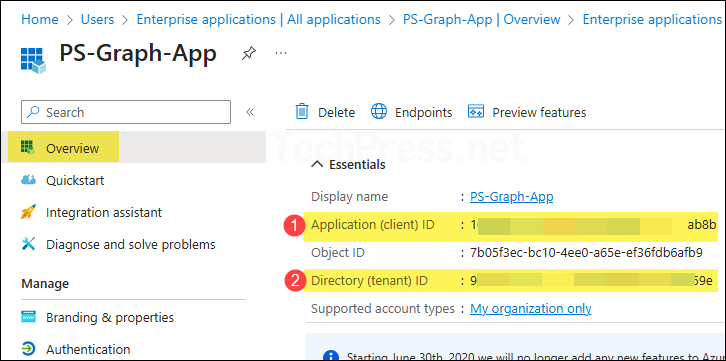
After configuring the API permissions and uploading the certificate to the app, copy the Client ID and Tenant ID from the app’s overview page. We will need this information when connecting with Connect-MgGraph.
- Then go to the Certificates & secrets and copy certificate Thumbprint value.

- You can also retrieve the certificate thumbprint by running the following command in a PowerShell console.
Get_Cert_Thumbprint
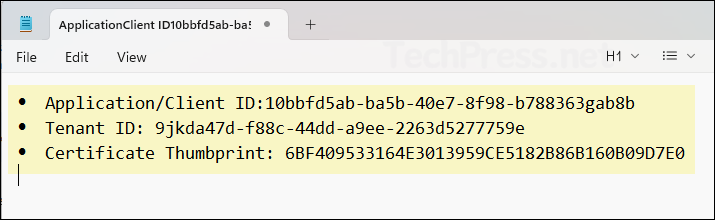
Get-ChildItem Cert:\CurrentUser\My | Select-Object Thumbprint, Subject- After you have copied the Client ID, Tenant ID, and Certificate Thumbprint values, paste them into a Notepad file for easy reference later.
Step 5: Connect to Graph PowerShell with Certificate
Now that you’ve copied all the required details to Notepad, use that information with the Connect-MgGraph cmdlet to connect to Microsoft Graph.
Connect-MgGraph using Certificate Thumbprint
Connect-MgGraph -ClientId "YOUR_APP_ID" -TenantId "YOUR_TENANT_ID" -CertificateThumbprint "YOUR_CERT_THUMBPRINT"Example
Connect-MgGraph -ClientId "10bb35ab-ba5b-40e7-8f98-b788369dab8b" -TenantId "9dfeda47d-f87c-44ee-a9ee-33de4525559e" -CertificateThumbprint "6BF409533164E3013959CE5182B86B160B09D7E0"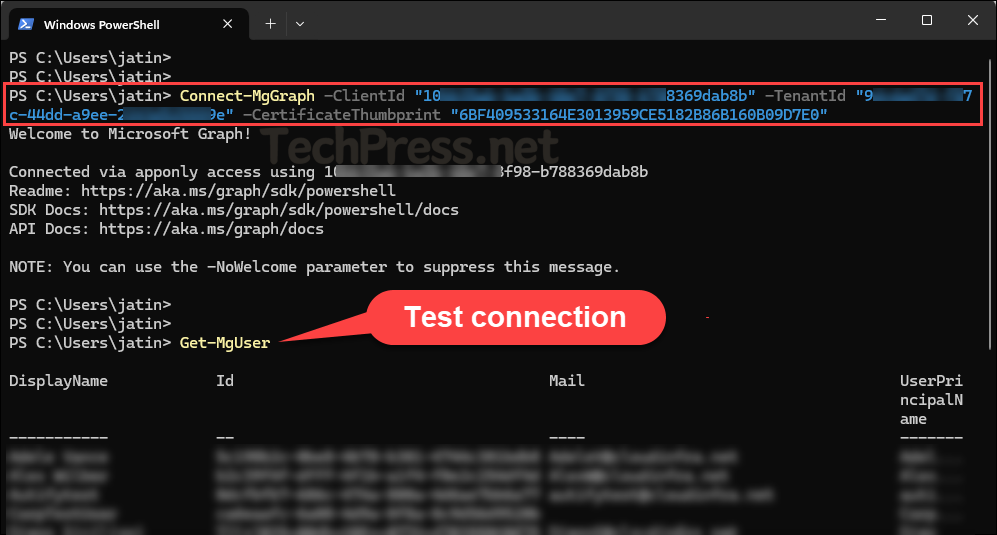
Connect-MgGraph using Certificate Subject Name
You can also connect to Microsoft Graph using the Certificate Subject Name (SN). To find the Subject Name of a certificate, run below command and locate your certificate in the list. Once you have the subject name, use it with the Connect-MgGraph cmdlet to establish the connection.
Get_Cert_SubjectName
Get-ChildItem Cert:\CurrentUser\My | Select-Object Thumbprint, SubjectConnect-MgGraph with Certificate Subject Name
Connect-MgGraph -ClientId "YOUR_APP_ID" -TenantId "YOUR_TENANT_ID" -CertificateName "YOUR_CERT_SUBJECT"Example:
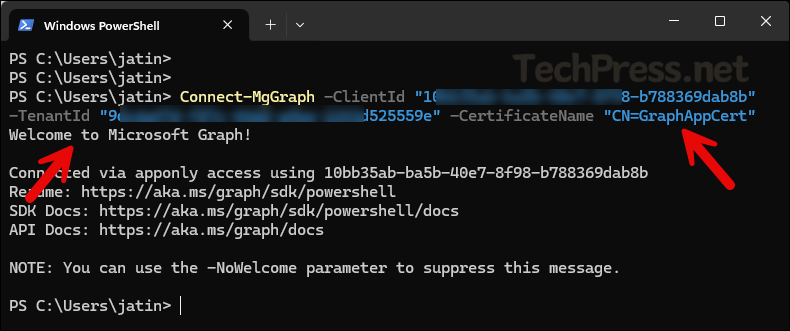
Connect-MgGraph -ClientId "10ff35ab-ba5b-40e7-ff98-b78836ffab8b" -TenantId "9fvdfg47d-ff87c-44dd-a9ee-224fde34d5559e" -CertificateName "CN=GraphAppCert"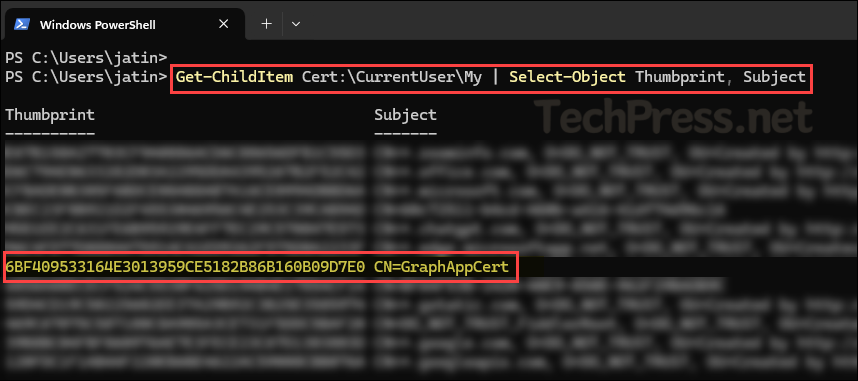
Below screenshot shows Connect-MgGraph usage with Certificate Subject Name (SN).
Connect-MgGraph using Certificate
You can also connect to Graph PowerShell directly using the certificate. For this, I’ve created a PowerShell script Connect-MgGraph_Cert.ps1, available for download from my GitHub repo. The script retrieves the certificate from the user’s certificate store and uses it to establish the connection. Before running it, make sure to update the Client ID, Tenant ID, and Certificate Thumbprint values in the script.
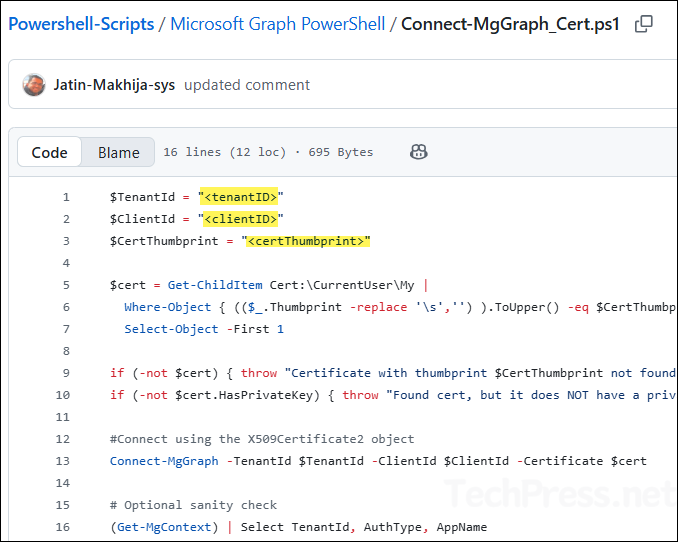
After updating the values, run the script in a PowerShell console. If the connection is successful, you’ll see a Welcome to Microsoft Graph message along with details such as TenantId, AuthType, and AppName.

Conclusion
This post explained how to connect to Microsoft Graph using a certificate and explored different ways to establish the connection. One important point to remember is to grant only the permissions necessary for the specific task, following the principle of least privilege. In this example, I used a self-signed certificate with a one-year validity period, but you can use your own certificate, and you can also use a longer expiry if preferred. Be sure to monitor the certificate’s expiry date and renew it in time to prevent any script failures.