In this blog post, we will demonstrate the steps to assign SharePoint site permissions to users using an Entra security group. When you create a SharePoint site, by default it creates three default groups for Owners, Members, and Visitors.
Owners have Full Control, Members have Edit rights and Visitors have read only rights on the site. You can use these default groups to provide permissions to users on the site and manage it directly from SharePoint admin center.
These default groups can also hold Entra security groups, which can then be used to assign permissions to a site more easily using Entra admin center. If a user requests for access to a SharePoint site, you can add the users to the corresponding Entra security group.
We will begin by creating a new Sharepoint Teams site, an Entra security group and a Sharepoint group. If you already have all of these created already, then you can skip ahead.
Contents
Create a Sharepoint Teams Site
I would be starting with creating a SharePoint site from scratch, If you already have an existing SharePoint site to work with, you can skip this step.
- Open PowerShell console in admin mode and execute below command to Install SharePoint Online Management Shell. If you can’t open PowerShell console in admin mode, you can open PowerShell in normal mode and run the second command (which uses
-scope CurrentUser) to install the module.
Install SharePoint Online Management Shell (Using an Elevated PowerShell Console)
Install-Module -Name Microsoft.Online.SharePoint.PowerShell -Force -AllowClobber- If you do not have administrator rights, Open PowerShell console and execute below command to Install SharePoint Online Management Shell.
Install SharePoint Online Management Shell (Using PowerShell console launched as a standard user)
Install-Module -Name Microsoft.Online.SharePoint.PowerShell -Scope CurrentUser -Force -AllowClobberConnect to SharePoint Online (with MFA)
Connect-SPOService -Url <sharepoint admin URL>

Example:
Connect-SPOService -Url https://techpress-admin.sharepoint.com
Creating a SharePoint Site
Using STS#3 as a Template, which will not create a Microsoft 365 group and only creates a Sharepoint site. Use
Get-SPOWebTemplatecmdlet to find more templates and replace it in below command.
New-SPOSite -Url "https://techpress.sharepoint.com/sites/TacticalWindows" -Owner "[email protected]" -StorageQuota "102400" -Template "STS#3" -Title "TacticalWin"Create an Entra Security Group
If you already have an existing Entra security group to work with, you can skip to the next step.
To create an Entra security group. Sign in to Entra admin center > Groups > All groups > New group and create a Security group which will be used later to assign permissions. You can also use below PowerShell commands to create an Entra security group.
Install Microsoft Graph PowerShell Module
Install-module Microsoft.Graph -Force -AllowClobberConnect to Microsoft Group with required scopes
Connect-MgGraph -Scopes "Group.ReadWrite.All"Creating a Test Entra security group
$param = @{
 description="TacticalWin SPO Site Editors"
 displayName="TacticalWinEditors"
 mailEnabled=$false
 securityEnabled=$true
 mailNickname="TactWin"
}

New-MgGroup @param
Create a SharePoint Group
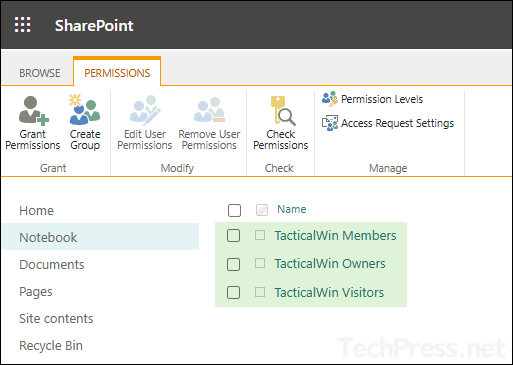
When we created a SharePoint site in the previous step, it also created three SharePoint groups automatically. You can add users to these groups to provide permissions.
- Site Members (Add/Edit/Delete Content)
- Site Owners (Full Control, including deletion of a Site)
- Site Visitors (Read Only Permission)
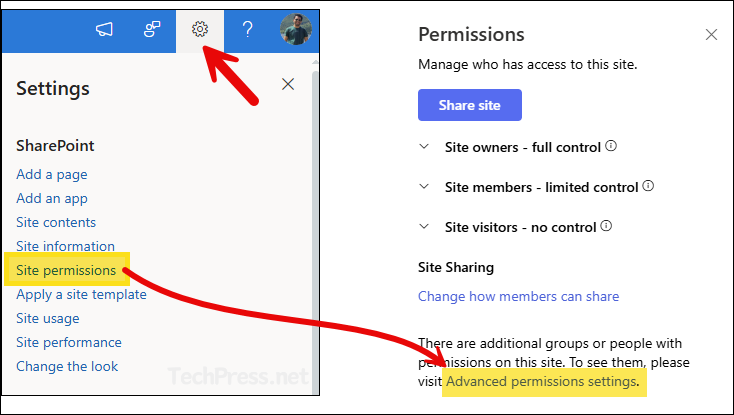
You can check these groups by launching the Sharepoint site > On top right-hand side corner, Click Settings > Site Permissions > Advanced permissions settings.
You can add an Entra security group to the default SharePoint groups, or create a new SharePoint group with specific permissions and add the Entra security group there.
Let’s create a new SharePoint group with Edit permission level:
Create a SharePoint Group
New-SPOSiteGroup -Group "NewSPOGroup01" -PermissionLevels "Edit" -Site "https://techpress.sharepoint.com/sites/TacticalWindows"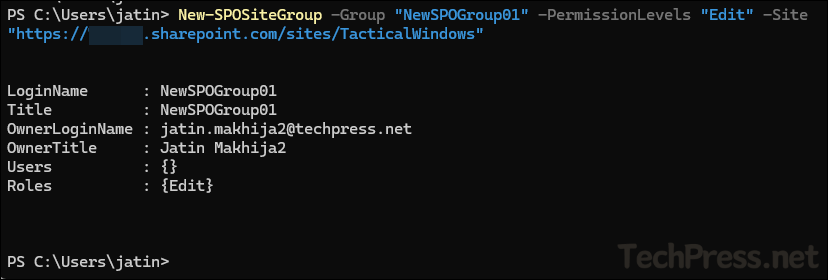
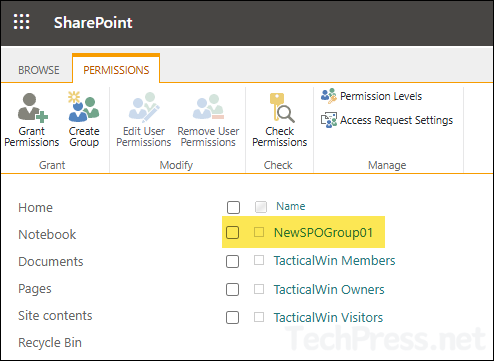
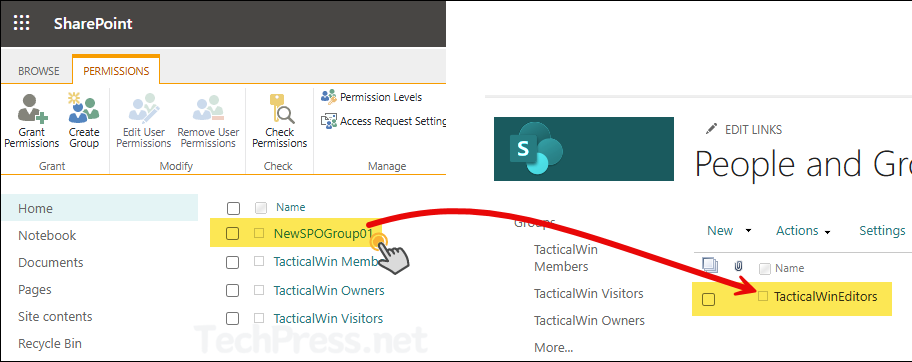
- You can verify the SharePoint group creation from Advanced site permissions settings.
Adding an Entra Security Group to a SharePoint Group
You can add an Entra security group to any SharePoint Group using Add-SPOUser cmdlet. First, get the object ID of the entra group and then use below command to add the group to the Sharepoint group. We will use below three switches with Add-SPOUser cmdlet.
- Group: Provide the SharePoint group name.
- LoginName: Provide login name of the user or group. In case of entra security group, the name needs to be in the format
c:0t.c|tenant|<guid>, where guid is the object ID of the entra security group. - Site: Provide the site URL.
Add Entra security group to a custom SharePoint Group
Add-SPOUser -Group "NewSPOGroup01" -LoginName "c:0t.c|tenant|964d3b8a-6b71-4cb4-8a67-4e584695e0b5" -Site "https://techpress.sharepoint.com/sites/TacticalWindows"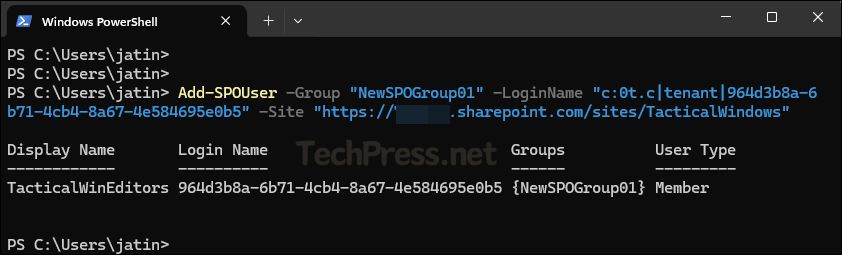
- Let’s see how to add an Entra security group to one of the default Sharepoint site groups (TacticalWin Members).
Adding Entra security group to a default Sharepoint group
Add-SPOUser -Group "TacticalWin Members" -LoginName "c:0t.c|tenant|964d3b8a-6b71-4cb4-8a67-4e584695e0b5" -Site "https://techpress.sharepoint.com/sites/TacticalWindows"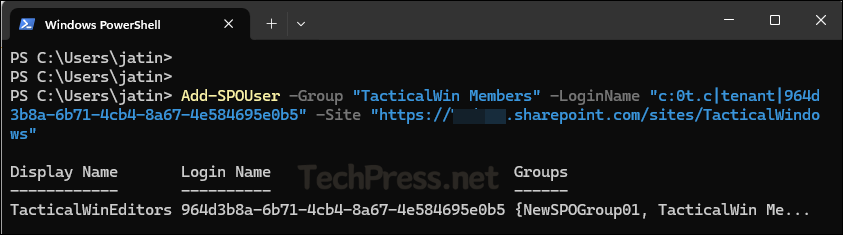
Confirm if Entra Security Group is Added to SharePoint Group
To check and confirm if Entra security group has been added to the SharePoint group, you can follow below steps:
- Launch the Sharepoint site > On top right-hand side corner, Click Settings > Site Permissions > Advanced permissions settings.
- Click on the SharePoint group to view its members. As shown in the screenshot, TacticalWinEditors (Entra security group) has been added successfully. Now, you can manage this site’s permissions through this Entra security group. Since the SharePoint group has Edit permissions, any user added to the TacticalWinEditors entra group will automatically get Edit access to the site.
Using SharePoint Admin Center to Assign Site Permissions via Entra Security Group
In the previous section, we have seen how to create a SharePoint site, create an entra security group, create a SharePoint group and then add an entra security group to the SharePoint group, All by using PowerShell. Now, you can do all of these by using GUI as well. Let’s check the steps:
Create a Sharepoint Site
- Sign in to the Microsoft 365 admin center as Sharepoint admin or Global admin.
- Click on the SharePoint under Admin Centers to open the SharePoint admin center.
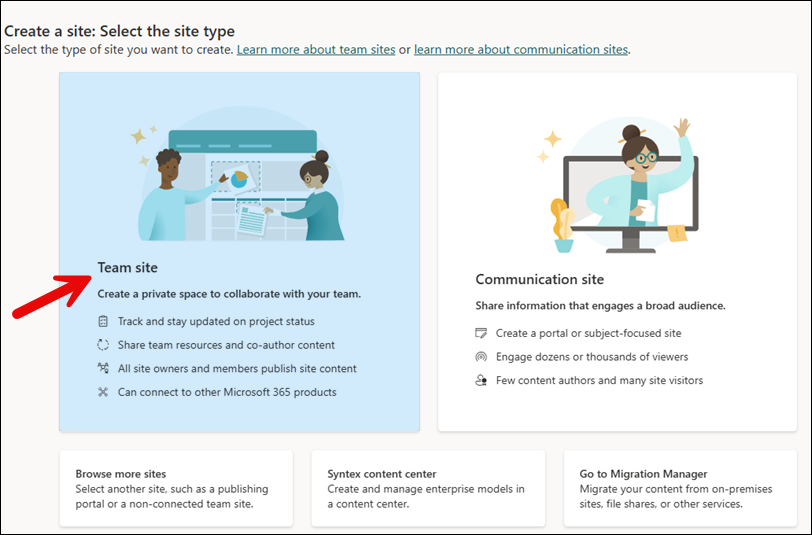
- Click on Sites > Active sites > Create
- Select Team Site.
- We will not go through all the steps, as it’s straightforward. Simply follow the wizard to create a site.
Create an Entra Security Group
You can create an Entra security group either using Entra admin center or from Microsoft 365 admin center. I will show you the steps from Microsoft 365 admin center.
- Sign in to the Microsoft 365 admin center > Teams & groups > Active teams & groups.
- Click on Security groups tab > click on Add a security group to create one.
Configure Sharepoint Site Permissions
- Sign in to the SharePoint Admin Center.
- Click on the Site URL to open the home page.

- Click on Settings >Site Permissions > Advanced permission settings.
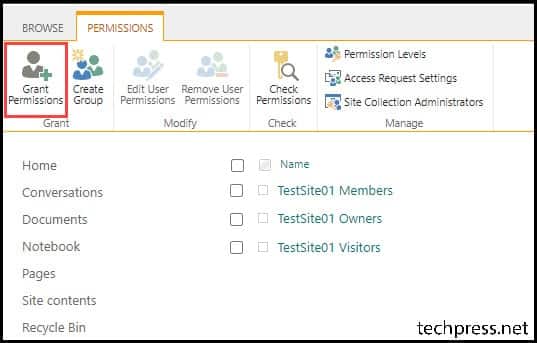
- Click on Grant Permissions.
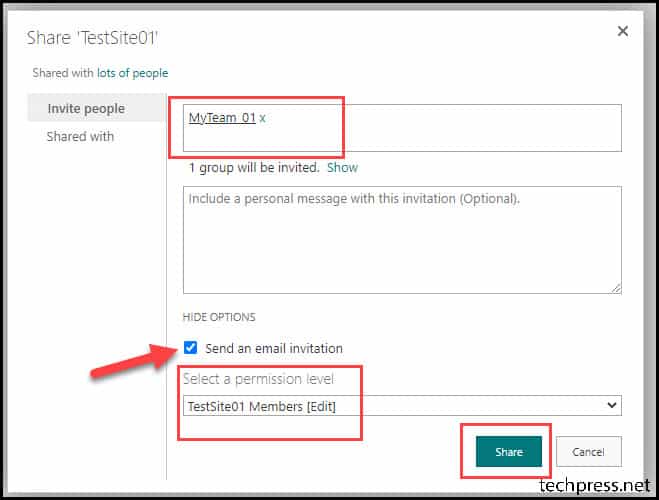
- On Invite People tab, search for the Entra security group. Click on Show Options and select the permission level for this group. If you want, you can click on Send an email invitation checkbox to email the users in the group.
Verify Permissions of Entra Security Group Permissions on Sharepoint Site
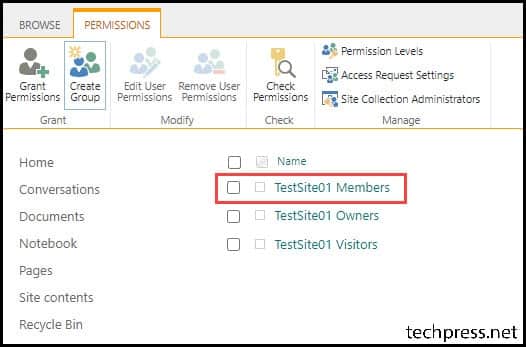
To verify if an entra security group has been added to the Sharepoint group. Click on the SharePoint group in which the Entra security group was added earlier and check its membership details.
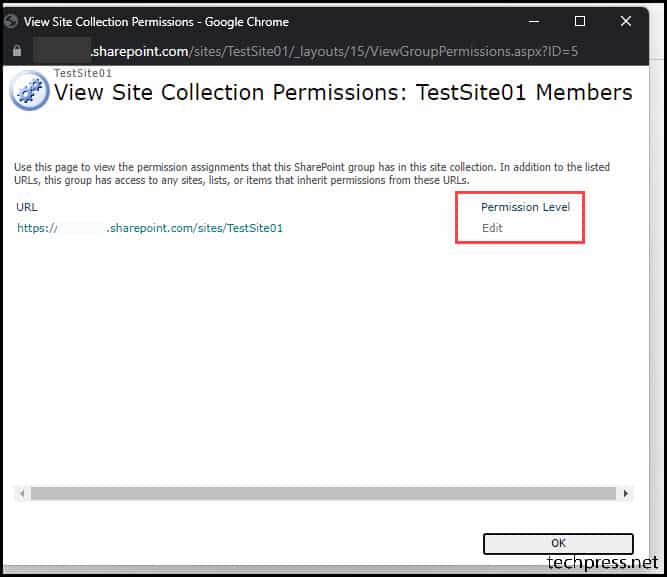
- Select the Entra security group and Go to Settings > View Group Permissions.
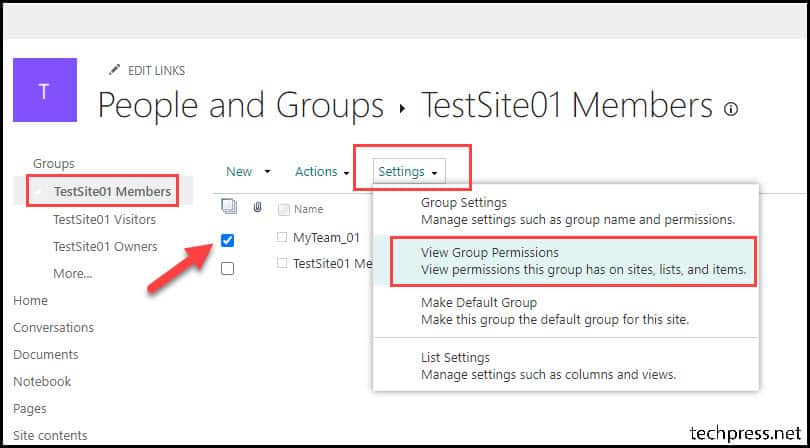
- As you can see from below screenshot, Entra security group MyTeam_01 has Edit level permission on TestSite01.