In this blog post, we will explore different methods to add domain users or Active Directory (AD) security groups to the local Administrators group on Windows devices. You can add users or groups to the Administrators group manually (if you have direct access to the device) or remotely using tools like Group Policy or device management solutions such as Intune.
Contents
1. Add Users to Local Administrator Group Manually
First option is to log in on a Windows computer and add users to local administrator group manually. When you join a computer to Active directory domain, the Domain Admins group is automatically added to the Administrators group and Domain Users are added to the Users group. To add users to local administrator group manually, follow below steps:
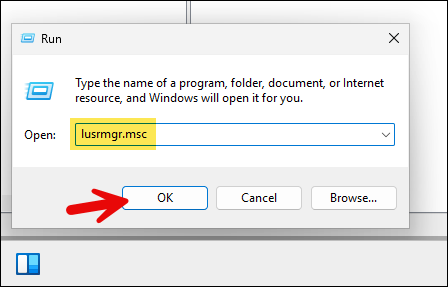
- Press Windows + R keys to open the Run dialog box.
- Type
lusrmgr.mscand press Enter to open Local Users and Groups management console.
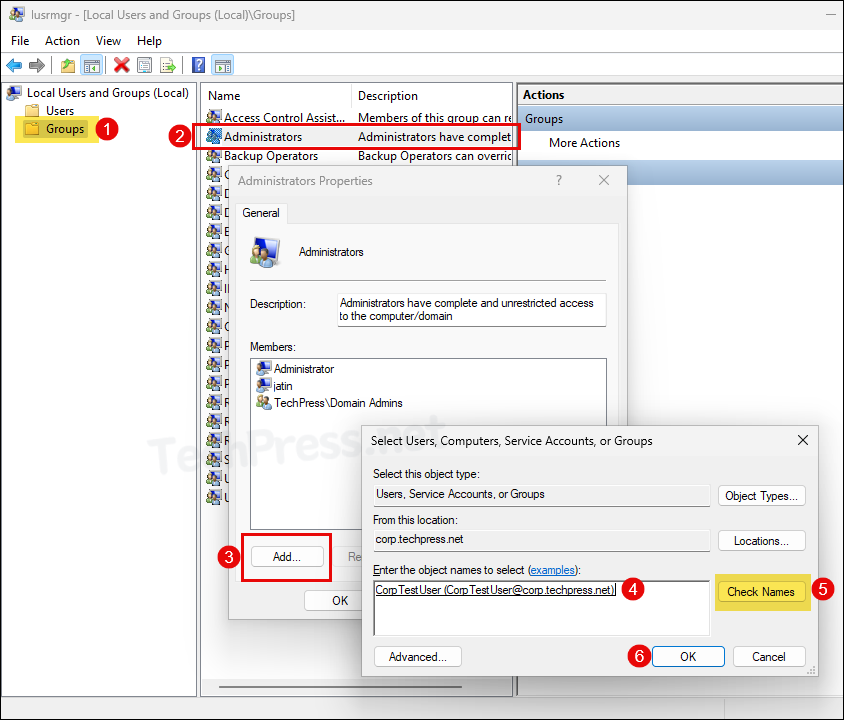
- Under Groups folder, double-click on Administrators > Click on Add. Search for the Active directory user account you want to add > Click on Check Names > Click on OK to add the user to local Administrators group.
2. Add Users to Local Admin Group using PowerShell
Instead of using Local Users and Groups management console to add users to local Administrators group, you can also use PowerShell commands. Let’s take a look:
List members of Local Administrators group (Using Get-Localgroupmember)
PS C:\Users\Administrator> Get-localgroupmember -group "Administrators"

ObjectClass Name                        PrincipalSource
----------- ----                        ---------------
User        TechPress\CorpTestUser      ActiveDirectory
Group       TechPress\Domain Admins     ActiveDirectory
User        TECHPRESS-W-2\Administrator Local
User        TECHPRESS-W-2\jatin         Local
List members of Local Administrators group (Using ADSI and WinNT namespace)
([ADSI]"WinNT://$env:COMPUTERNAME/Administrators").Members() | ForEach-Object { $_.GetType().InvokeMember("Name", 'GetProperty', $null, $_, $null) }List members of Local Administrators group (Using net localgroup)
net localgroup administratorsAdd one domain user to Administrators group
Add-LocalGroupMember -Group "Administrators" -Member "Techpress\CorpTestUser"Add multiple domain users to Administrators group
Add-LocalGroupMember -Group "Administrators" -Member ("Techpress\CorpTestUser", "Techpress\Tpadmin01")Add one domain user to Administrators group (Using NET LocalGroup)
net localgroup Administrators "Techpress\CorpTestUser" /addAdd one domain user to Administrators group (Using ADSI and WINNT namespace)
([ADSI]"WinNT://$env:COMPUTERNAME/Administrators").Add("WinNT://TechPress/CorpTestUser")


# To Add a Local User acccount to Administrators group instead of domain user, Use below command:
([ADSI]"WinNT://$env:COMPUTERNAME/Administrators").Add("WinNT://$env:COMPUTERNAME/Username")
3. Add AD Security Group to Local Administrators Using GPP
Group Policy Preferences (GPP) is a part of Active Directory Group Policy Objects (GPO) that allows you to add Active Directory domain users to the local Administrators group on target Windows devices.
For demonstration purposes, I will add an AD security group named Techpress\TP-WSAdmins to the local Administrators group on Active Directory-joined computers using Group Policy.
This AD security group contains all administrators in my team, adding a security group to local administrators group makes it easier to manage the local administrator membership. You easily add or remove users from this group to control the access. Let’s check the steps:
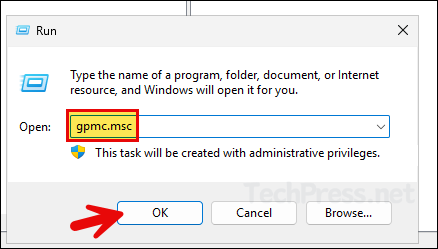
- Login to a Domain controller and Open Group Policy management console (
gpmc.msc).
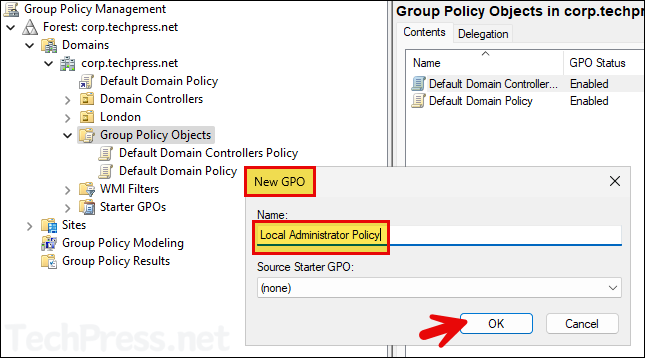
- Right-click on the Group Policy Objects and Select New.
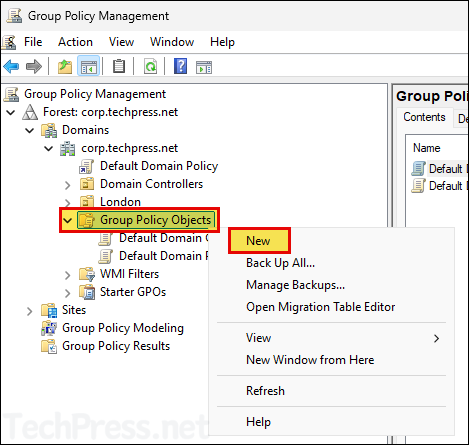
- Provide a Name of the GPO and click OK.
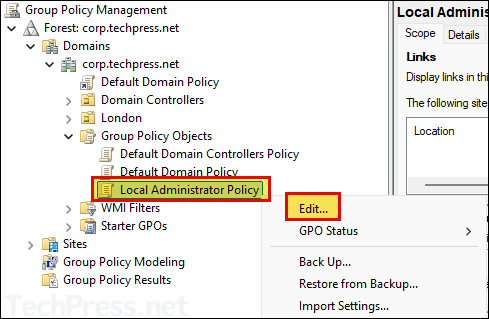
- Right-click on the GPO and click Edit.
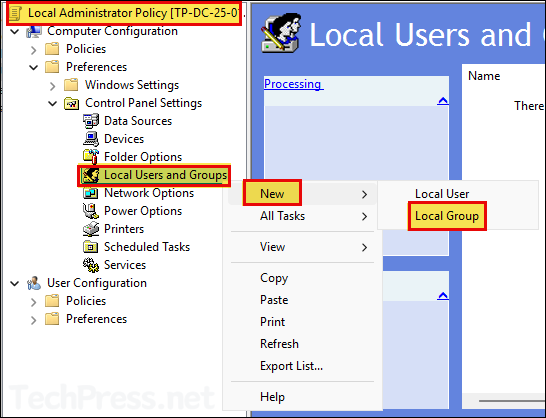
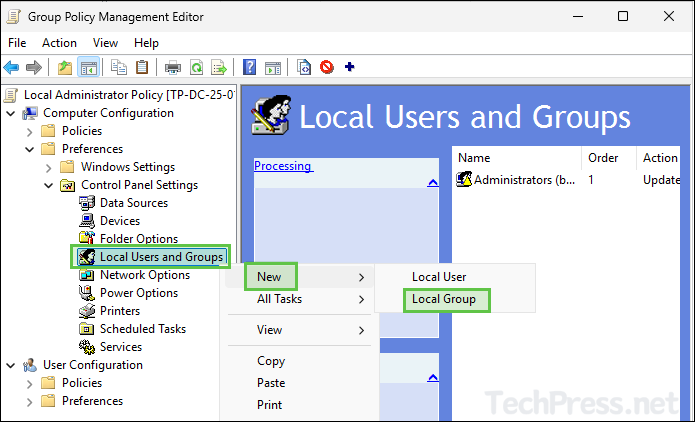
- Navigate to Computer Configuration > Preferences > Control Panel Settings > Local Users and Groups. Right-click on it > Select New > Local Group.
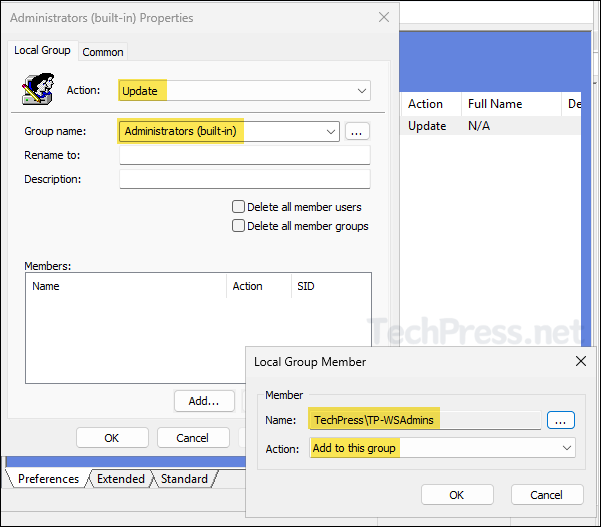
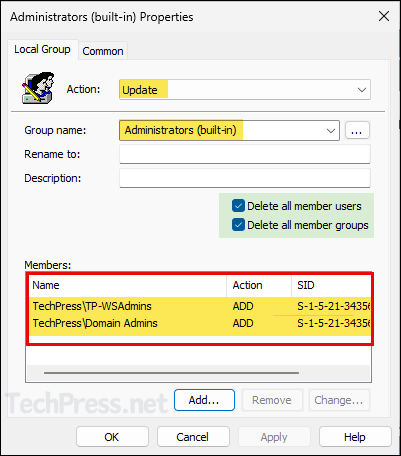
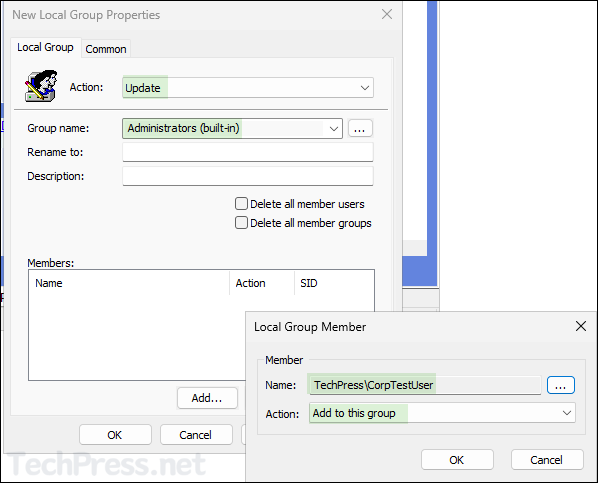
- Select Action as Update and Group name to Administrators (built-in).
- Click on Add and select the security group you want to add, and click on OK.
If you have renamed the built-in Administrators group on target Windows computers, you can still select the group as Administrators (built-in) from the drop-down menu. When this policy adds a user to the built-in Administrators group, it references the group’s SID (Security Identifier), which is S-1-5-domain-500. This SID remains unchanged, even if the account is renamed.
Note
- Repeat the step to add TechPress\Domain Admins group, as we are going to also select Delete all member users and Delete all member group settings. These settings will remove Domain Admins group along with other existing users and groups. Therefore, we are making sure that its added back as we want to keep TechPress\Domain Admins group in the Local Administrators group.
If you do not want to remove any existing users or groups from Local administrators group, then do not select Delete all member users and Delete all member group checkboxes in the policy.
In that case, you can just provide the name of the user or group to add to Local administrators group. Existing membership of Administrators group will remain unchanged.
- If you want to add another domain user or security group, you can add them at this stage. Click OK to save the policy. You can edit the policy later to add or remove users and groups as needed.
You can optionally check Delete all member users and Delete all member groups check boxes to remove any users and groups that are added to the local Administrators group except built-in Administrators account.
This ensures that the Administrators group is entirely controlled by Group Policy. Any users or groups manually added using
lusrmgr.mscor PowerShell, will be removed the next time the GPO is applied.Please note, if you select Delete all member groups option, Domain Admins group (which is by default added to the local Administrators group) will also be removed from Administrators group. Therefore, ensure that it’s added back using the GPO, else all domain admins will lose local administrator access on all target computers where this policy will be applied.
If you do not select these checkboxes, there is no need to re-add the Domain Admins group or any other existing users or groups you want to retain. Users or groups already existing in the local Administrators group will remain unchanged and will not be removed.
Note
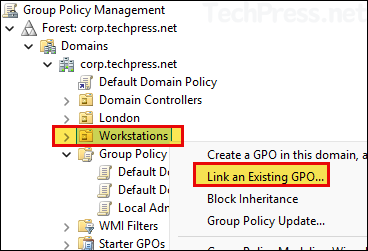
- Now, link the GPO with an OU containing Windows computers. I would be linking this to Workstations OU. Right-click on the OU > Select Link an Existing GPO…
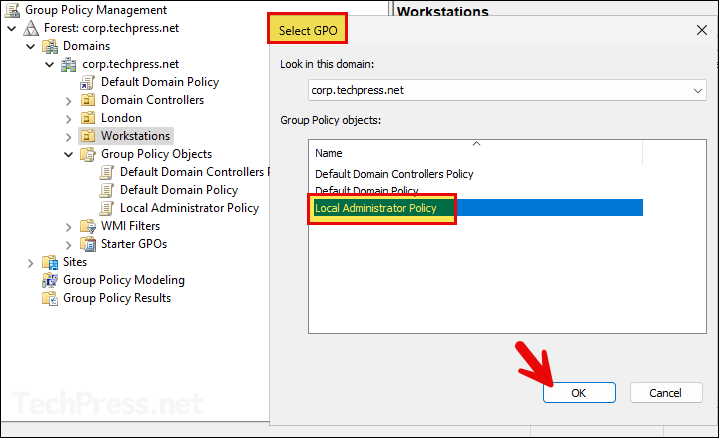
- Select the newly created GPO and click on OK to link it.
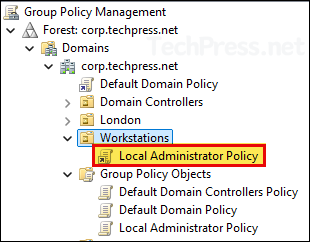
- Verify if the GPO has been linked to the correct OU.
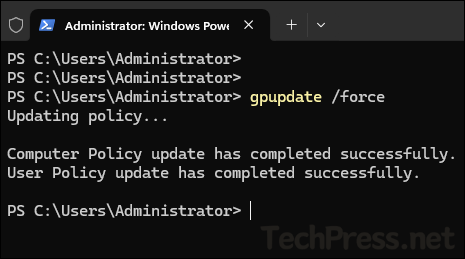
- By default, group policy refreshes/updates every 90 minutes. To speed up the process, you can open command prompt or PowerShell console in Admin mode and execute
gpupdate /forcecommand.
- Verify if the security groups have been added to local Administrator group by opening
lusrmgr.mscand checking the Administrators group.
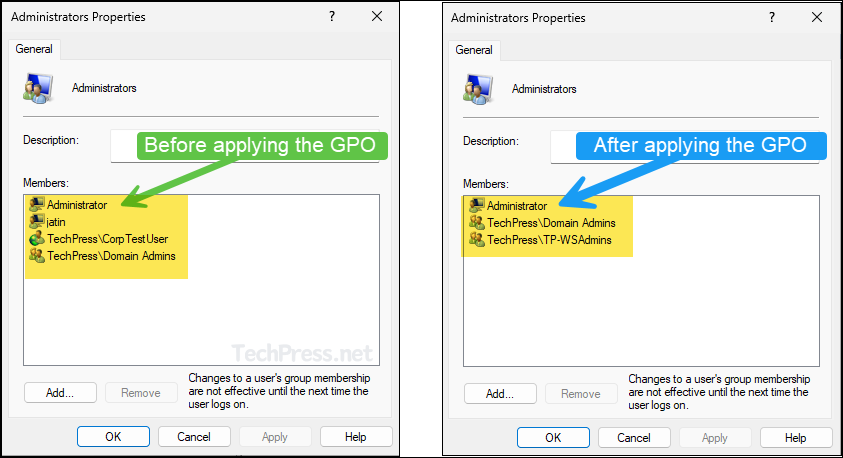
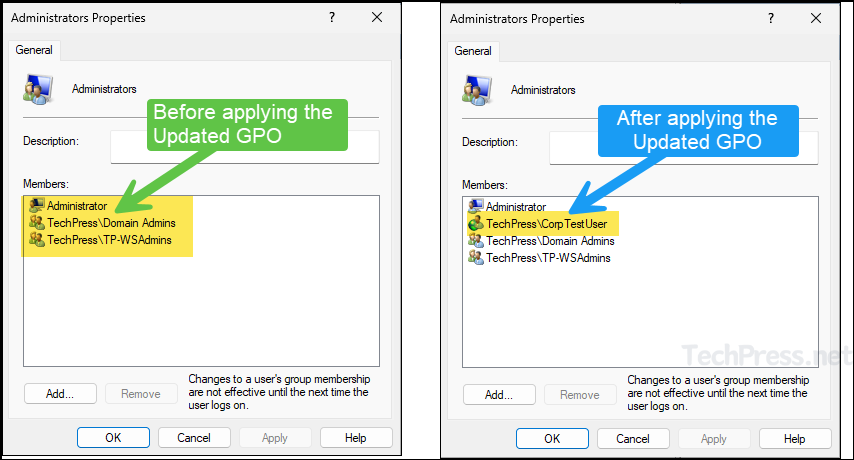
- Below screenshot shows the members of Administrators group before and after applying the GPO. You can notice that a local user account called jatin and domain user account CorpTestUser have been removed and replaced by what is configured in the GPO.
4. Add Domain Users to Administrators Group On a Specific Computer using GPP
Now that we have added an AD security group in Local Administrators group on all workstations. You can also add a domain user account to the Administrators group using Group policy preferences (GPP).
You can use the same Group Policy Object (GPO) that was used to add security groups to the Administrators group. We will be using Item-level targeting for adding the domain users only to specific computers within the Workstations OU. Let’s check the steps:
- Edit the same Local Administrator Policy we created in the previous step.
- Navigate to Computer Configuration > Preferences > Control Panel Settings > Local Users and Groups. Right click on it > Select New > Local Group.
- Select Action as Update and Group name to Administrators (built-in).
- Click on Add and provide the domain user you want to add to this group.
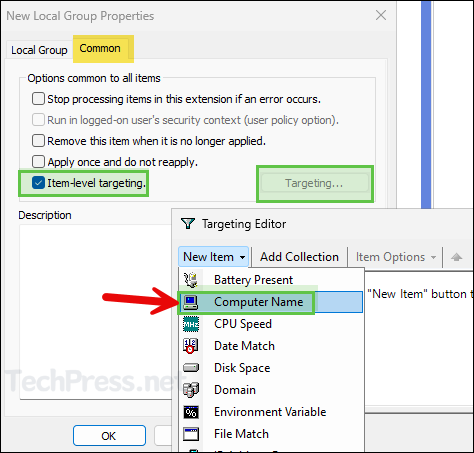
- Go to the Common tab and select the check-box for Item-level targeting. Click on Targeting button to launch Targeting Editor. Click on New Item drop-down and select Computer Name.
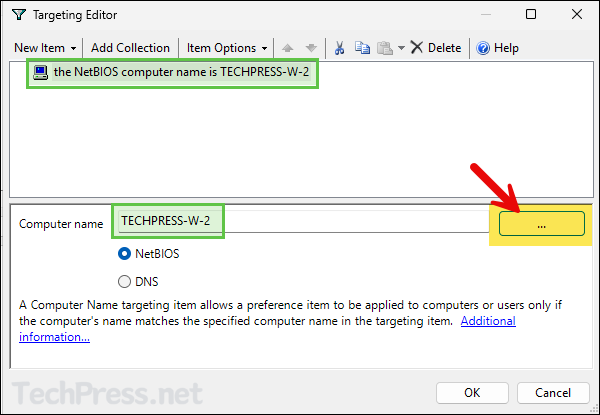
- Provide the name of the computer on which you want to provide administrator rights to the user. You can click on three dots button and search for the computer account in AD.
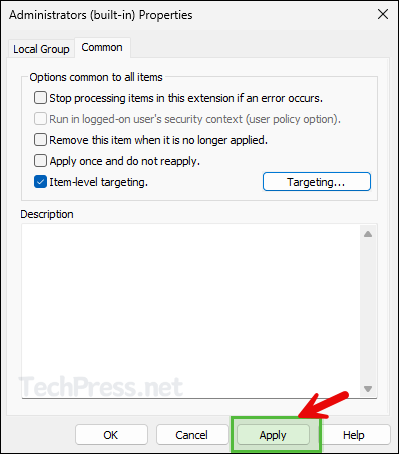
- Click on Apply to save changes.
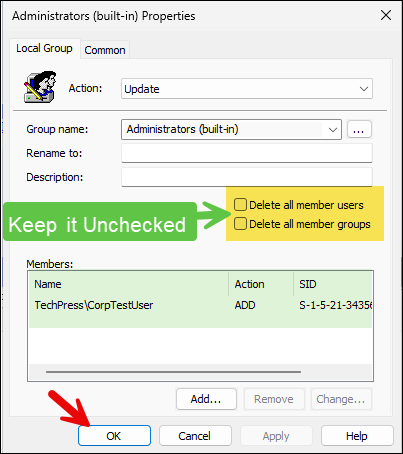
- Do not select Delete all member users and Delete all member groups checkbox. As we have already selected this when adding an AD security groups into the Administrators group via the same policy. Click on OK to save and exit.
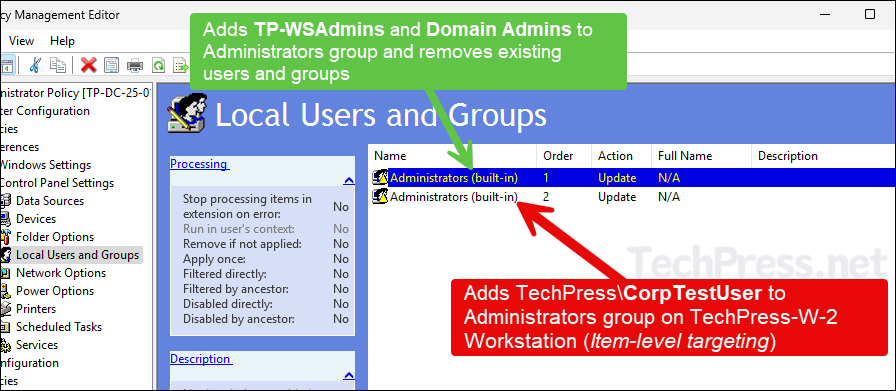
- Below screenshot shows the order of two configurations for Administrators group. Please note that GPP settings will be applied in top to bottom order. Policy setting with Order 1 will be applied first and then Order 2 and so on.
- First Policy (Order 1) setting adds TechPress\TP-WSAdmins and TechPress\Domain Admins to local Administrators group and removes all existing user and group membership (Except built-in Administrator account).
- Second Policy (Order 2) will just add TechPress\CorpTestUser user account to Administrators group only on TechPress-W-2 computer. This Policy does not remove any users or groups from Administrators group.
5. Managing Local Admins Using Restricted Groups
There is another option to add users or groups to local Administrators group. You can use Restricted Groups which allows local groups management on Windows computers.
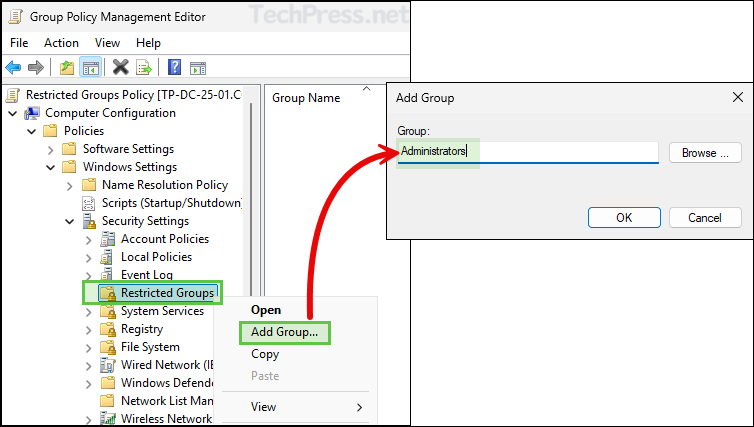
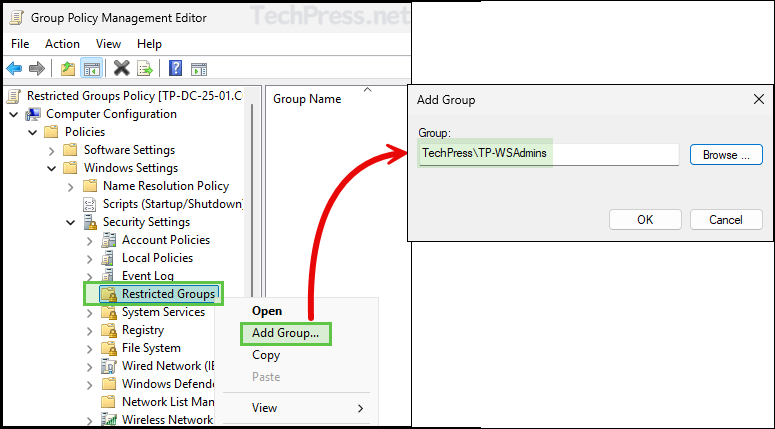
- Create or Edit a Group Policy and Navigate to Computer Configuration > Policies > Windows Settings > Security Settings > Restricted Groups.
- Right-click on Restricted Groups and select Add Group. Provide the name of the group you want to manage, e.g., Administrators.
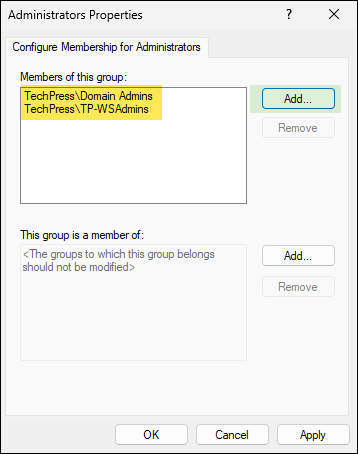
- Click on Add button to Configure Membership for Administrators. Add the domain users and groups here. Click on OK to save the changes. Please note this will replace local Administrators group membership on the target computer with what has been specified in the GPO.
- Link this Policy to Workstations OU. Once the policy is applied on the target devices, Administrator group membership will contain TechPress\Domain Admins and TechPress\TP-WSAdmins, rest of the users and groups will be removed/replaced.
To ensure the existing membership of the Administrators group remains unchanged and only the specified domain user or security group is added, follow these steps:
- Right-click on Restricted Groups > Add Group.
- Provide the name of the user or group (In format <domain\<username> or <domain>\<groupname>) you want to add into the Administrators group. Click on OK button.
- Click Add next to This group is a member of, and specify the Administrators group. Then, click Apply to save the changes.
- This configuration will add TechPress\TP-WSAdmins to the Administrators group without removing or replacing any existing users or groups already added to it.

6. Add Users or Groups to Local Admin Using Intune
If you manage Windows devices using Intune, you can add users or groups to the local Administrators group by creating an Account Protection policy in the Intune admin center.
For a step-by-step guide on how to add users or groups to the local Administrators group using Intune, refer to the link below:
Troubleshooting
If the group policy has not been applied on to your device yet, you can use gpupdate /force command on command prompt or PowerShell console opened as administrator.
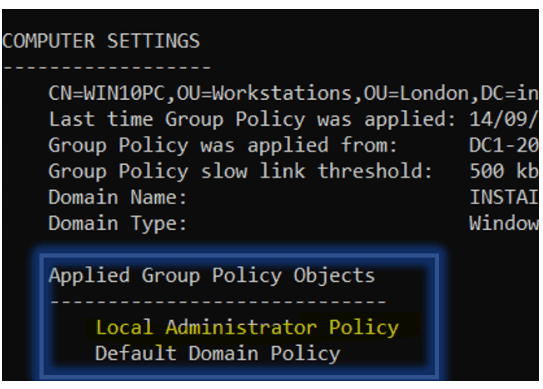
As we have applied policies from Computer configuration node, you can use below command to check if the GPO with Computer settings has been applied on the computer.
gpresult /r /v /scope computer | more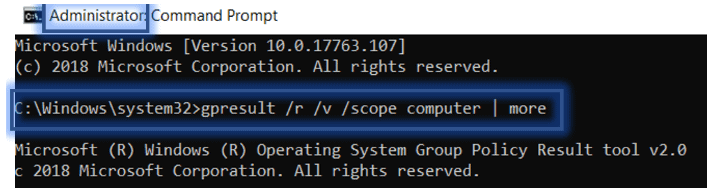
To be honest, this isn’t the best method to implement this.
Reason being, is that when you do things via preferences versus policy, they are “tattooed” so-to-speak. Policy is dynamic, meaning when you update that policy, it gets updated during the next gpupdate. If the GPO with the policy linked to a particular OU goes away, the systems in that OU will no longer have those policy settings.
On the other hand, when you use preferences, those permanently affect a system, even if you unlink or otherwise remove the GPO.
A better way to go about this would be go through Policy -> Windows Settings -> Security Settings -> Restricted Groups, then just add BUILTIN\Administrators.
Yes, Correct. Thanks for the insight CatsAndIT. While using GPP and deleting a member from Administrator Group (which we added using Local Administrator Policy), another GPO will be required to remove members and just changing the Action from ADD to REMOVE. However,using Restricted Group can simplify management and make it a bit easier. You can add a security group e.g Techpress\WKSAdmins and add it to the BUILTIN\Administrators Group.
Here is a screenshot of a GPO setting for removing a user added to Local Admin Group:
I want to implement this Local Admin Gpo for one user per PC.
Like if a test user logs in test PC1 then he is Admin only on that PC.
If test user 2 logs in the same PC1 then he should not be having Admin. Please suggest if I can implement such a policy.
Its a bit tricky but still possible to do that. You can create a group for each PC and it to a security group called Workstations Admins. Use the Restricted Groups to add Workstations Admins security group to local administrator group of each PC. Once above is done. Just add the user to their respective PC by checking the name of the PC. But its difficult to manage if there are 100s of PCs and then 100s of security groups.
Second option is to use a script something like as shown in the links i shared below. I haven’t tested it yet but let me know if it works or the other solutions. This lets you set an attribute in AD and a startup script to assign local admin. This feels like much better solution than the previous solution. I hope this will help you.
Script1:
So to make someone a local admin on just one machine, I just have to add this computer’s name to the user’s Description in AD and ask user to reboot, and removing the computer’s name removes the local admin rights.
Script2:
Local admin rights to specific machines
or Implement LAPS
LAPS Download and Information Location