This blog post will guide you to install and configure Universal Print connector. Printers that don’t natively support Universal Print protocols and therefore not Universal Print ready require Universal Print connector. Connector’s job is to connect the printers installed on a machine to Universal Print.
Contents
Universal Print Connector Tasks
- Registers Printers with Universal Print.
- Provides print job status report and printer status to Universal Print service.
- It gets the print job from Universal Print and send it to the Printer.
Prerequisites
- Universal Print License.
- A Global admin or Print admin.
- Recommended Platforms:
- Windows 11 64-bit, Pro or Enterprise, version 22631 or later
- Windows Server 2025 64-bit or later.
- .NET Framework 4.8 or later (download link).
- Connector PC with below requirements:
- Connected to the internet.
- Running 24×7 with hibernate and sleep disabled.
- Can access Universal Print endpoints.
1. Download Universal Print Connector
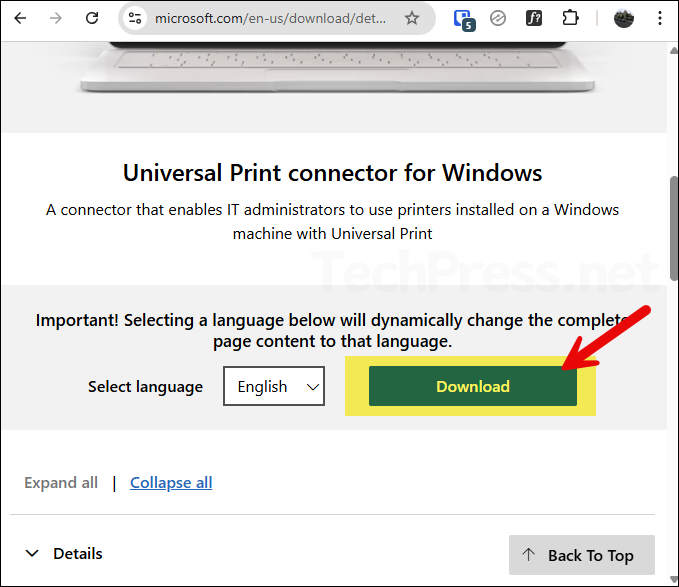
The first step is to download the Universal print connector application on a device which has direct access to the Printers and meets the above prerequisites. Download link: Universal Print connector for Windows.
2. Install Universal Print (UP) Connector
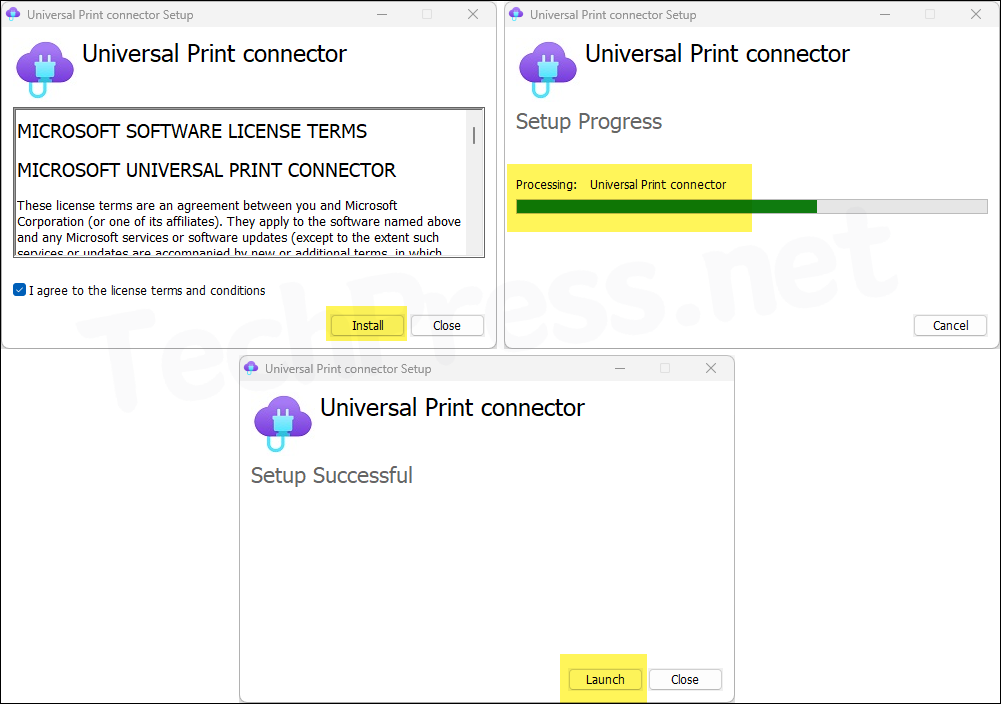
After you have downloaded the UP Connector, you can install it on a computer which has access to the printer(s). Double-click on the UP connector EXE file to start the installation. Once the installation completes successfully, it will create a desktop shortcut at C:\users\public\desktop named PrintConnectorApp.
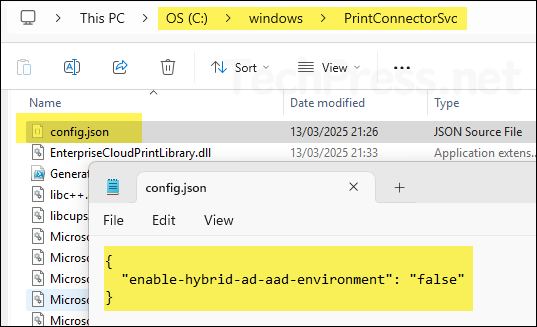
After Universal Print Connector is installed, it stores its configuration data in multiple locations and registers a few services on the Windows device. No changes are required to any of these configuration files or services under normal circumstances — this information is provided mainly for reference and for use in advanced troubleshooting scenarios.
- C:\Windows\PrintConnectorSvc\config.json: Connector config file.
- C:\ProgramData\Microsoft\UniversalPrintConnector: This folder is used by the Universal Print Connector as a data and configuration storage location. It may also contain a CustomPrintTicketMappings folder, which is used by the Universal Print Connector to store custom mapping rules that translate Universal Print ticket options into the equivalent settings supported by the local Windows printer driver.
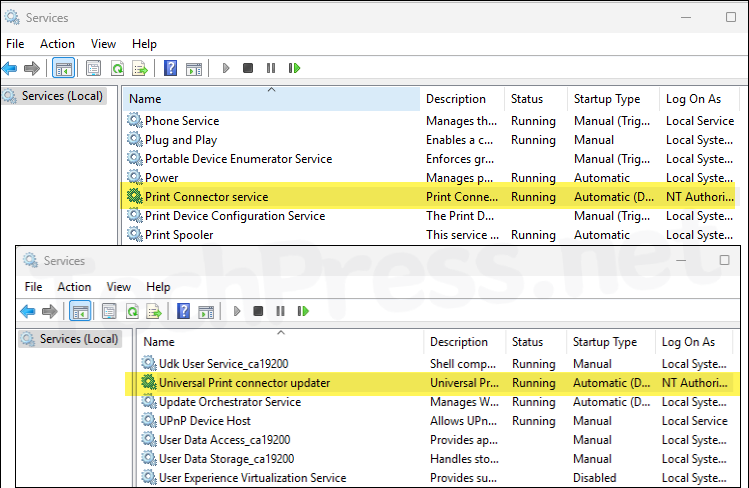
- Universal Print connector also installs Print Connector service and Universal Print connector updater service in services.msc. Ensure that these are in Running state.
3. Register Printers with Universal Print
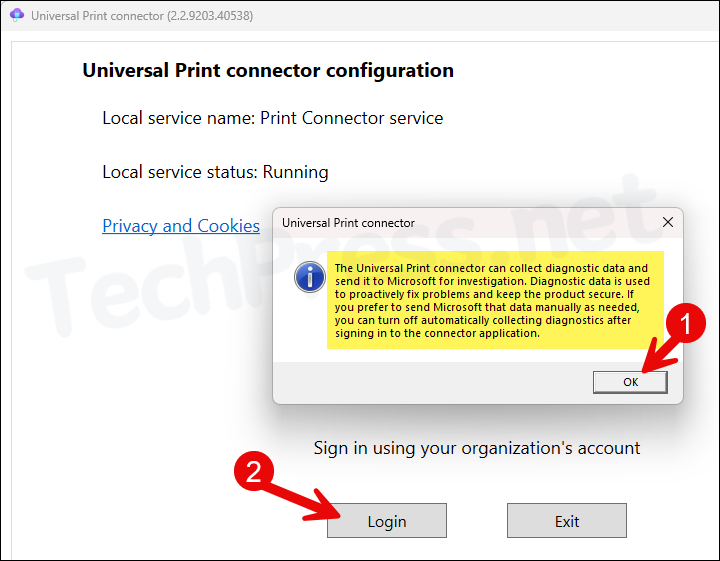
After you have installed Universal Print connector, click Launch button.
- After launching the Universal Print Connector app, you may see an informational pop-up message. Click OK, then click the Login button. Sign in using an account with either the Global Administrator or Print Administrator role. If you attempt to register the connector with an account that does not have one of these roles, you will receive an error message (which we’ll discuss later in this guide).
The Universal Print connector can collect diagnostic data and send it to Microsoft for investigation. Diagnostic data is used to proactively fix problems and keep the product secure. If you prefer to send Microsoft that data manually as need, you can turn off automatically collecting diagnostic after signing in to the connector application.
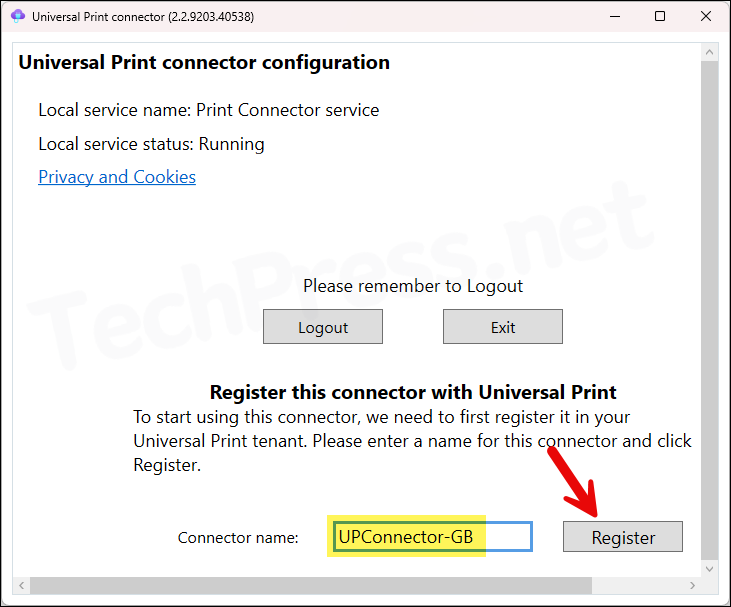
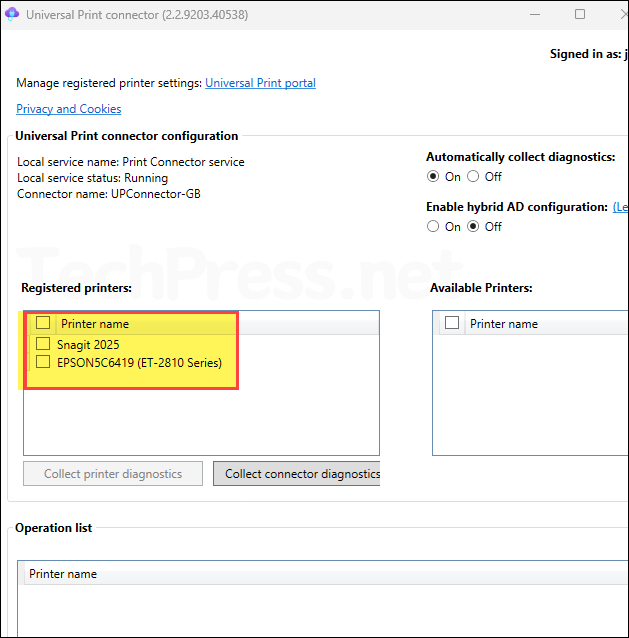
- Provide the Connector name and click Register.
- After the connector registration completes successfully, it will scan and show you the list of Available Printers. If your printer is not displayed, click the Refresh Printers button located in the top right corner. Select the printers you want to register with the Universal Print service, then click Register.
- Automatically collect diagnostics: Keep it On.
- Enable Hybrid AD Configuration: Turn this option On if your client devices are Entra hybrid joined. Enabling it allows the connector to retrieve user information from Active Directory domain controllers and impersonate the user account that sent the print job. This ensures that the Owner shown in the print queue reflects the actual user account.
- If your computer is Entra joined and Enable Hybrid AD Configuration is set to Off in the connector app, the connector will send the print job to the target printer using the Local System account. As a result, the Owner field in the print queue will display SYSTEM instead of the user’s account.
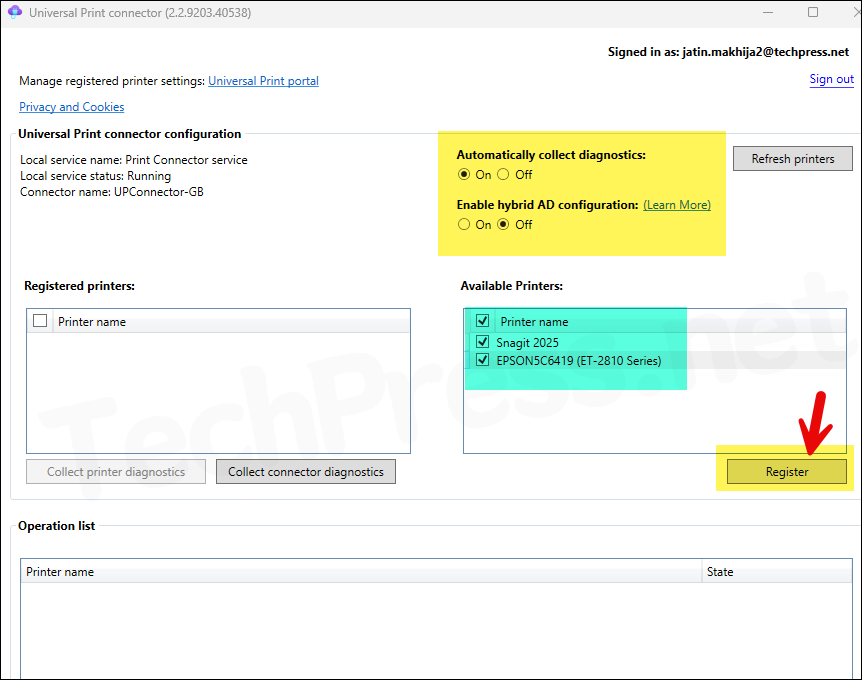
- Selected printers are now registered with Universal print successfully.
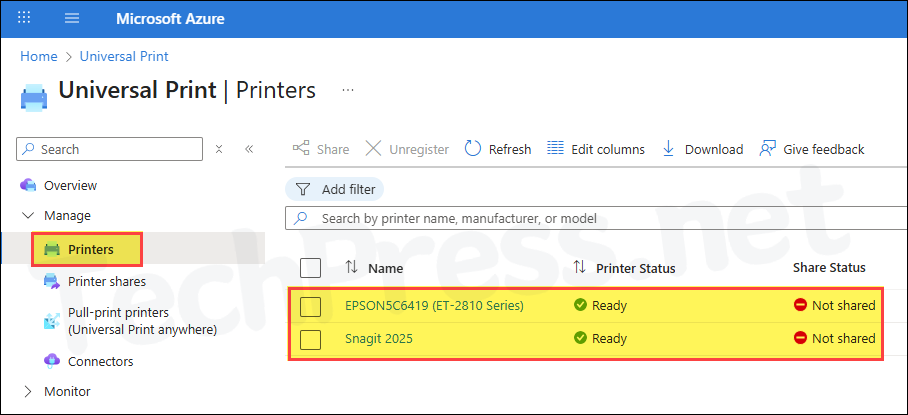
- Sign in to the Microsoft Azure portal.
- Search for Universal Print > click Printers.
- You will find all printers registered with Universal Print listed on this page. Note that the Share Status is initially set to Not shared. You can select any printer from the list and share it with users in your organization.
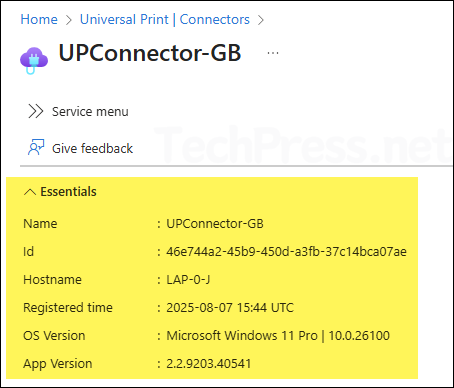
- Click on Connectors to list all registered Universal Print connectors in your organization.

- To find more information about a connector registered with Universal Print service. Click on it and it will show below information:
- Name: Name of the connector.
- Id: ID of the connector.
- Hostname: Hostname of the connector machine.
- Registered time: Connector registration time.
- OS version: Connector machine OS version information
- App version: Connector app version info
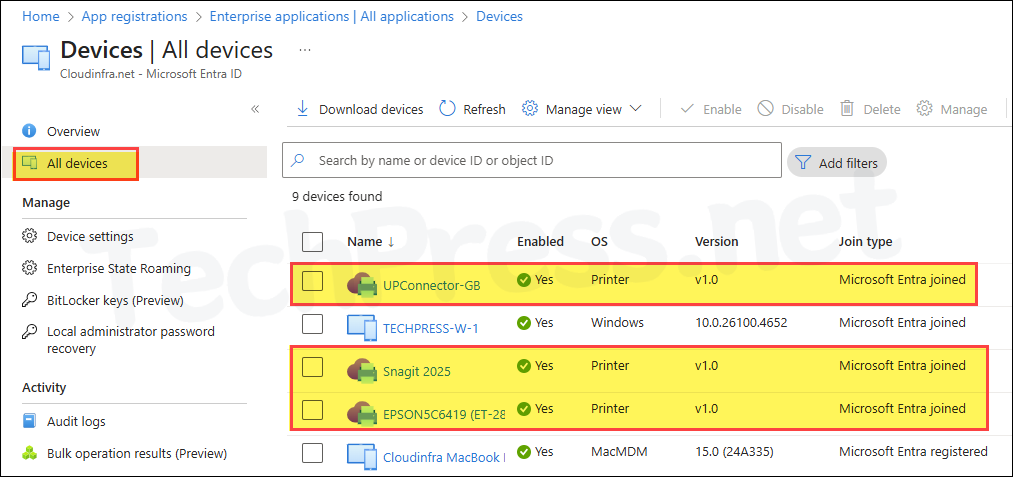
Universal Print connector and all your printers registered with Universal print also exist as a Printer object in Entra ID. To check these objects, Sign in to the Entra admin center > Devices > All devices and search for the objects.
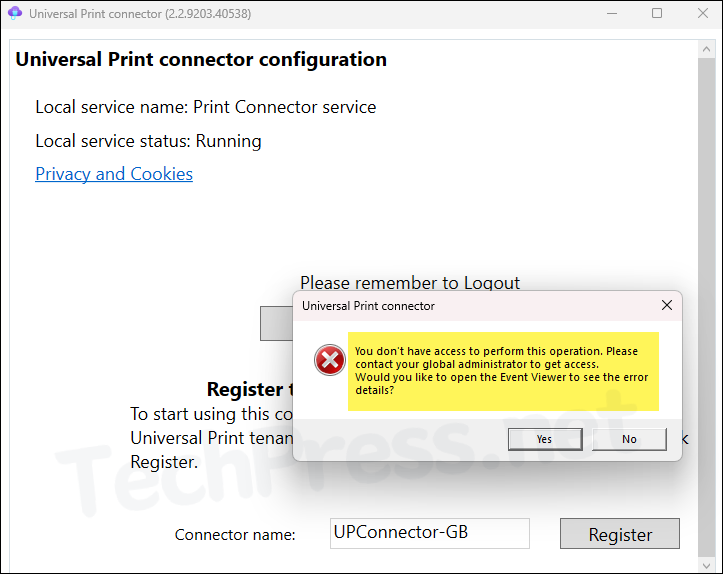
Unable to Register Universal Print Connector
You have downloaded and installed the Connector application on a computer, and successfully signed in using Microsoft 365 administrator credentials. After entering the Connector Name and clicking the Register button, you receive the following error message:
You don’t have access to perform this operation. Please contact your global administrator to get access. Would you like to open the Event Viewer to see the error details?
To fix this issue, click on Logout and Login using an account with either Global administrator or Print administrator privileges.
- Open PowerShell console on your computer, type and run this command: eventvwr /c:Microsoft-Windows-PrintConnector/Operational. This will open the Universal Print connector logs.
- Go through the logs to find the Event ID 106 for failed connector registration. (HTTP error forbidden).
Method b__0 is not being retried for HTTP error Forbidden
Retry Loop Completed: False
Retry Count: 0
Callstack:
ProxyLibrary.RetryHandler+d__3`1
ProxyLibrary.Register+<>c__DisplayClass25_0+<b__0>d
ProxyLibrary.RegisterConnectorHelper+d__19
Exception:
ProxyLibrary.UPServiceException: Exception of type ‘ProxyLibrary.UPServiceException’ was thrown.

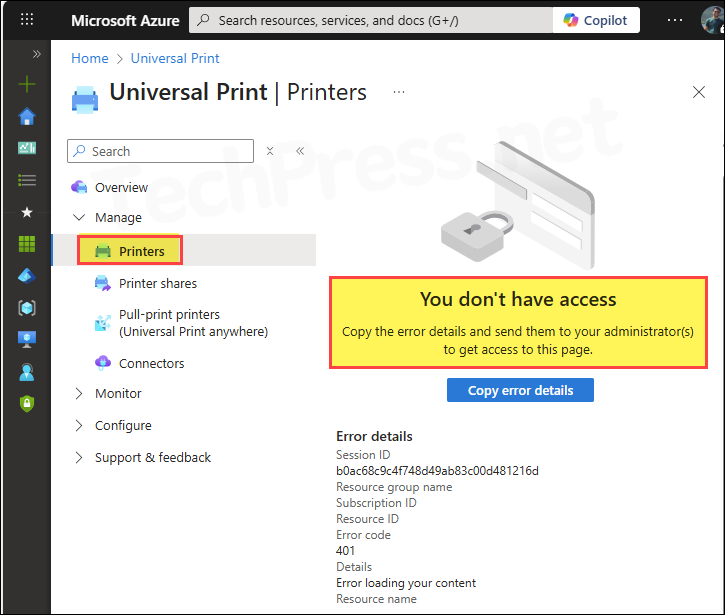
Unable to view Printers in Universal Print
You have successfully registered the printers to Universal print service in Azure and now checking the registration details by going to Microsoft Azure Portal > Printers, you may get below error message:
You don’t have access
Copy the error details and send them to your administrator(s) to get access to this page.
{“sessionId”:”b0ac68c9c4f748d49ab83c00d481216d”,”subscriptionId”:””,”resourceGroup”:””,”errorCode”:”401″,”resourceName”:””,”details”:”Error loading your content”}
To fix this error and view printers in the Universal Print service, ensure that you are signed in with an account that has either Global Administrator rights or Print Administrator rights. Once you sign in with the correct account, the printers will be displayed on this page.