In this blog post, I will show you the steps on how to upgrade Windows 11 Home to Pro. If you are using Windows Pro and want to upgrade to Windows Enterprise, you can still use the same steps provided in this blog post. Only make sure to use the Product key corresponding to the target Windows edition. I have also written a guide specifically to cover that topic, read here: Upgrade Windows 11 Pro to Enterprise.
Windows 11 Home is the standard edition designed for personal and household use, offering core features like the new Start menu, Microsoft Edge, integrated Microsoft 365 apps, and built-in security tools to keep your device safe. It provides everything needed for productivity, entertainment, and everyday tasks, but does not include advanced options such as BitLocker, Hyper-V, or Group Policy. Let’s learn about the differences between Windows 11 Home and Windows 11 Pro, and how to switch.
Contents
Windows 11 Home vs. Windows 11 Pro
Windows 11 Home comes preinstalled on most consumer PCs. Windows 11 Pro targets small businesses and power users, and is available preinstalled on many business laptops or as an upgrade.
| Features | Windows 11 Home | Windows 11 Pro |
|---|---|---|
| Microsoft Entra ID (Azure AD) Join | No | Yes |
| Active Directory Domain Join | No | Yes |
| Windows Update client policies | No | Yes |
| Windows Autopilot | No | Yes |
| BitLocker Drive Encryption | No (limited) | Yes |
| Remote Desktop (host) | No | Yes |
| Hyper-V | No | Yes |
| Windows Sandbox | No | Yes |
| Assigned Access (Kiosk) | No | Yes |
| Local Group Policy Editor (gpedit.msc) | No | Yes |
Upgrade from Windows 11 Home to Pro Edition
Let’s review the upgrade steps from Windows 11 Home to Pro Edition. Before looking into the step-by-step process, it’s important to note some key points that will help with the upgrade between editions.
- To upgrade from Windows 11 Home to Pro, you must have a valid genuine Windows 11 Pro product key for activation.
- If your device is already linked to a Microsoft account that owns a digital license for Windows 11 Pro, no additional setup is required. The upgrade will complete automatically once the license is recognized. Alternatively, you can enter a Pro product key manually under Settings > System > Activation > Change product key to trigger the edition upgrade.
Steps to Upgrade Windows 11 Home to Pro
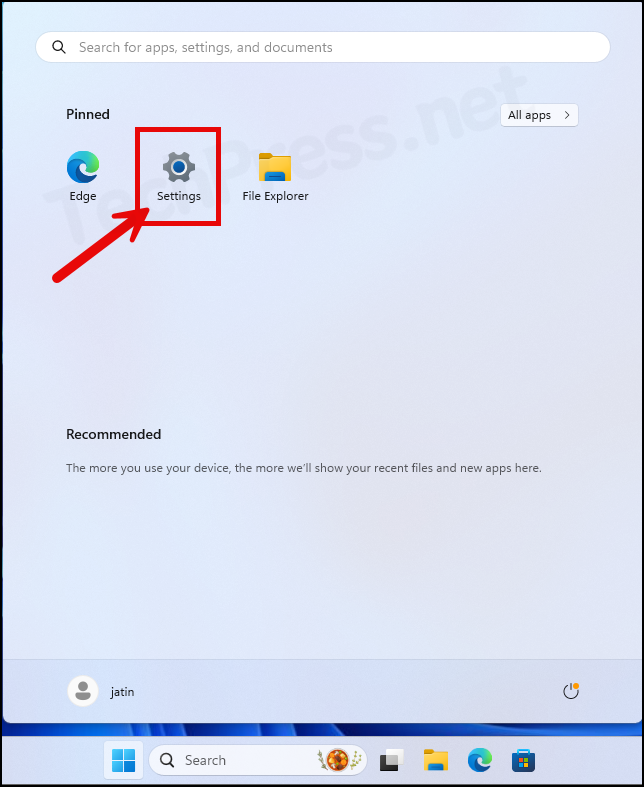
- Press the Windows key + I to open the Settings app. Alternatively, you can also click on the Windows logo (Start Menu) and then click on Settings App Icon to launch it.
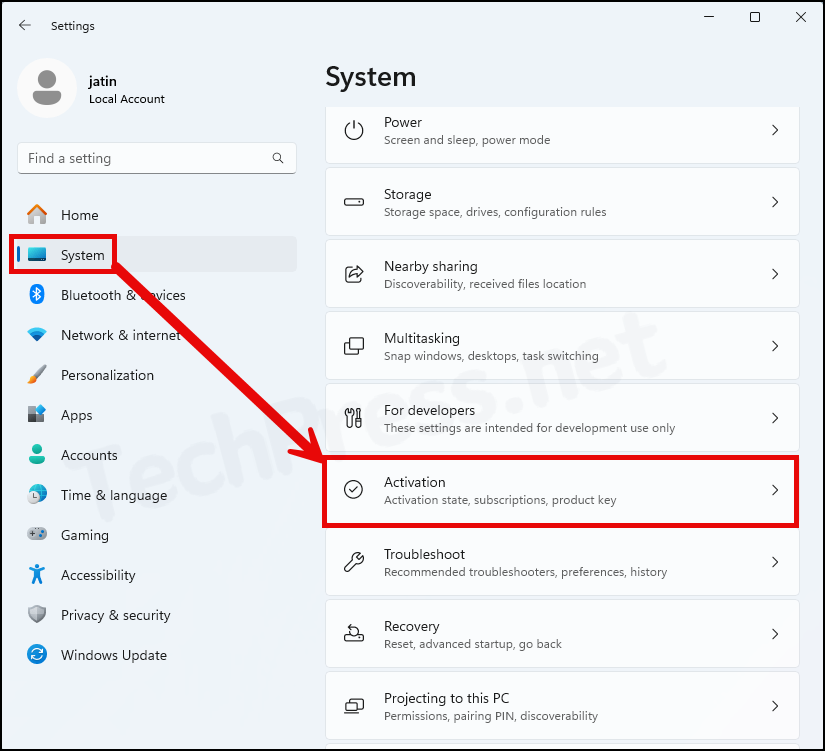
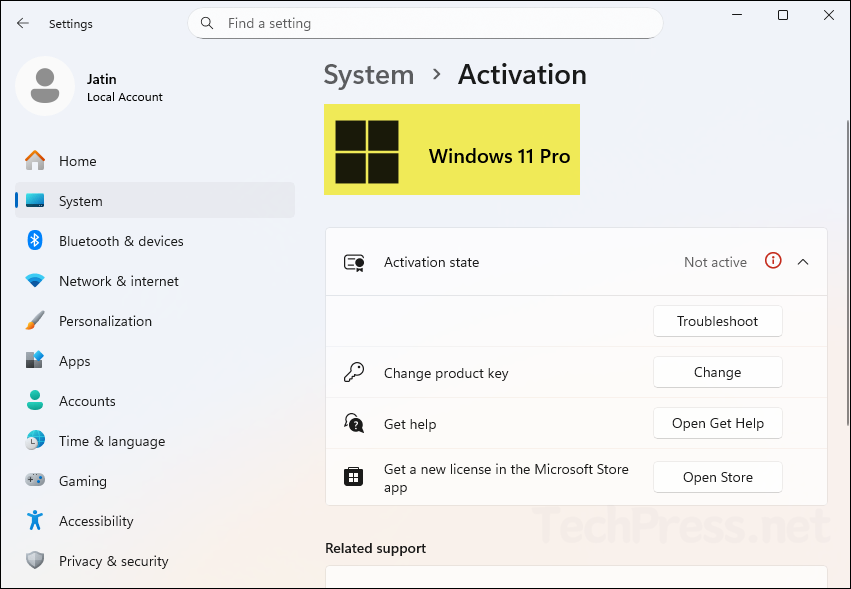
- Click on System > Activation.
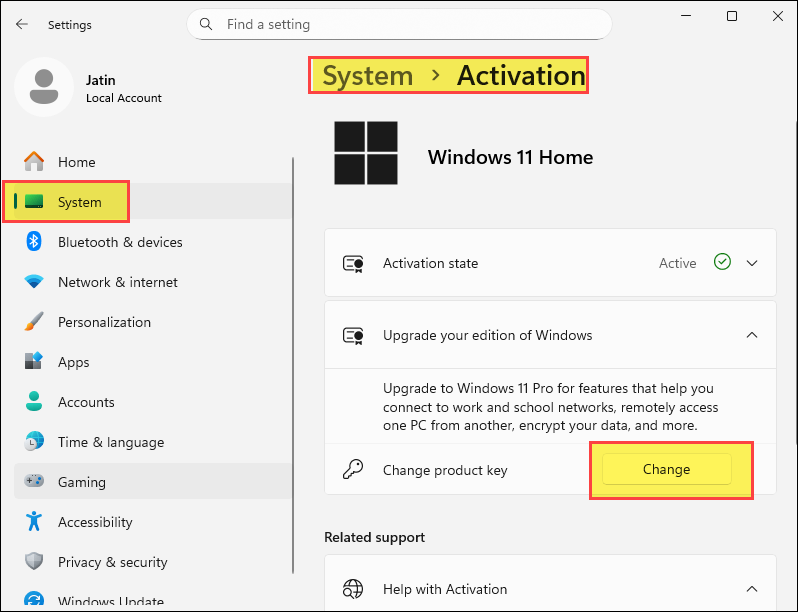
- Click on the Change button to update the Product key.
- At this stage, owning a valid Windows 11 Pro key is required. If you don’t have one, you can temporarily use a generic key to convert Windows 11 Home to Pro. This will change the edition, but Windows will remain unactivated until you enter a valid purchased license key. Generic keys are intended for edition conversion and testing, not for permanent activation.
VK7JG-NPHTM-C97JM-9MPGT-3V66T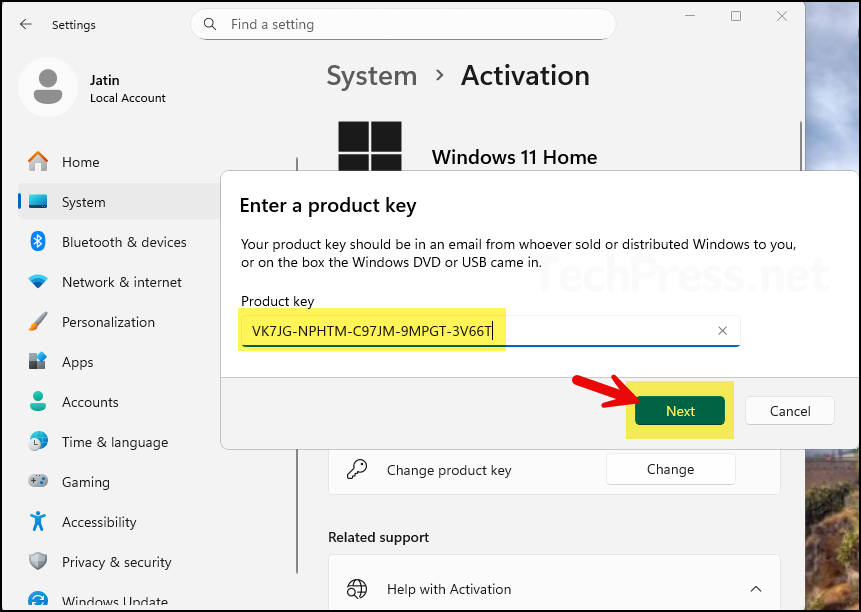
- On Upgrade your edition of Windows screen, click Start.
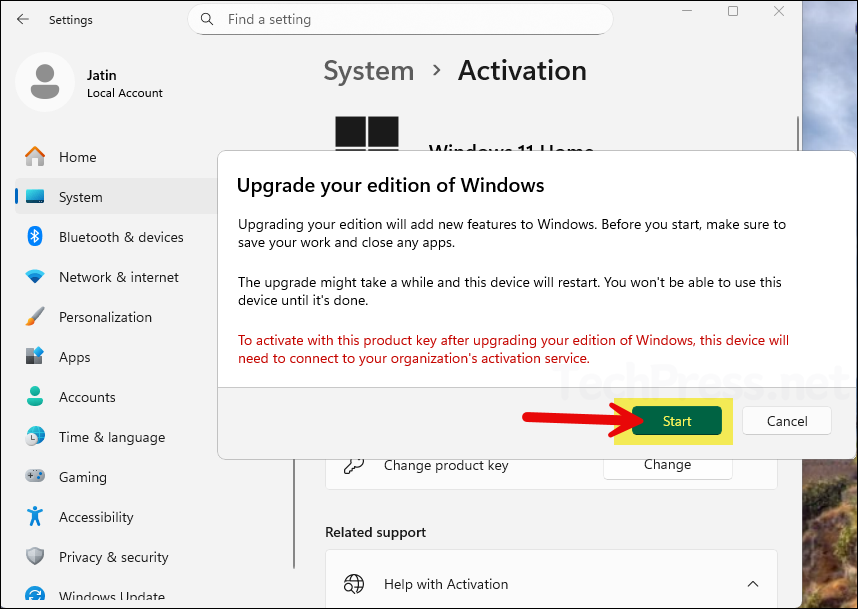
- Your system may reboot for changing the edition. Also note that you must have a valid/genuine Windows 11 Pro key to successfully activate your product.
Using Command Prompt to Install a Product Key
There are other ways to install a Product key on your Windows device. You can utilize slmgr which is a Software licensing management tool.
slmgr syntax
slmgr /ipk <product key>slmgr Installing a Product Key
slmgr /ipk VK7JG-NPHTM-C97JM-9MPGT-3V66T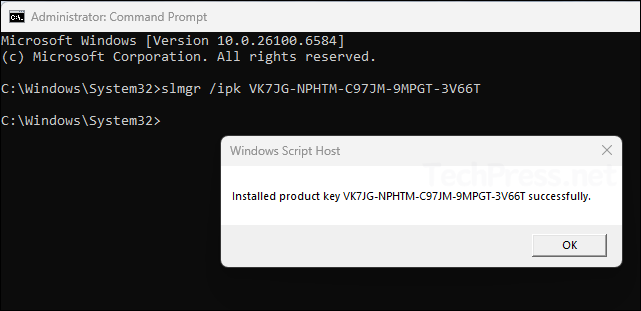
Conclusion
In summary, this blog post has provided guidance on upgrading from Windows 11 Home to Windows 11 Pro, offering users a detailed understanding of the steps involved and the key differences between the two editions.
You can change the product key on your Windows device using either the Command Prompt or the Settings app. It’s important to have a valid Windows 11 Pro key for the upgrade. While generic keys can trigger the edition change, they will not activate Windows.