This post is about showing you the steps on how to factory reset a Windows 11 PC. A factory reset can solve stubborn performance issues, malware damage, and configuration drift by putting Windows back into a known-good state.
In Windows 11, Reset this PC feature offers two clear options: you can either keep your personal files while reinstalling Windows or remove everything for a completely fresh start. In this guide, I’ll explain each reset option and show how to initiate the reset from Settings app. You’ll also learn best practices for backups, BitLocker, drivers, activation, and a post-reset checklist to ensure your system is stable and fully updated afterward.
Contents
Understanding Windows 11 Reset Options
When you start resetting your Windows 11 device, you will go through a wizard which will provide you with reset options like Keep my files, remove everything, cloud download, local download etc. Let’s understand each of these options first:
Choice
What it does
When to use
Keep my files
Also known as Refresh, Reinstalls Windows and keeps files in user profile. Removes apps and drivers.
You want a fresh OS but need documents intact.
Remove everything
Also known as Reset. Wipes all personal files, apps, and settings.
You are selling, donating, or want a truly clean slate.
Cloud download
Downloads a fresh Windows image from Microsoft.
Local files might be corrupted, or you want the latest bits.
Local reinstall
Uses files on your device to rebuild Windows.
Faster, no big download, and current image is healthy.
Clean data? (for Remove everything)
Adds a secure overwrite pass on the drive.
Resale or hand-off where data recovery must be harder.
If you use OneDrive, confirm important folders are synced and up to date.
Collect product keys and sign-outs
Export license keys for paid apps (Adobe, Office perpetual, etc.). De-authorize apps that limit activations.
Know your account and BitLocker details
Microsoft account email/password ready.
If BitLocker is on, confirm you can access the recovery key (account.microsoft.com/devices or your saved key). For details on how to find your key, refer to the link: Find your BitLocker recovery key – Microsoft Support.
Ensure power and internet
Plug in a laptop. For Cloud download, you need a stable connection and about 4–6 GB of data.
Disconnect extras
Unplug nonessential USB devices and storage to avoid wiping the wrong drive.
Work or school devices
Ask your admin first. Managed devices may be protected or should be wiped via Intune or company process.
🕒 Time estimate Local reinstall method to reset the PC is usually faster. When you use cloud download option, the time it will take will depend on your internet speed.
Steps to Reset Windows 11 PC
Using the Settings app is the easiest method to reset a Windows 11 PC. Let’s look at the steps:
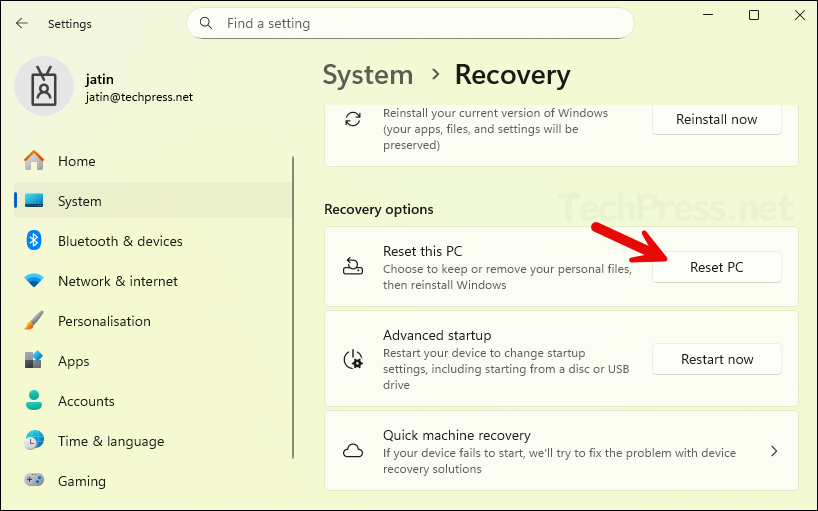
Open Settings > System > Recovery > Under Recovery options, click Reset PC. (If you are not an administrator on your PC, you may be prompted for providing local administrator credentials).
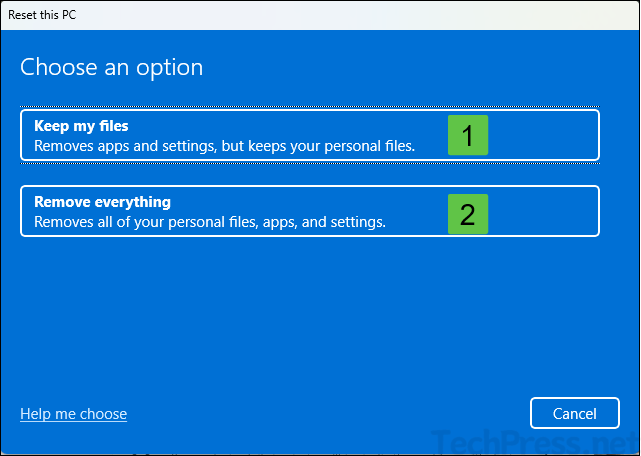
After you click Reset PC, a window will appear with below two options. For the demo, I’ll select Remove everything option.
Keep my files: As detailed earlier, it will keep files in the user profile and remove apps and settings.
Remove everything: Wipes all personal files, apps, and settings. This option is also known as Reset.
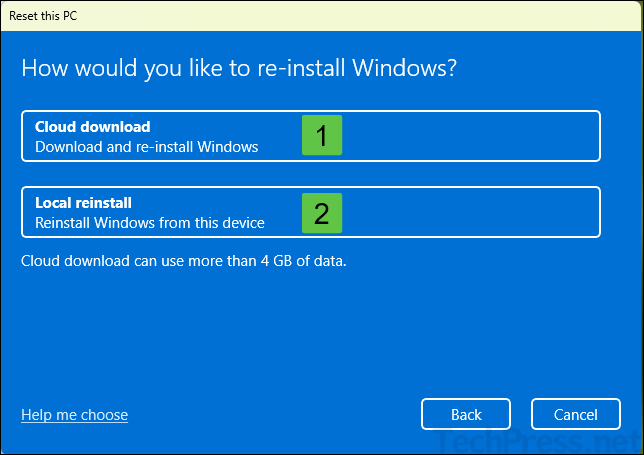
The next screen again presents with below two options. I will go with Local reinstall method.
Cloud download: Downloads a fresh copy of Windows from the cloud, ensuring you get the latest, fully updated version.
Local reinstall: It will re-install Windows by using the files on your PC.
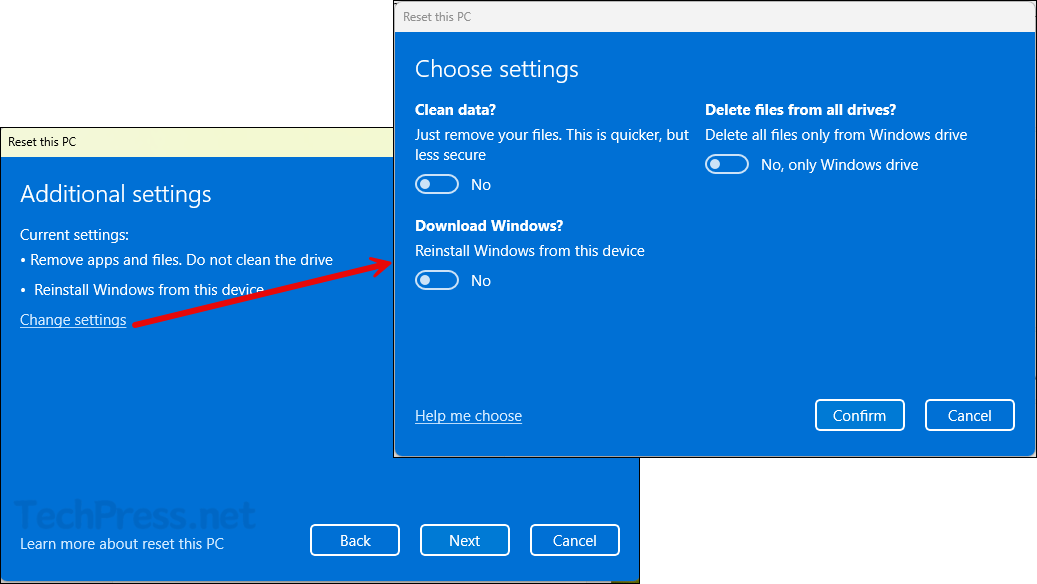
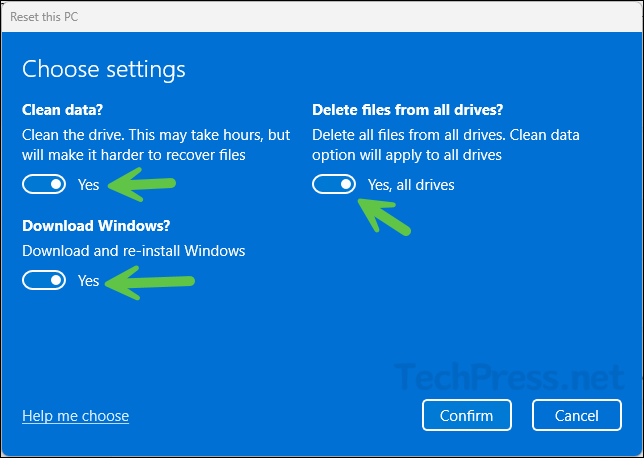
The next screen presents additional settings with Change settings link. When you click on it, you will get another screen with three toggle switches, Clean data, Download Windows and Delete files from all drives options. For the demo, I will not be switching on any of these toggles (as shown in below screenshot). If you have a specific requirement which can be met by enabling any of these toggles, then you can switch it on and proceed accordingly.
Clean data: Turns a quick wipe into a more thorough wipe by overwriting the drive to make file recovery harder. Use this when selling, donating, or decommissioning the PC. It takes longer and is not a certified multi-pass sanitization, but it is stronger than the default quick reset.
Download Windows: Selects where setup files come from. On means Cloud download which fetches a fresh image from Microsoft and is helpful if local files may be corrupted, or you want the cleanest baseline. Off means Local reinstall, which uses files already on the device and is faster and works offline. This setting does not change whether you keep files or remove everything.
Delete files from all drives: By default, a reset targets only the Windows system drive. Turning this on wipes all internal drives and partitions that Windows can see, not just C:. Use only if you truly intend to erase all internal storage. External USB drives are not affected unless you booted from them or chose them explicitly.
You can also decide to switch on the toggles for Clean data, Download Windows and Delete files from all drives and the necessary action will be taken by Windows to reset your PC. Make sure you understand what each option means (as described above) before tuning it on.
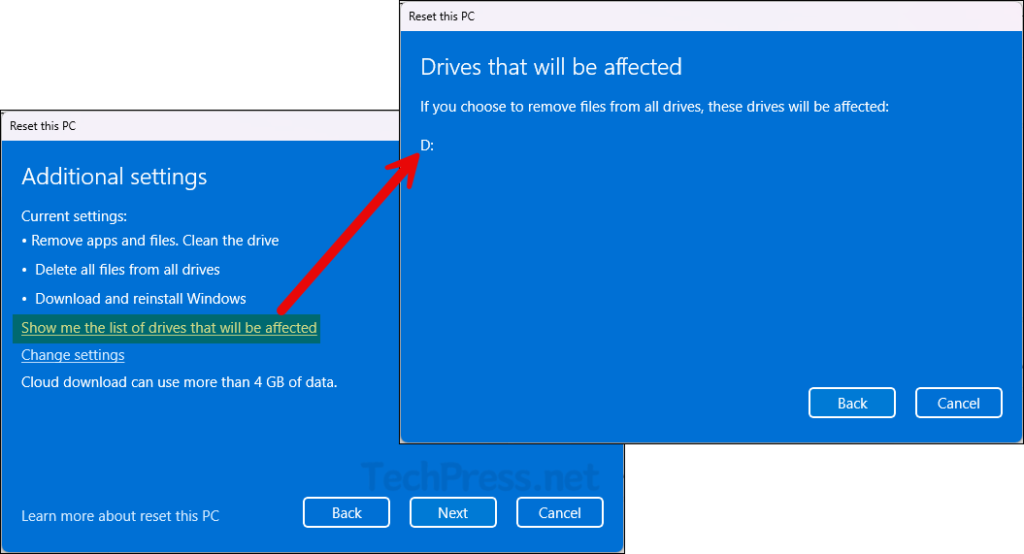
When the Delete files from all drives toggle is turned on, and you click Confirm, the Additional settings screen will have a link Show me the list of drives that will be affected. When you click on it, it will show all the drives that will be wiped clean. Below screenshot shows, D: drive is also going to be impacted, which is my data drive.
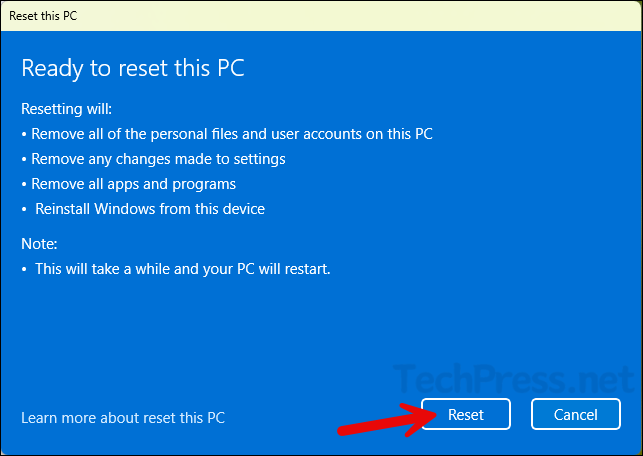
When you are ready to begin the reset process. Click Reset button.
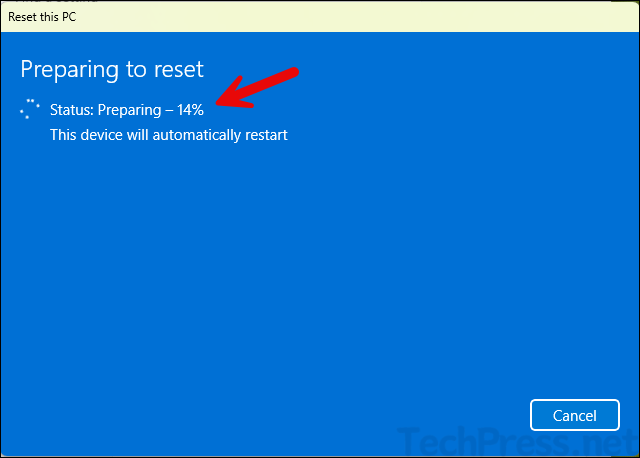
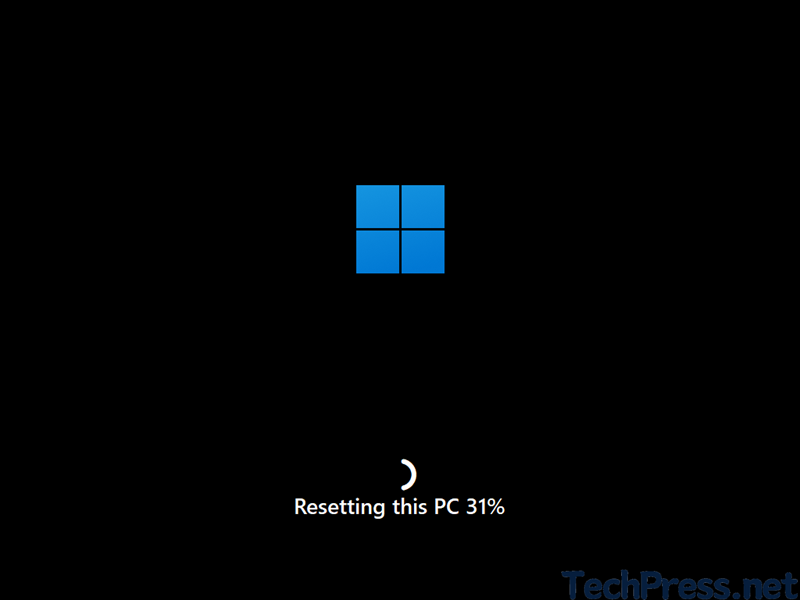
Windows OS reset process has begun, starting with the Preparing to reset stage. At this point, you still have the option to cancel the process if you decide not to proceed.
Windows will reboot, and you will see below screen which will show you the reset progress.
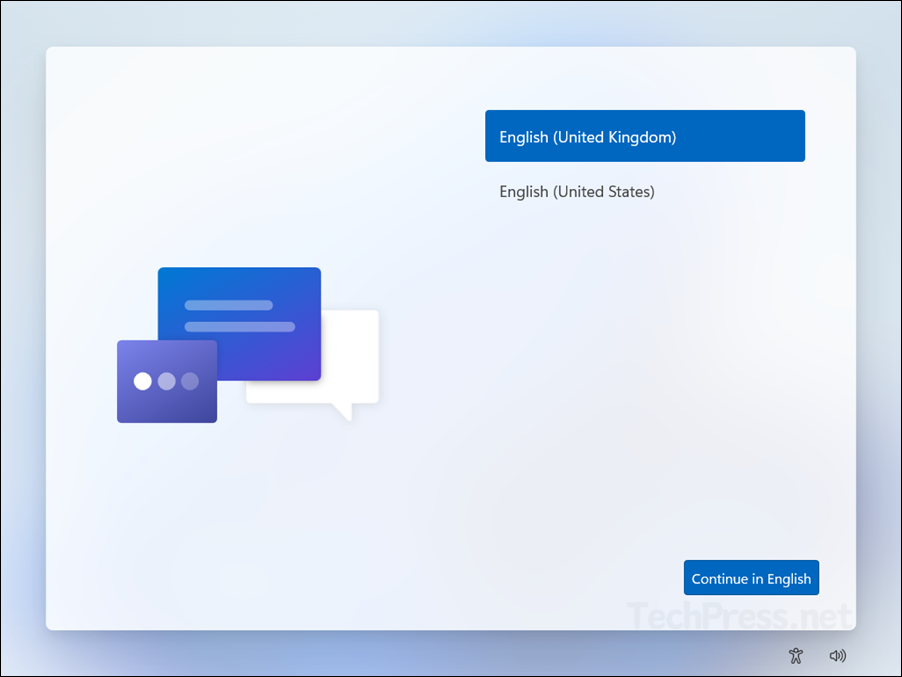
After the reset is complete, you’ll be guided through a series of setup screens known as the Out-of-Box Experience (OOBE). Follow the on-screen instructions and choose the appropriate options to configure your Windows installation.
If this device is company-managed/Intune-managed and was reset for Windows Autopilot, you can refer to a step-by-step guide that includes all the OOBE (Out-of-Box Experience) steps with screenshots under the #end-user-experience section.
Post Reset Setup Checklist
After your Windows 11 PC has been successfully reset, it is recommended to perform post-reset checks. This ensures your system is fully operational, just as it was before the reset.
Windows Update
Install all cumulative updates, .NET updates, and driver updates. Reboot when prompted.
Drivers & devices
Check Device Manager for unknown devices. Install vendor GPU, chipset, audio, and network drivers if needed.
Security
Re-enable BitLocker after confirming activation and backups are stable (Check with your administrator before enabling this option, as it might be automatically controlled or enabled by a policy.)
Check and confirm if Virus & threat protection, Ransomware protection (Controlled folder access as desired) are switched on in Windows security.
Apps
Reinstall essential software. Restore app settings from backups if supported. (An administrator may have setup the automatic installation of apps if your device is Intune managed)
Restore data
Copy back personal files. Verify OneDrive sync and backup policies.
Activation
Confirm Settings > System > Activation shows Active. Digital license usually auto-activates on the same hardware.
Browser & mail
Sign in and restore extensions, bookmarks, and profiles. Restore Outlook PSTs if you use them.
Tidy up
Remove old Windows.old after a week using Storage Sense or Disk Cleanup to reclaim space.