In this blog post, I will show you how to change printer driver on Universal Print connector system. You may need to change the printer driver if there are issues with the current one, or if the vendor has released an updated version with improved functionality.
You can make this change in one of the two ways, depending upon if the printer driver version change is significant or simply a minor update. If the new printer driver is significantly different from the previous driver, Microsoft recommends creating a new print queue and swap the printer in the old printer share in Universal Print.
Swapping a printer is seamless and does not require redeploying it. You can keep the same printer share and replace the printer in the background. There is no action required from users side. Users will not notice any changes on their devices and will continue printing through the same printer share, but to the new printer.
Swap Printers when:
- Performing a major printer driver update on Universal Print connector system.
- When your printer has broken down, and you are replacing it with a new Printer.
If the new printer driver is a minor driver update, you can simply perform an In-place driver update without creating a new print queue. I will provide more details and steps in the following sections of this post.
Contents
Minor Printer Driver Update
If you have downloaded a new printer driver which is a minor update to the existing driver, follow below steps to change the printer driver on a Universal Print connector system.
- Download and install the new printer driver on Universal Print connector system.
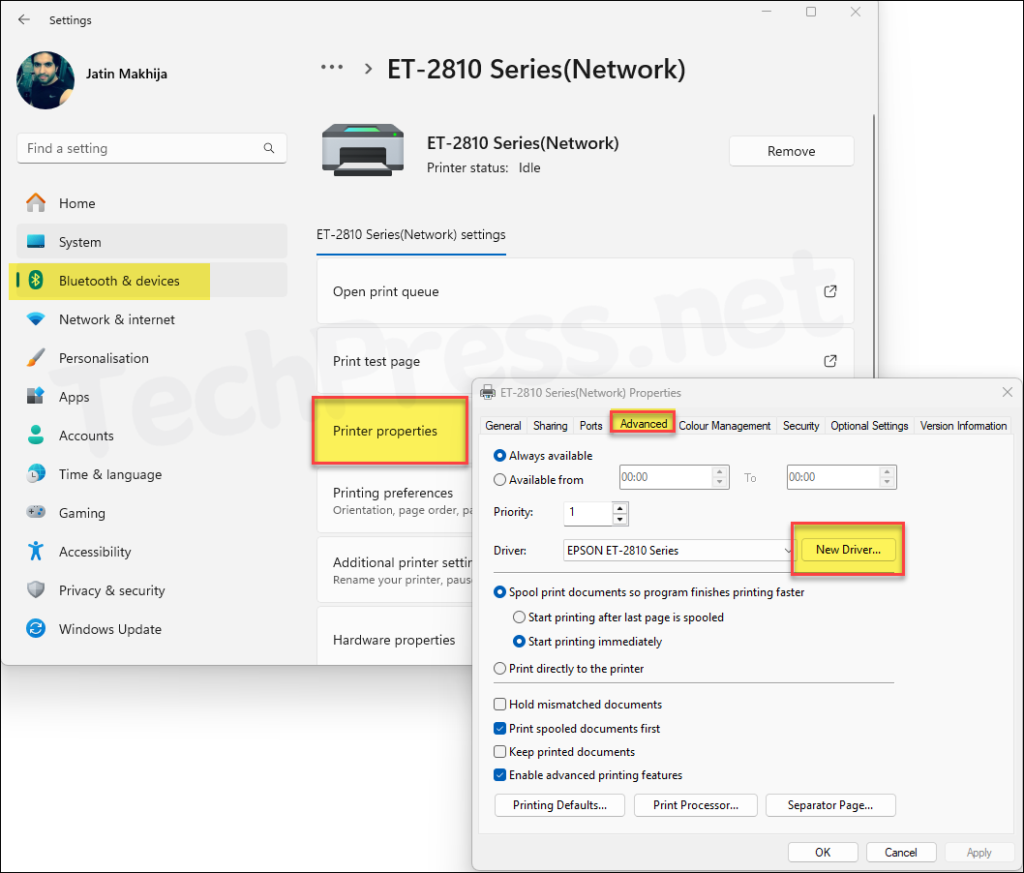
- Open the Settings app and go to Bluetooth & devices > Printers & scanners.
- Select the Printer and go to Printer properties > Advanced tab > New Driver. Follow the wizard to update the new driver.
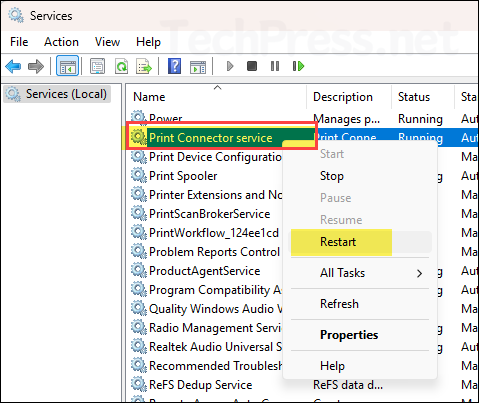
- Once the driver has been updated, Open Services on Universal Print connector system and restart Print Connector service.
Major Printer Driver Update (Swap Printer)
When performing a major printer driver update or replacing a faulty printer with a new one, follow below steps to update the printer driver/printer. We will use the Swap Printer option in Universal Print, which allows you to keep the same printer share and permissions by simply swapping the old printer with a new one that has the updated driver.
- Download and install the new print driver on Universal Print connector system.
- Create a new print queue which points to the same port as the existing printer but with new print driver.
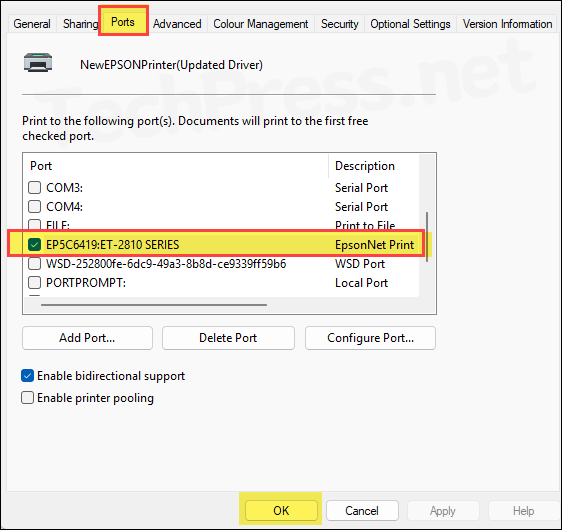
- Open the Settings app and go to Bluetooth & devices > Printers & scanners > Select the Printer and go to Printer properties > Ports. Take a note of the Port information of the old/existing printer. This will be required while creating new Print queue.
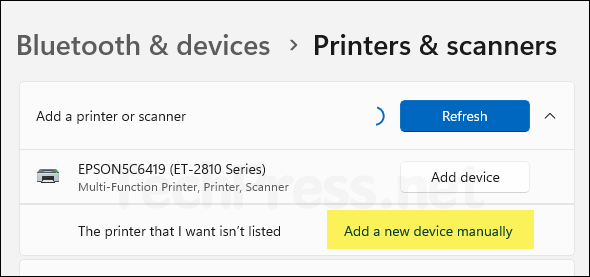
- To create a new print queue, Open the Settings app and go to Bluetooth & devices > Printers & scanners > click on Add device and then click on Add a new device manually.
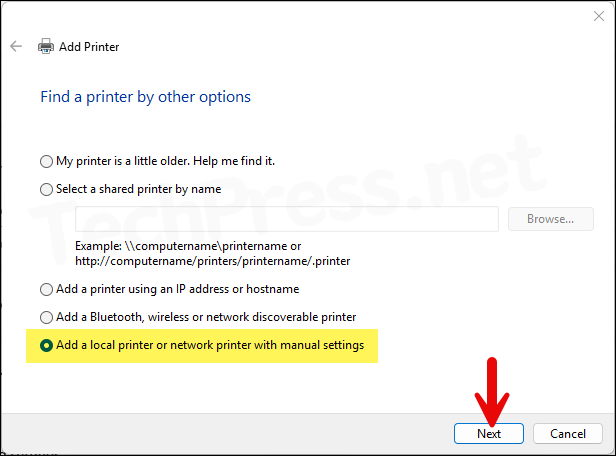
- Select Add a local printer or network printer with manual settings. Click Next.
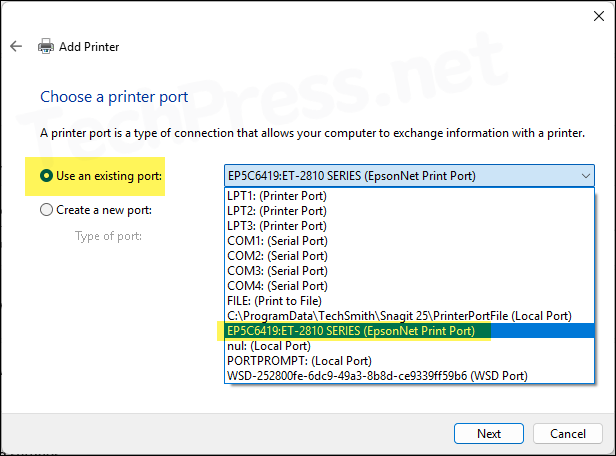
- Select Use an existing port and use the drop-down to select the Printer port of the existing printer you noted earlier.
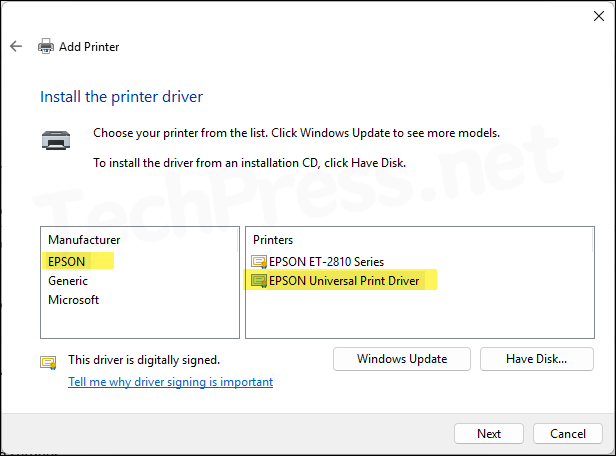
- Let’s assume that EPSON Universal Print Driver is an updated printer driver provided by the vendor. This driver includes major changes and adds significant functionality to the printer. You can use this screen to select the new driver and click Next.
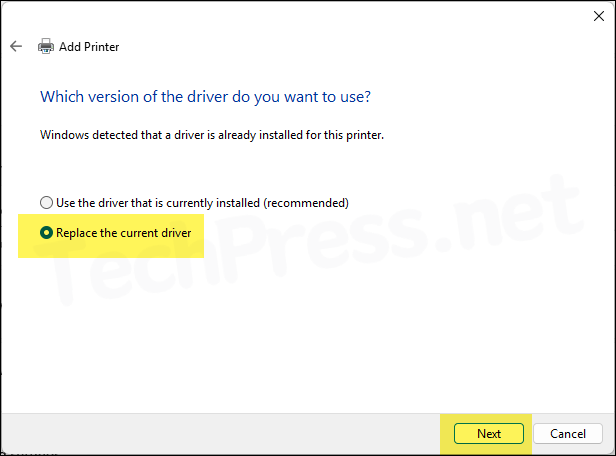
- Click Replace the current driver. Click Next.
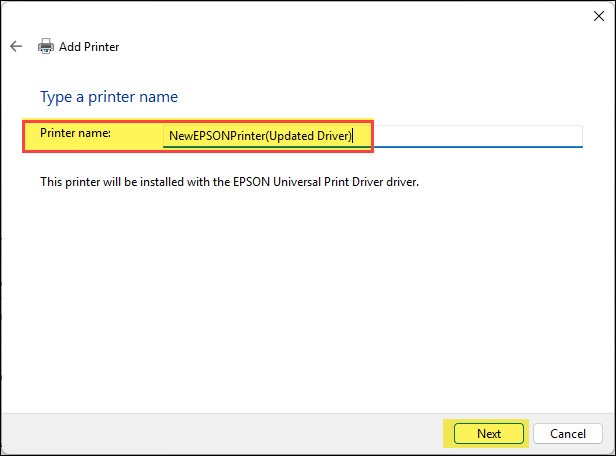
- Provide a name for the new print queue. For demonstration purposes, I am using NewEPSONPrinter(Updated Driver).
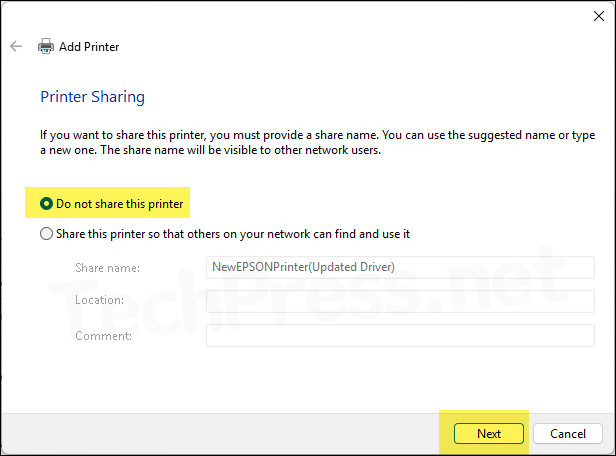
- We don’t want to share this printer. Therefore, select Do not share this printer and click Next.
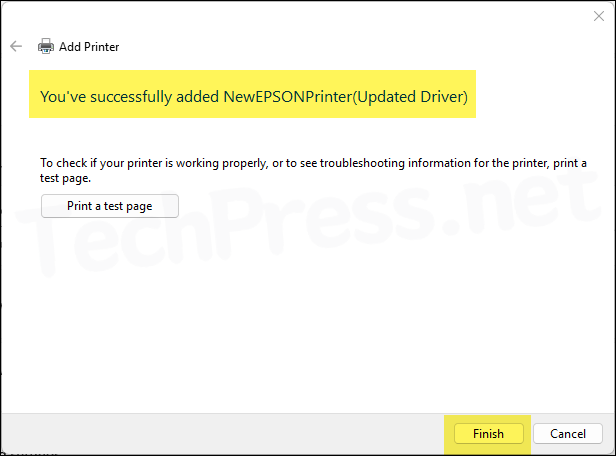
- New print queue has been created successfully. Click Finish.
Register the New Printer using Universal Print Connector
Now that we have the new print queue created with new print driver, let’s register the printer with Universal Print. Launch Universal Print connector app using a desktop shortcut icon. Click Refresh printers. This will pull the printers installed on your system. Select the new printer and click on Register.
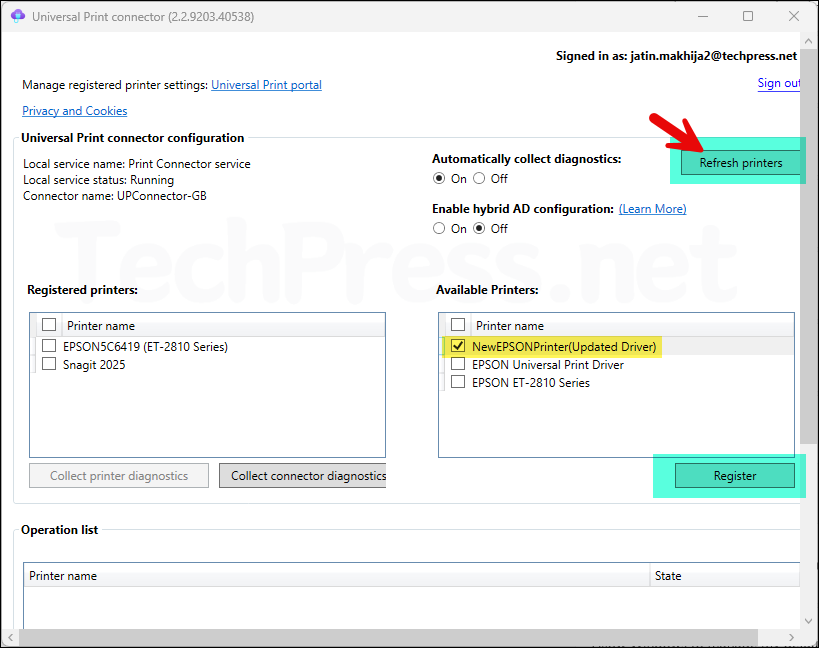
- New Printer has been registered with Universal Print successfully.
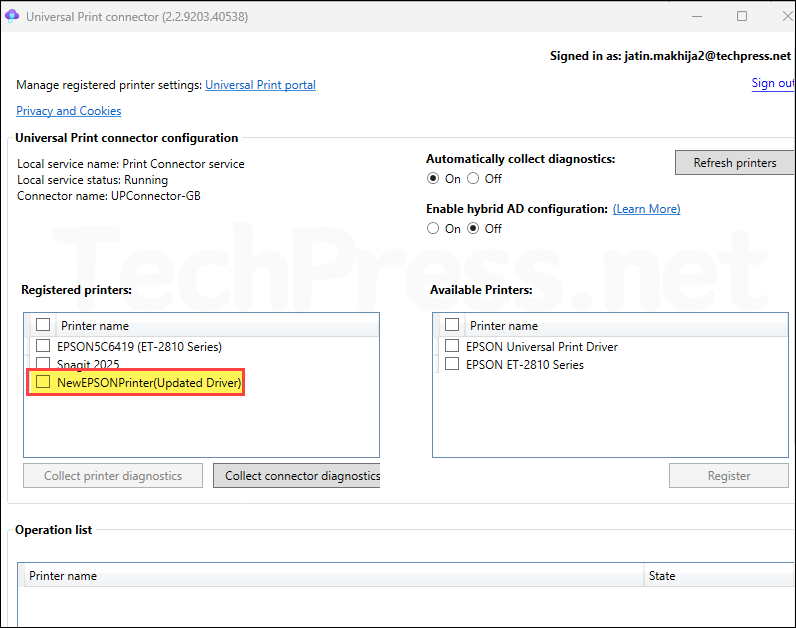
- Test the new printer registered with Universal Print to make sure that it’s working fine. Share the printer with a test user, install the printer on a test machine and send a test print.

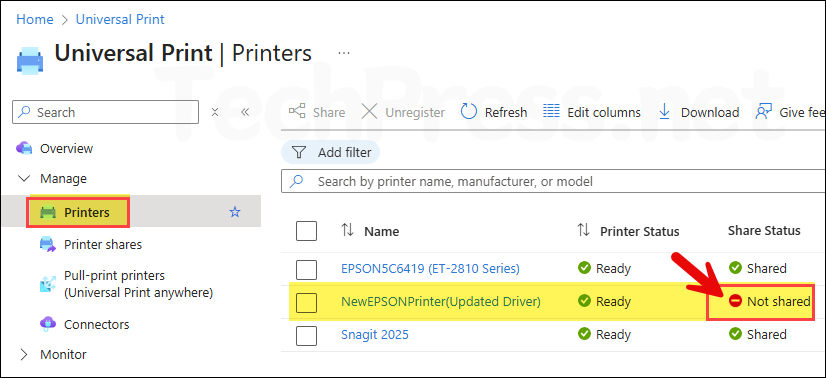
- Once the new printer with updated drivers is tested and working fine. We need to unshare the printer for swapping. If you keep the new printer shared, swapping will not work.
Swap the Printer
The new print queue with the updated driver has been tested successfully, and it’s now time to swap the printer. Please note, printer swapping will keep the existing Printer share active and point to the new Printer. After the swap, next time users send a print job, it will be directed to the new printer.
There are two ways to swap a printer in Universal Print: the 1) By using Universal Print using Azure Portal, and 2) By using the UniversalPrintManagement PowerShell module. Let’s explore both these methods:
1. Swap Printer using Azure Portal
- Sign in to Microsoft Azure portal using Global administrator or Print administrator rights.
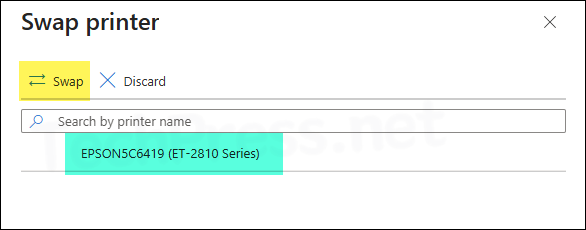
- Universal Print > Printer shares > Select the existing printer share > Click Swap printer.
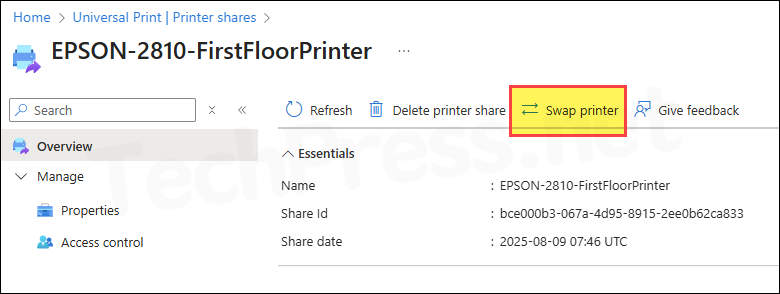
- Select the new printer name and click on Swap.
2. Swap Printer using PowerShell
Second option is to use PowerShell to swap printer. I ended up using this method as Swap printer method from Azure portal was not working for me. You can use either of the methods, as both methods should work fine. Use Swap-UPPrinters.ps1 script. Before running the script, ensure that you are connected to Universal Print using Connect-UPService cmdlet. For more information, refer to the link: Manage Universal Print using PowerShell.
- $ShareName: Provide the existing Print share name.
- $NewPrinterName: Provide name of the new printer.
Swap-UPPrinters.ps1
$ShareName        = "EPSON-2810-FirstFloorPrinter"
$NewPrinterName   = "NewEPSONPrinter(Updated Driver)"

Import-Module UniversalPrintManagement; Connect-UPService
$share  = (Get-UPPrinterShare).Results | Where-Object DisplayName -eq $ShareName
$target = (Get-UPPrinter).Results      | Where-Object DisplayName -eq $NewPrinterName
if(!$share -or !$target){ throw "Share or printer not found (check names or paging)." }
Set-UPPrinterShare -ShareId $share.Id -TargetPrinterId $target.Id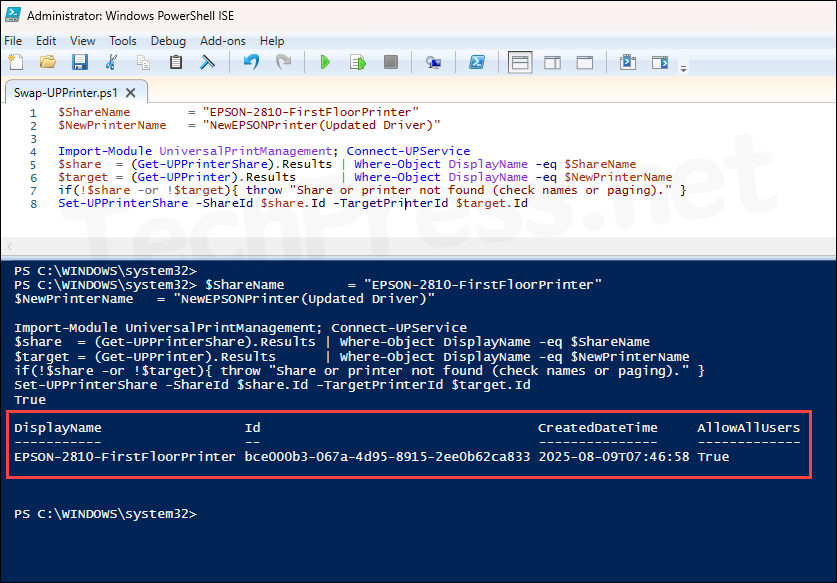
What to Expect After Swapping Printers
After completing the printer swap, you will notice that the Share Status next to the old printer is set to Not shared. The printer share EPSON-2810-FirstFloorPrinter is now linked to the new printer, which has the updated driver. The change is seamless, as users will continue to see the same share name on their devices. There is no action needed from user’s end and no changes required on user’s device.
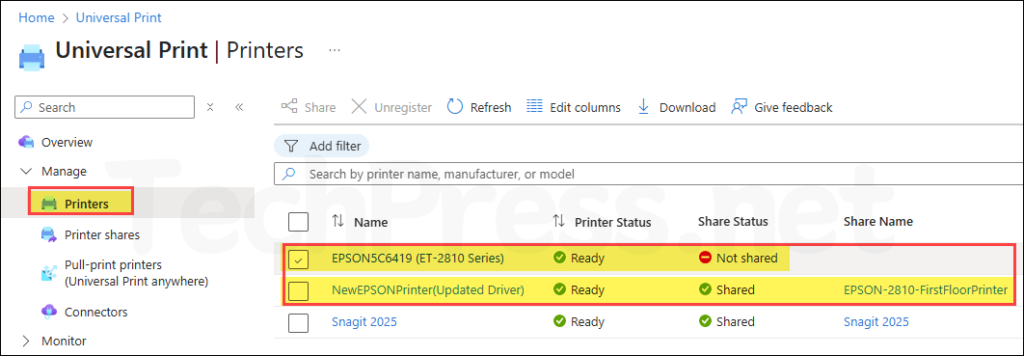
You can also confirm whether the swap was successful by clicking Printer shares and checking the details of the printer share associated with the new printer.

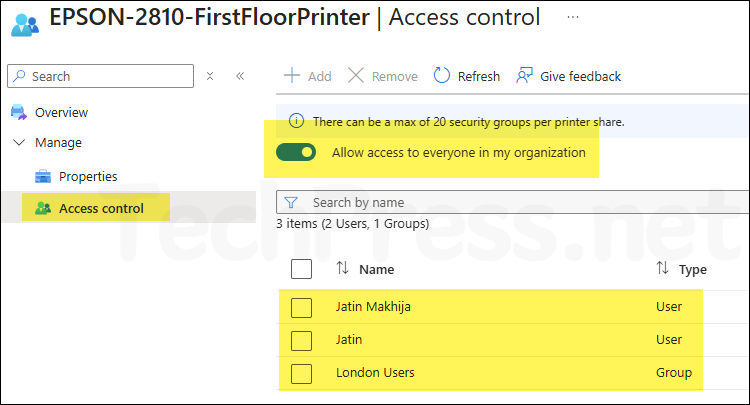
There will be no impact on printer access control after swapping the printer. As shown in the screenshot below, all permissions which were assigned to the printer share remain unchanged.
