In this blog post, I will show you how to enable/disable HDR screenshot colour corrector in Snipping tool. On HDR monitors, screenshots can look washed-out or blown-out on SDR displays. The HDR Screenshot Color Corrector toggle tells Snipping Tool to automatically tone-map HDR captures so they look “normal” when viewed or shared on non-HDR screens. Turn it On for shareable, SDR-friendly screenshots; turn it Off if you want the raw HDR look for workflows that expect it.
Prerequisites
- Windows 11 with a modern Snipping Tool build. The toggle was introduced around Snipping Tool 11.2403.x and is present in later builds (e.g., 11.2405.32.0). Update from Microsoft Store if needed.
- An HDR-capable display isn’t required to see the toggle, but it’s what triggers the issue the setting solves.
Enable HDR Screenshot Colour Corrector in Snipping Tool
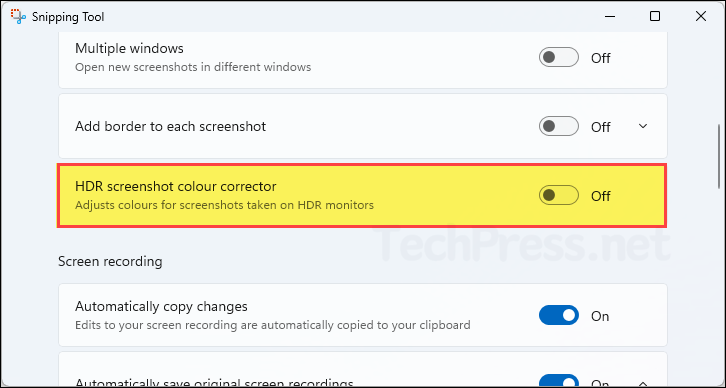
Enable HDR Screenshot Colour Corrector setting is disabled by default in snipping tool on Windows 11 computers. Follow below steps to enable it.
- Sign in to your Windows 11 PC.
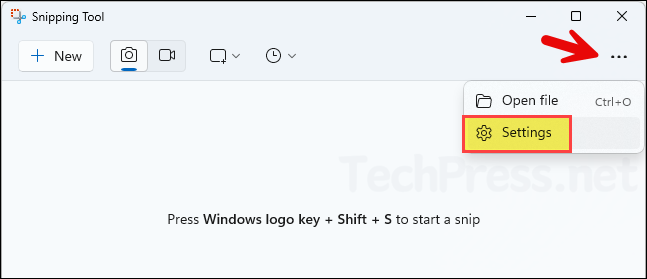
- Open the Snipping tool > Click on three dots (…) on top right-hand side corner > click Settings.
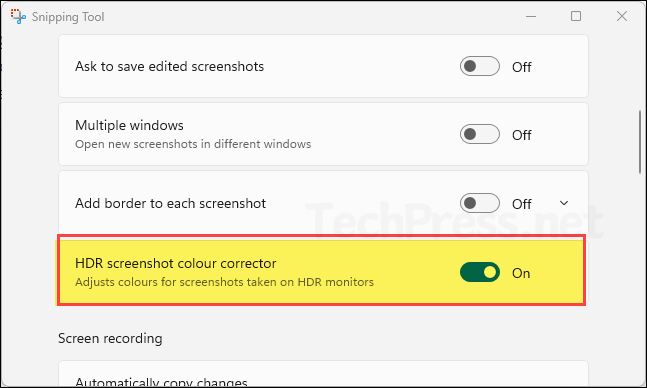
- Scroll down to find the setting HDR Screenshot Colour Corrector and use the toggle switch to enable it.
Disable HDR Screenshot Colour Corrector in Snipping Tool
To disable HDR Screenshot Colour Corrector setting, simply use the same toggle switch and turn it off.