In this blog post, I will demonstrate the steps to configure secure release with QR code in Universal Print. As of now, there are two ways to release a print job in Universal Print: direct print and secure QR code release. When using the direct print option, the print job is released immediately. However, when you use the secure release option, print jobs are held in a queue until the user physically goes to the printer and scans the QR code to release the job.
Contents
Prerequisites
- Microsoft 365 mobile app for Android (16.0.16501 or later) and iOS (2.76 or later).
- Universal Print license assigned to the user.
- User with Microsoft 365 corporate account.
Enable Secure Release with QR code
Follow below steps to enable secure release with QR code for a Universal Print registered printer.
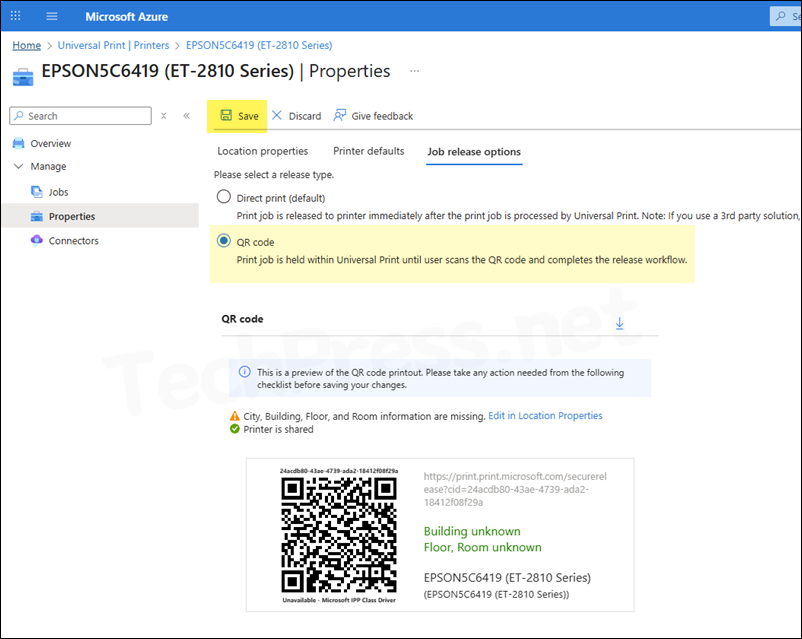
- Sign in to Microsoft Azure portal using Global administrator or Print administrator rights.
- Universal Print > Printers > Click on a Printer, then click on Properties.
- Click the tab Job release options where you can select QR code option. Click Save to save the changes.
- After you get the QR code, print it and paste it on the printer for users to scan and release print jobs.
- When you unshare a Universal Print printer and share it again, QR code remains the same. Even though the QR code will still work, you may consider re-printing and re-pasting the QR code on the printer if you are changing the print share name. This avoids confusion due to printer name mismatch.
- If you Unregister a printer and re-register is QR code will change. You will need to re-print the new QR code and re-paste it on the printer.
Important Points
End User Experience
If the user does not have the cloud printer installed already on their device, they need to first add the printer using the following steps:
- Open the Settings app and go to Bluetooth & devices > Printers & scanners. Click Add device. For step-by-step guide on installing a Universal print Printer, refer to the link: End User Experience.

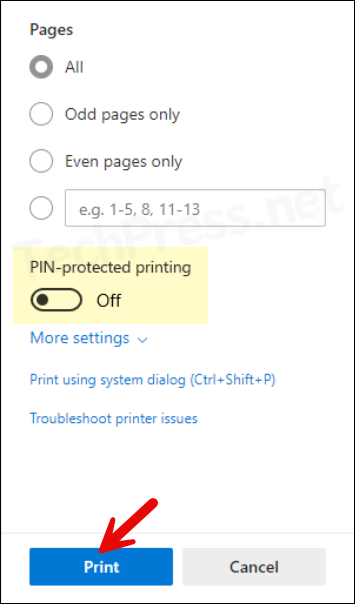
- After the printer is added, send a print job to the printer. If any printer supports PIN-protected printing, you may be presented with an option to enable it. As per Microsoft, it’s not recommended to enable secure release with QR code with printers that already have other secure release options enabled. Let’s keep it off.
Release Print Job
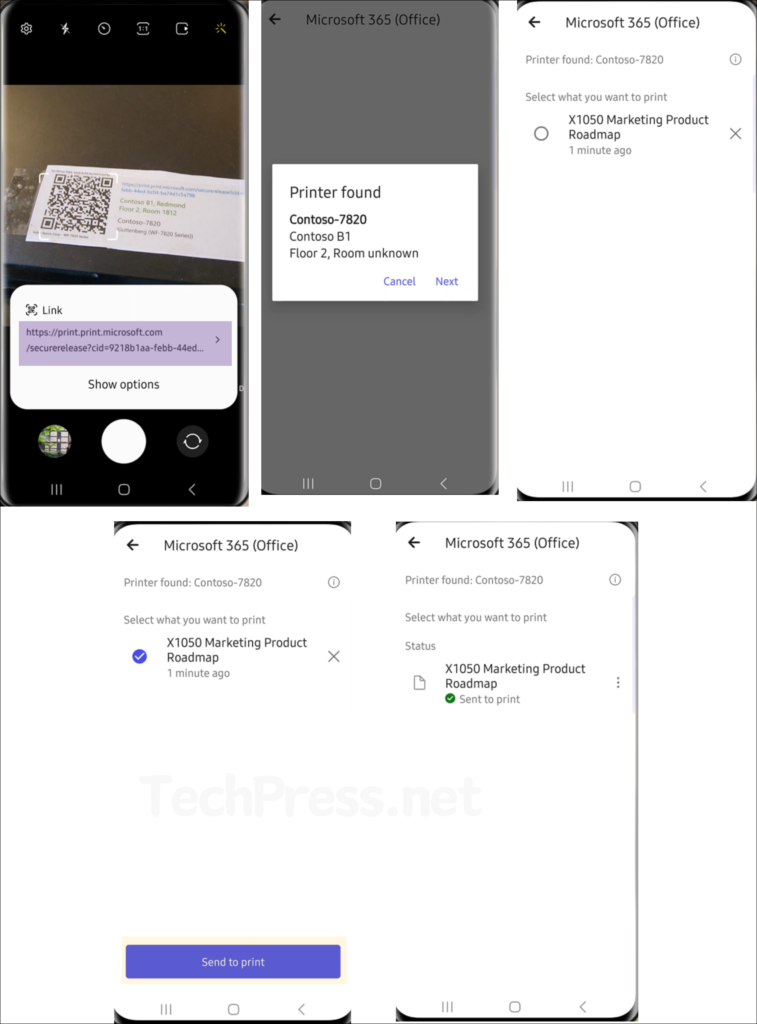
- Go to the printer and use any of below methods to scan the QR code. Microsoft recommends using the camera app to scan the QR code.
- Open your camera app and scan the code.
- or Open Microsoft 365 app > Apps > Scan > Scan QR code.
- Go through the steps to find your print job and tap on Send to Print to release.
- Ensure that the correct corporate account is signed in and active in Microsoft 365 app. You won’t be able to release a print job with your personal account.
- If multiple secure release options are selected, such as PIN and secure QR code, the user must first scan the QR code to release the job from Universal Print and then enter the PIN to print.
- Print jobs which are not released from the printer are not counted as a print job, and therefore you will not be charged for it.