In this blog post, I will show you how to enable FileVault on macOS with Intune. FileVault is Apple’s full-disk encryption for Mac, similar to BitLocker on Windows. Both encrypt the entire drive to protect data at rest. FileVault uses APFS with XTS-AES-128 and works with the Secure Enclave on Apple Silicon or the T2 chip, while BitLocker uses XTS-AES-128/256 and relies on the TPM.
When FileVault is on, the startup disk is encrypted, and you must unlock it at boot with your password or Touch ID, and a recovery key can also unlock it. If a Mac device is lost, the data cannot be read. When FileVault is off, the disk is not encrypted and someone with physical access could read your files by booting from or connecting the drive to another system.
Contents
Prerequisites
- macOS devices enrolled in Intune.
- macOS 10.13 or later (Big Sur/Monterey/Sonoma/Sequoia fully supported).
Intune RBAC requirements to manage FileVault
Use Endpoint Security Manager to create and assign the macOS Disk encryption > FileVault policy in Intune; if you use Settings catalog, the Policy and Profile Manager role can create and assign that profile. For support tasks, Help Desk Operator and Endpoint Security Manager can Get FileVault key and Rotate FileVault key, while Read Only Operator can view keys. Apply scope tags as needed. To create a custom RBAC role for a specific requirement, refer to the link: Create Custom RBAC role in Intune.
Option 1: Enable FileVault using Endpoint Security Policy
Let’s get to the steps to enable Filevault using Endpoint security policy.
- Sign in to the Intune admin center > Endpoint security > Disk encryption > Create policy.
- Platform: macOS
- Profile: macOS FileVault

- Basics tab: Provide a Name and Description of the policy. For example: Enabling macOS FileVault.
Configuration settings
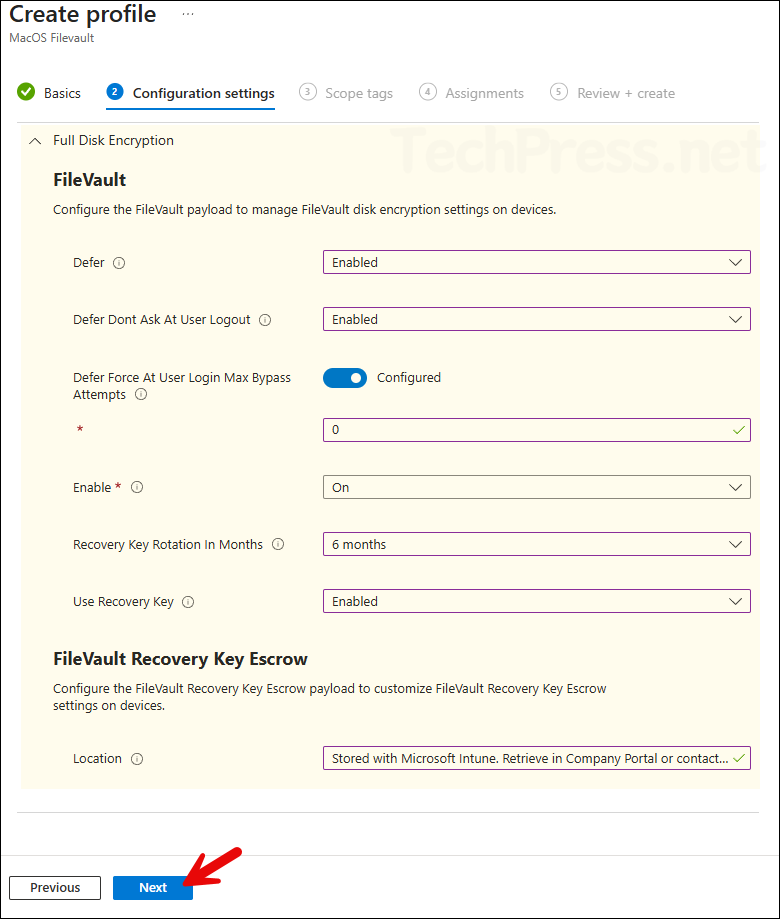
Configure the FileVault payload to manage FileVault disk encryption settings on devices.
FileVault
Recommended baseline: Enable = On, UseRecoveryKey = Enabled, Rotation = 6–12 months, Defer = Enabled, DeferDontAskAtUserLogout = Enabled, DeferForceAtUserLoginMaxBypassAttempts = Enabled
- Defer: Enabled (it must be configured to Enabled to apply filevault settings).
- Defer Don’t Ask At User Logout: If true, prevents requests for enabling FileVault at user logout time.
- Defer Force At User Login Max Bypass Attempts: Maximum number of times users can bypass enabling FileVault before being required to enable it to log in. If the value is 0, the user will be required to enabled FileVault the next time they attempt to log in. Setting this key to -1 disables the feature.
- Enable: On
- Recovery Key Rotation In Months: 6 months (can be set up to 12 months)
- Use Recovery Key: If true, creates a personal recovery key and displays it to the user.
FileVault Recovery Key Escrow
- Location: Enter a short, user-facing message that tells where the personal recovery key is stored and how to get help. Example: Stored with Microsoft Intune. Retrieve in Company Portal or contact IT Help Desk email: [email protected].
- Scope tags (optional): A scope tag in Intune is an RBAC label you add to resources (policies, apps, devices) to limit which admins can see and manage them. For more Information, read: How to use Scope tags in Intune.
- Assignments: Assign the policy to Entra security groups that contain the target users or devices. As a best practice, pilot with a small set first; once validated, roll it out more broadly. For guidance on assignment strategy, see Intune assignments: User groups vs. Device groups.
- Review + create: Review the deployment summary and click Create.
Option 2: Enable FileVault using Settings Catalog Policy
You can also enable FileVault using a Settings catalog policy. Settings catalog provides more settings related to Filevault. But if you are only interested in basic settings and happy with the Endpoint security policy then you can stick with that and for any additional settings use a Settings catalog policy.
- Sign in to Intune admin center > Devices > Windows > Configuration > Create > New Policy.
- Platform: Windows 10 and later; Profile type: Settings catalog.
- Click Create.
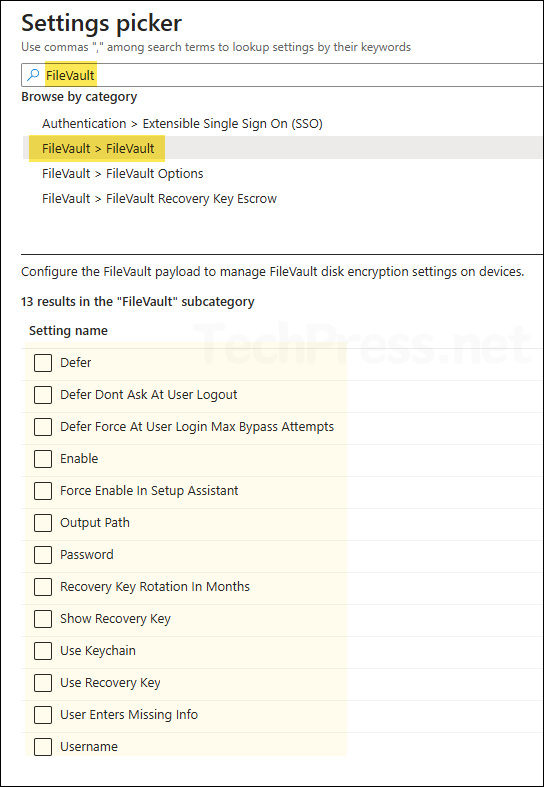
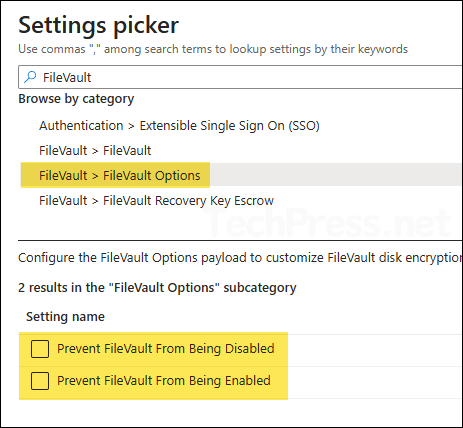
- You can also use a setting to prevent FileVault from being disabled. Go through other FileVault categories to find the setting you require and configure it accordingly.
Monitoring FileVault Disk Encryption Policy
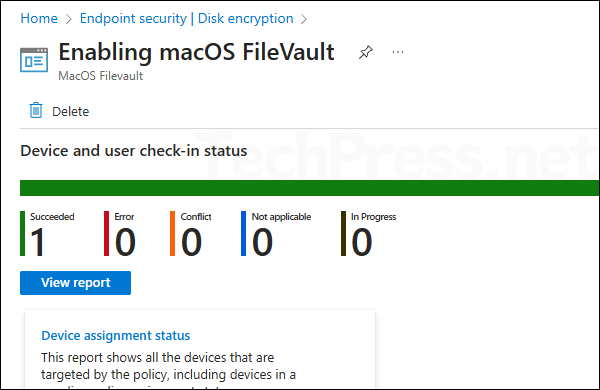
- Go to Intune admin center > Endpoint security > Disk encryption and click on the FileVault policy.
- Check under Device and user check-in status to confirm the success of the profile deployment.
- For additional details, click Device Assignment Status and Per Setting Status.
Sync Intune Policies
The device check-in process might not begin immediately. If you’re testing this policy on a test device, you can manually kickstart Intune sync from the device itself or remotely through the Intune admin center.
Alternatively, you can use PowerShell to force the Intune sync on Windows devices. Restarting the device is another way to trigger the Intune device check-in process.
End User Experience
After the Intune policies is applied on the target device, Once a user logs out and log back in, they will be presented with below pop-up. Click Enable Now to enable FileVault.
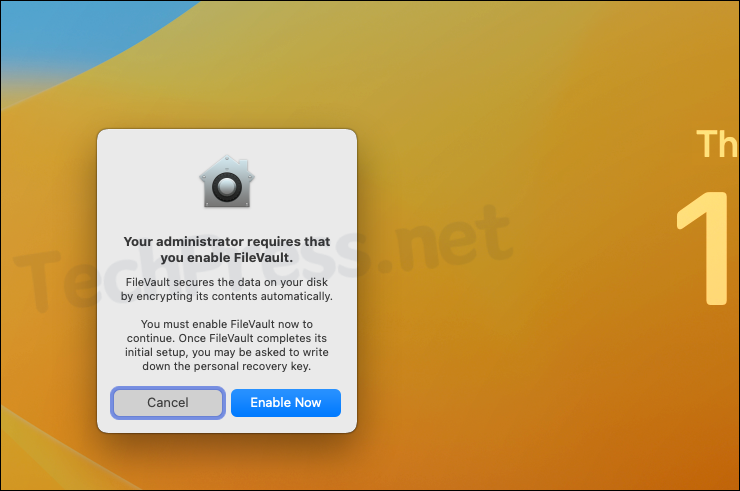
Enabling FileVault on your Mac.

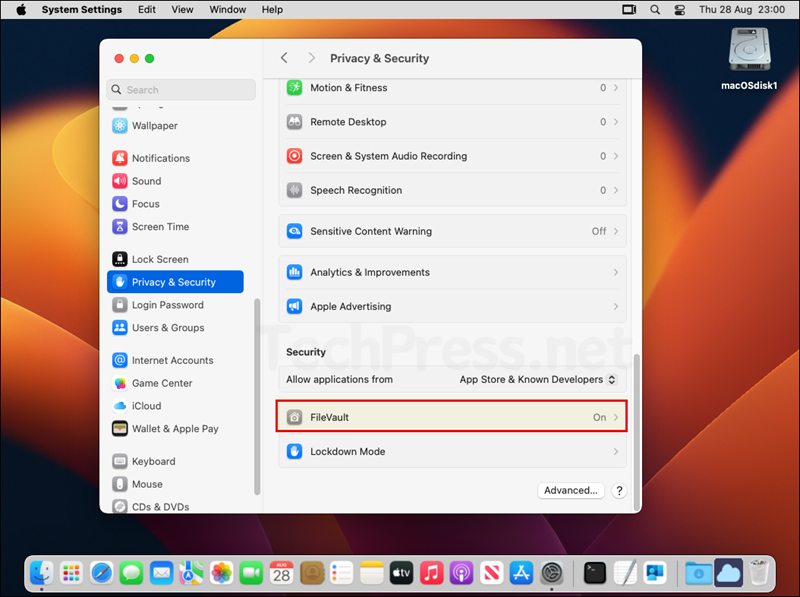
Open System Settings > Privacy & Security > scroll down on the page to Find FileVault under Security section. Check its status should be On.
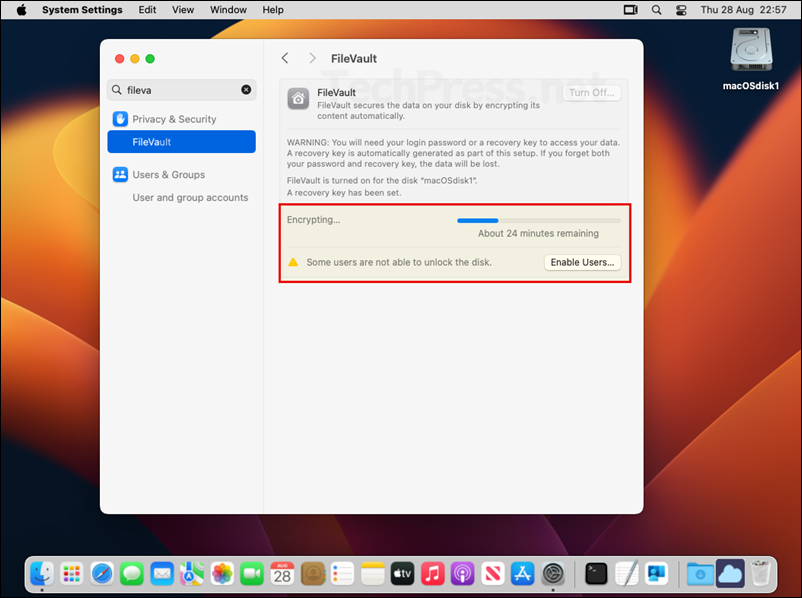
Click on FileVault to check the progress of disk encryption. Below screenshot shows that the disk Encryption is in progress.
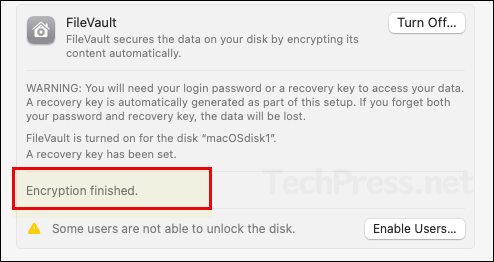
Once the disk is fully encrypted, It will show the status as Encryption finished.
View FileVault Recovery key on Intune Portal
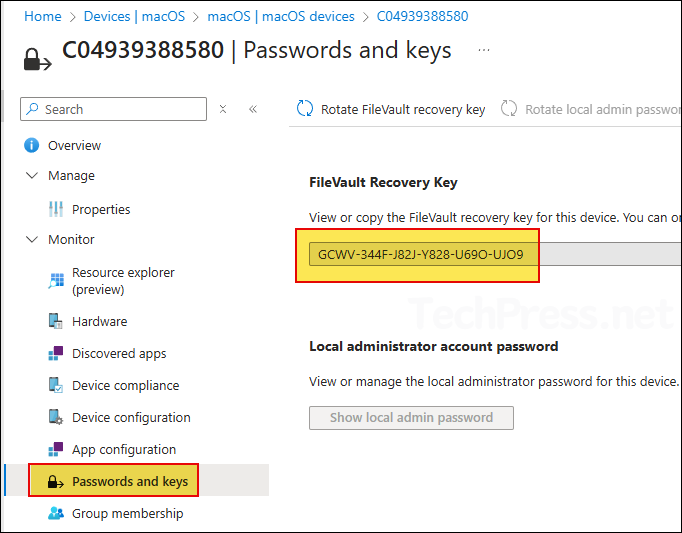
- From Intune admin center > Devices > macOS > Click on a Mac device > click Password and keys on left-hand side. Here, you will find FileVault Recovery key.
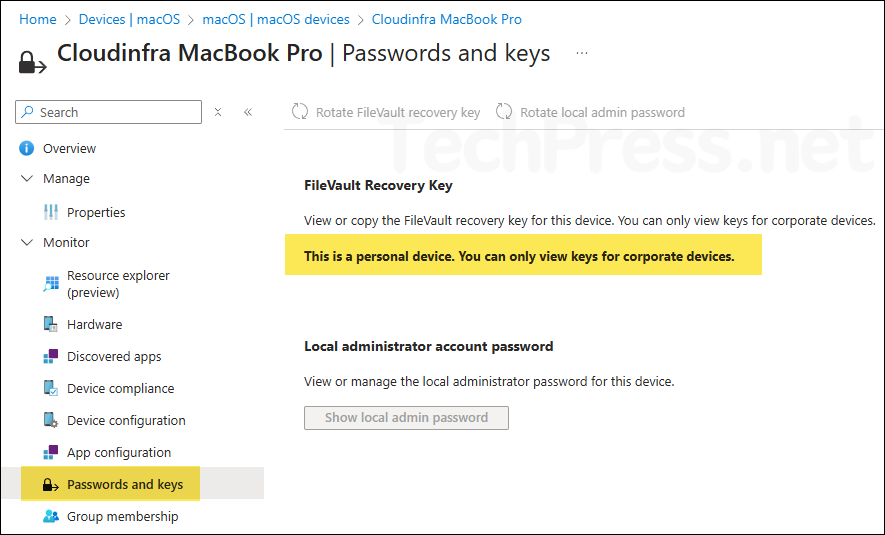
- If your Mac device is a personal device, you will get a message on the screen: This is a personal device. You can only view keys for corporate devices.
Conclusion
Enabling FileVault on your managed Mac devices is highly recommended. In this post, we looked at different options to enable FileVault via Intune. You can use a Settings catalog policy or Endpoint security policy to enable it. A settings catalog policy provides more options than an Endpoint security policy. Just be aware to not configure the same setting at both the places and apply it to the same device, that could cause conflicts.
