In this blog post, I will demonstrate the steps to disable User Account Control using group policy. User Account Control (UAC) is a Windows security feature that keeps apps and tasks running with standard user rights by default and only grants administrator privileges when explicitly approved (e.g., an elevation prompt).
This limits the blast radius of malware or misconfigurations by blocking silent changes to protected areas like Program Files, Windows, system services, registry hives, and security settings. When elevation is needed, Windows can switch to the secure desktop to prevent spoofing, and if enabled runs admins in Admin Approval Mode, so even local admins don’t run everything as full admin all the time.
Disabling UAC (setting EnableLUA=0) removes these guardrails, can break modern/UWP apps, and requires a reboot, so it’s generally recommended only for tightly controlled scenarios like lab images or specific kiosks/legacy app cases.
Contents
Create a Group Policy to Disable User Account Control
Let’s get to the steps to create a Group policy object (GPO) in Active directory and disable User Account control on Windows devices.
- Login to a domain control with domain administrator privileges.
- Open Group Policy Management Console (gpmc.msc).
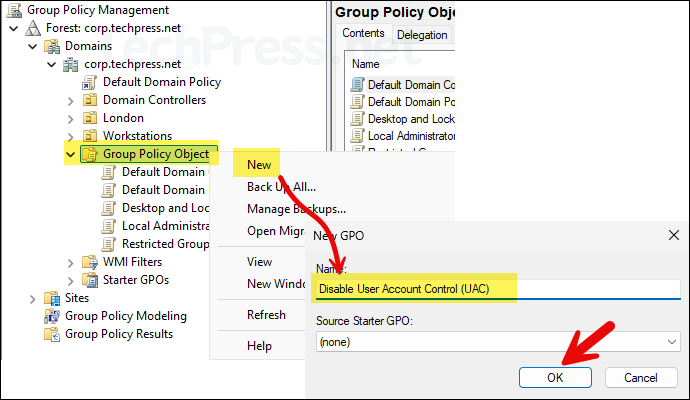
- Right-click on Group Policy Object > New and provide the name of group policy object. Click OK.
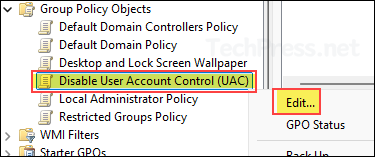
- Right-click on the newly created GPO and click Edit.
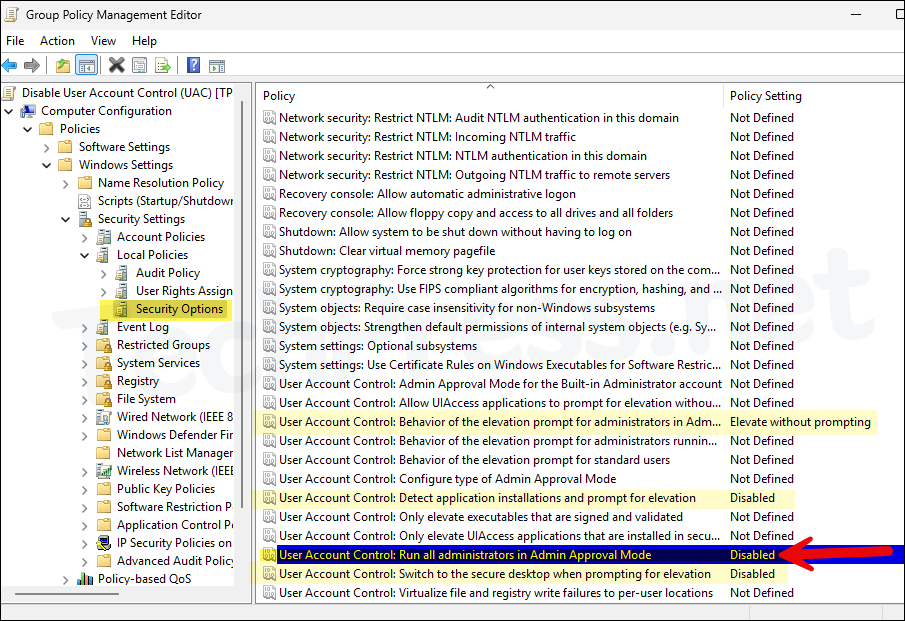
- Navigate to Computer Configuration > Policies > Windows Settings > Security Settings > Local Policies > Security Options and search for User Account Control policy settings.
To disable UAC on a Windows device, Set User Account Control: Run all administrators in Admin Approval Mode = Disabled. Please note that this also changes EnableLUA value to 0 in HKEY_LOCAL_MACHINE\SOFTWARE\Microsoft\Windows\CurrentVersion\Policies\System registry key to disable UAC.
Other Optional UAC settings to disable according to the requirement.
- User Account Control: Behavior of the elevation prompt for administrators in Admin Approval Mode = Elevate without prompting
- User Account Control: Detect application installations and prompt for elevation = Disabled
- User Account Control: Switch to the secure desktop when prompting for elevation = Disabled
Link Disable User Account Control (UAC) GPO
As we have configured the settings in the GPO in Computer configuration node. Link this GPO to an OU containing computer accounts.
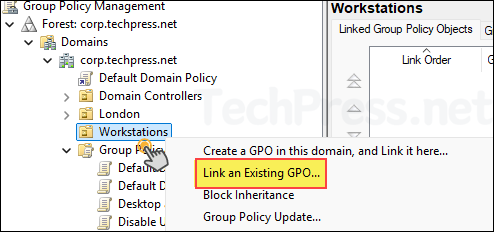
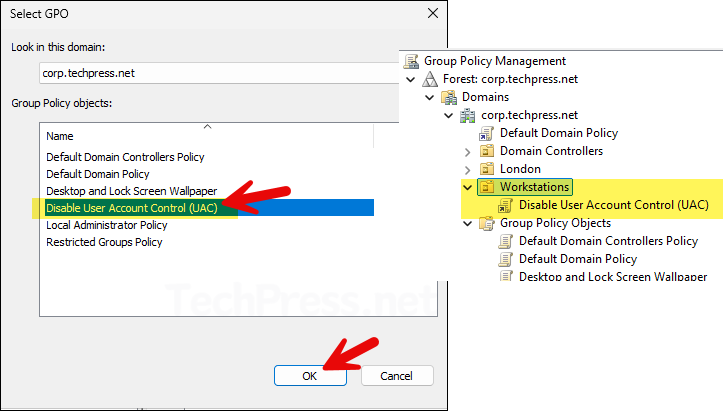
Select Disable User Account Control (UAC) GPO and click OK to link.
End User Experience
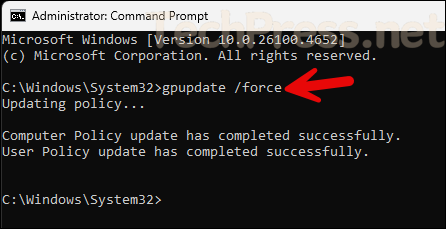
By default, group policies refresh or update every 90 minutes on the client computer, with a randomized offset time of up to 30 minutes. This interval applies to both computer-based configuration settings and user-based configuration settings. To speed this up, open command prompt as an administrator and run gpupdate /force command.
- Sign in to the target computer and open command prompt as administrator. Execute gpupdate /force command.
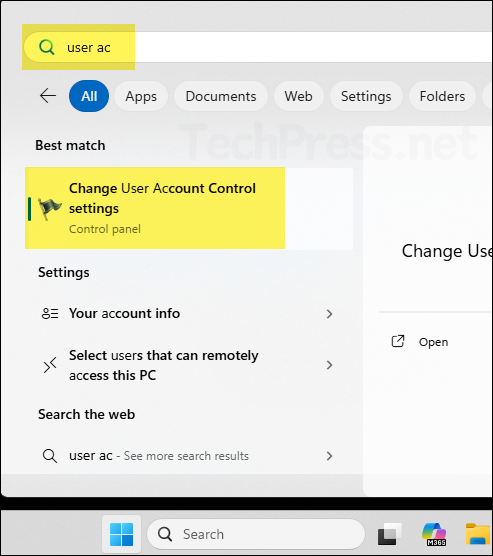
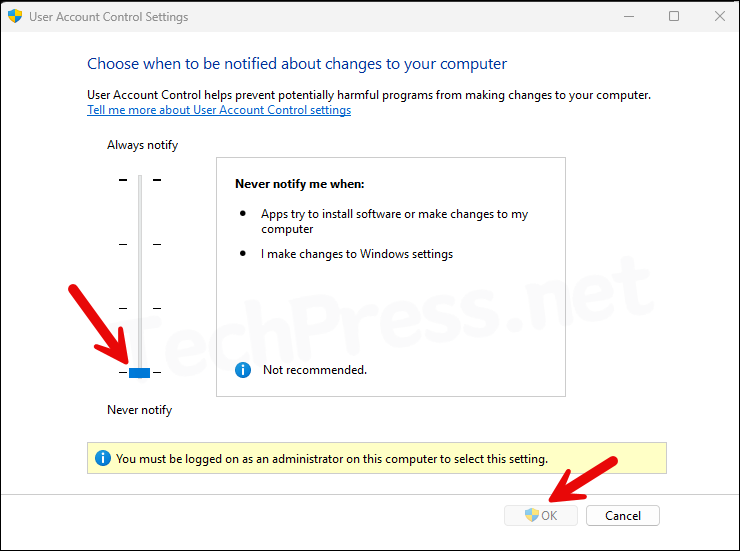
- Click on Windows Icon/Start menu Icon and search for user account control. Click on Change User Account Control settings.
- The slider for the UAC configuration will be at the bottom and set to Never notify. The OK button will also be greyed out and cannot be used to update these settings, as they are managed by a Group Policy Object (GPO).
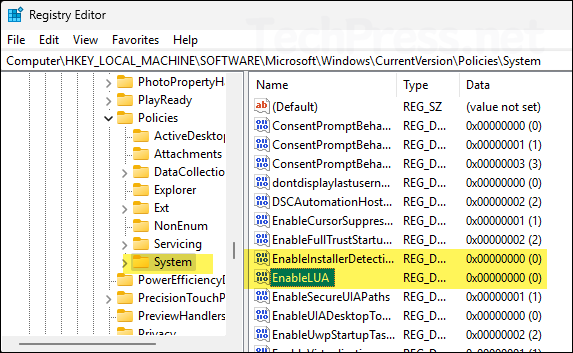
- We have set User Account Control: Run all administrators in Admin Approval Mode = Disabled. This corresponds to a registry entry called EnableLUA. When UAC is enabled its value is 1 and when it’s disabled, its value will be 0.
- Open registry editor and navigate to HKEY_LOCAL_MACHINE\SOFTWARE\Microsoft\Windows\CurrentVersion\Policies\System registry key. Check and confirm the value of EnableLUA. If its set to 0 that means UAC is disabled. You can also verify other related UAC settings here like EnableInstallerDetection reg value etc.