In this blog post, I will demonstrate the steps to Export and Import Azure Automation Runbooks. Azure Runbooks are scripts or workflows that you create and manage in Azure Automation to automate repetitive tasks, processes, and administrative operations in your Azure environment (and beyond).
If you want to transfer a runbook from one tenant to another or simply want to export it as a backup. You can do that using Azure PowerShell module (Az) cmdlets. More specifically, Export-AzAutomationRunbook and Import-AzAutomationRunbook cmdlets.
Contents
Install Azure PowerShell module
As the cmdlets Export-AzAutomationRunbook and Import-AzAutomationRunbook are part of Azure PowerShell module, you need to install this module first. Azure PowerShell module is called as Az PowerShell module. For exporting and importing azure automation runbooks, ensure that Az PowerShell module is installed on your device. Refer to the post: Get Started with Azure PowerShell Module for more details. I have also provided commands in the following section as well to install the module.
- Launch PowerShell 7 console (as admin) and execute below commands.
Set the execution policy
Set-ExecutionPolicy -ExecutionPolicy RemoteSigned -Scope CurrentUser- Install Azure PowerShell module (Az).
Install Az PowerShell module
Install-Module -Name Az -Repository PSGallery -ForceConnect to Azure Account
After installing the module, you need to make a connection with your azure account using Connect-AzAccount cmdlet. Once you execute this command, you will be prompted to authentcate with Azure. Enter your credentials and complete MFA.
Connect to Azure
Connect-AzAccountExport Azure Automation Runbooks
After installing az module and connecting to azure, export the Azure automation runbook using Export-AzAutomationRunbook cmdlet. Provide below values in the script. You can run the code snippet as it is or save it into a .ps1 file and execute it from PowerShell console.
- ResourceGroupName: Provide the resource group name where the runbook exists.
- AutomationAccountName: Provide the automation account name of the runbook.
- Name: Provide the name of runbook which you want to export.
- Slot: Provide a value of Published, for a published runbook.
- OutputFolder: Provide the folder path where you want to export this runbook.
Export-Runbook.ps1
$runbookParams = @{
    ResourceGroupName        = "AllRunbooks-RG"
    AutomationAccountName    = "TP-Automation-01"
    Name                     = "test01"
    Slot                     = "Published"
    OutputFolder             = "C:\ExportRunbook"
}

Export-AzAutomationRunbook @runbookParams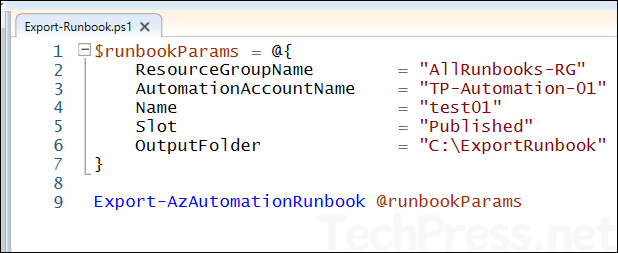
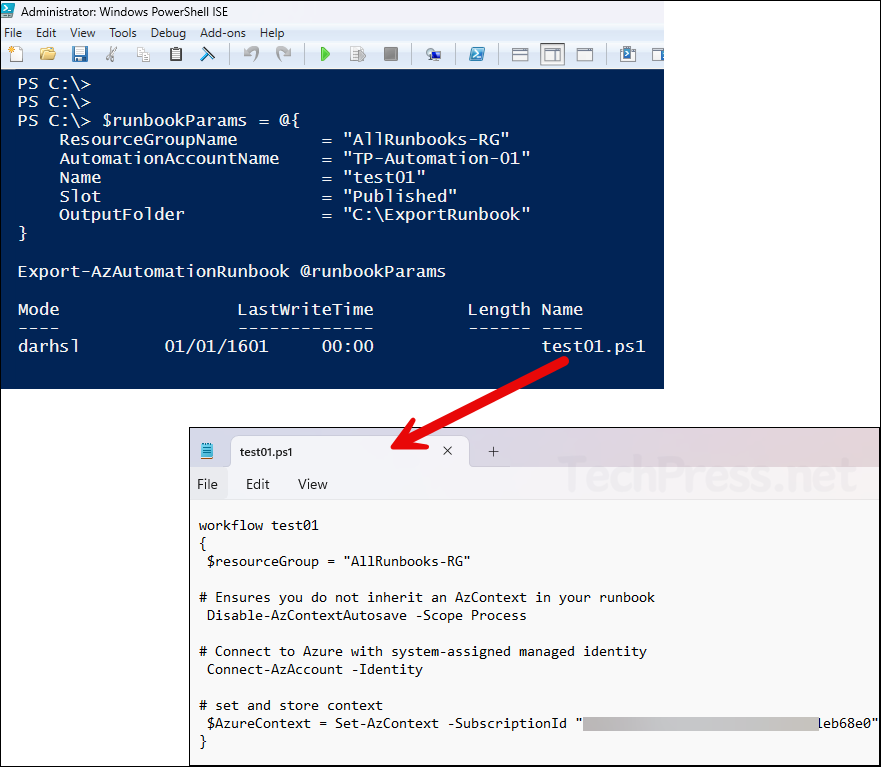
- As shown in the screenshot below, the
Export-AzAutomationRunbookcmdlet outputs a.ps1file containing the exported runbook. We will use this .ps1 file in the next step during the import process.
Import Azure Automation Runbooks
There are two ways to import Azure Automation runbooks: you can either use Import a runbook option in the target Automation Account, or use PowerShell cmdlet Import-AzAutomationRunbook. Let’s explore both methods.
Import Using PowerShell
You will find below PowerShell code snippet that can be run to import a runbook. Prepare below information from your azure environment and provide it in the script.
- $importRunbookName: Provide new name of the runbook or you can keep it same.
- $importFilePath: Provide the path of exported runbook ps1.
- ResourceGroupName: Provide the target resource group name.
- AutomationAccountName: Provide the target automation account name.
- Path: $importFilePath
- Type: Provide the type of runbook. Typically its the same as source runbook type.
- Name: $importRunbookName
- Description: Provide a description for the new runbook.
Import-Runbook.ps1
$importRunbookName = "test02"
$importFilePath    = "C:\ExportRunbook\test01.ps1"

$params = @{
    ResourceGroupName     = "AllRunbooks-RG"
    AutomationAccountName = "TargeAutomationAccount"
    Path                  = $importFilePath
    Type                  = 'PowerShell'
    Name                  = $importRunbookName
    Description           = 'Imported module from Sub1'
}
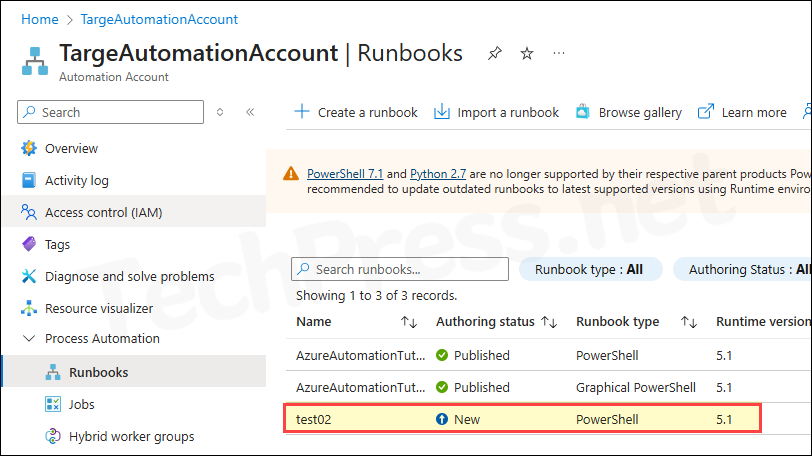
Import-AzAutomationRunbook @params- Below screenshot shows that the Import-AzAutomationRunbook cmdlet has been executed successfully.
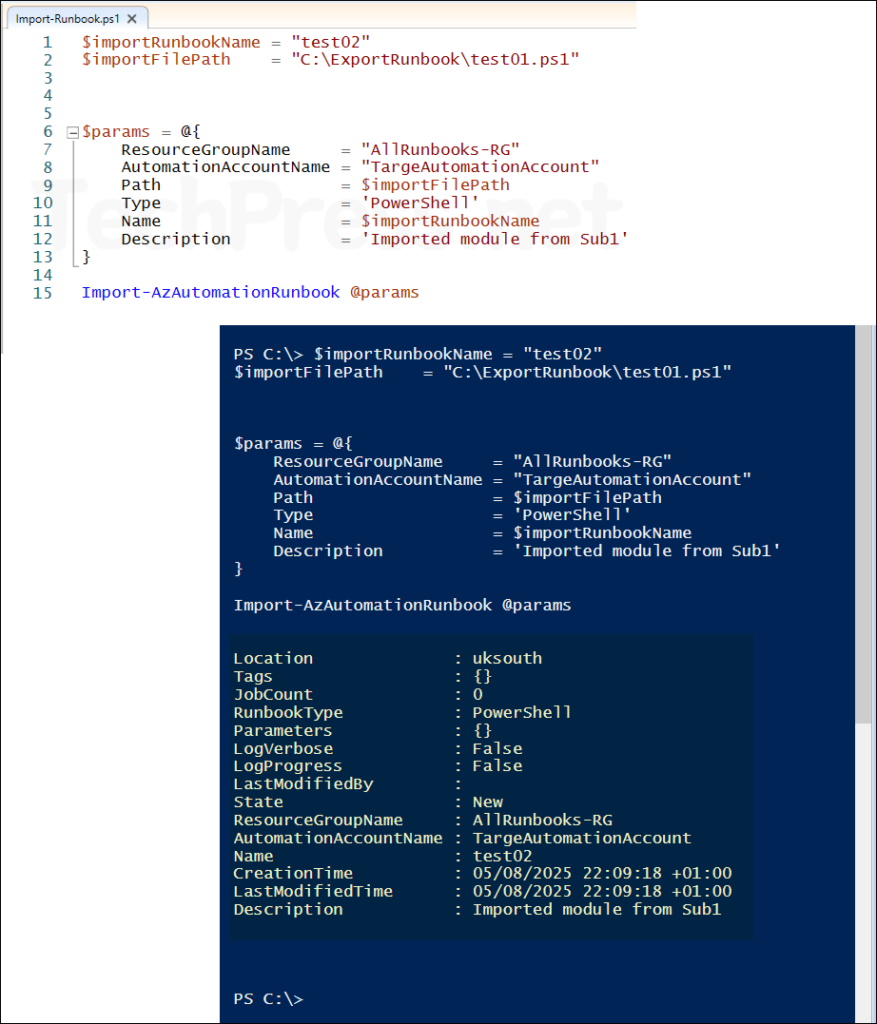
- Runbook imported successfully.
Import Using Azure Portal
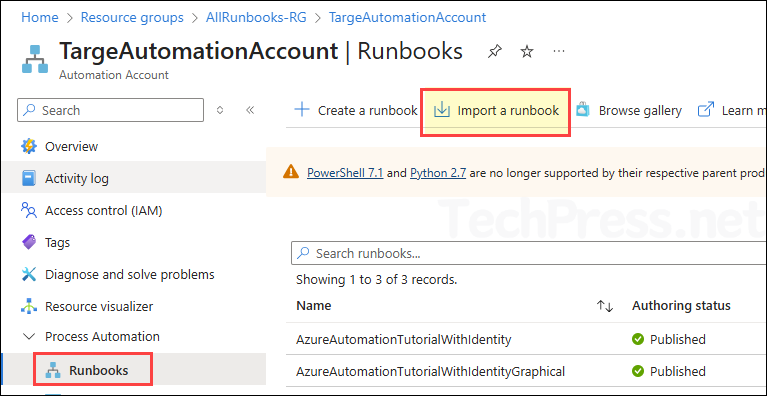
To import a runbook using the Microsoft Azure portal, follow these steps:
- Sign in to the Azure Portal.
- Navigate to the target Automation Account where you want to import the runbook.
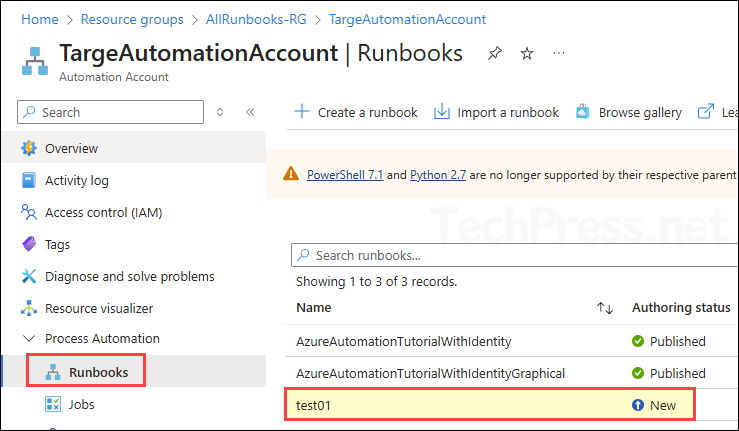
- In the left-hand menu, under Process Automation, click Runbooks.
- From the top menu bar, select Import a runbook.
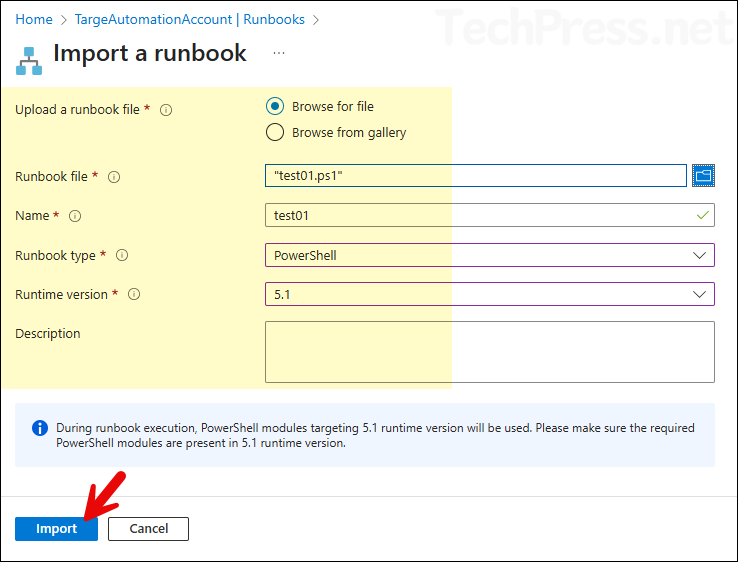
Provide the values below to import a runbook. I am keeping the same settings as they were configured in my source tenant — for example, the same runtime version and runbook type. You can change the name of the runbook if you want.
- Upload a runbook file: Browse for file.
- Runbook file: Browse to the exported runbook ps1 file.
- Name: You can choose a name for the new runbook in the target account.
- Runbook type: PowerShell (As I had exported a PowerShell type of runbook, therefore I will provide type as PowerShell while importing). Other values are: Python, Graphical, Graphical PowerShell Workflow)
- Runtime version: 5.1
- Runbook imported successfully.