In this blog post, I will show you how to create and deploy Wi-Fi profile using Intune for Windows devices. A typical Wi-Fi profile defines the SSID, authentication settings, security settings, and more. Once you configure all the settings according to your business requirements, you can deploy the profile to end users devices.
Multiple Wi-Fi networks can exist in a corporate environment, each with different settings and security configurations. For example, you could have one wireless network for internal staff, another for guests that is more open than the internal staff network, and perhaps a third network with specific restrictions or enhanced security requirements.
Creating each network manually on hundreds of devices would not be practical. With the help of Intune, you can create any number of Wi-Fi profiles to meet different network requirements and deploy them directly from Intune.
Contents
Prerequisites
Before we begin creating a Wi-Fi profile in Intune, make sure the following requirements are met:
- Confirm Wi-Fi profile settings such as SSID, authentication type, password, and other parameters with your network administrator in advance. This will help speed up the profile creation process.
- Create a group in Entra ID containing the users who will receive this profile on their devices.
- An administrator with at least Policy and Profile manager role. You can create a custom role in Intune, add this permission and assign this role to administrators who will create and manage the Wi-Fi profiles. For more Information, refer to the link: How to Create Custom RBAC role in Intune.
- Support Platforms for Wi-Fi Profiles:
- Android device administrator
- Android Enterprise and kiosk
- Android (AOSP)
- iOS/iPadOS
- macOS
- Windows
- Windows Holographic for Business
Create a Wi-Fi Profile in Intune
- Sign in to the Microsoft Intune admin center > Devices > Manage Devices > Configuration > Create > New policy.
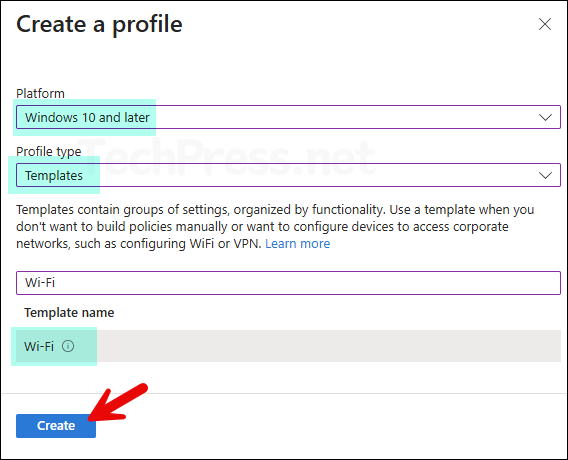
- Platform: Windows 10 and later
- Profile Type: Templates
- Template Name: Wi-Fi
- Basics tab: Provide a name and description of the Wi-Fi profile. For example, Corp-WiFi profile.
Configuration settings
Wi‑Fi type: Use the drop‑down to select Basic or Enterprise. Select Basic for home or personal networks, which uses WPA/WPA2 security. For an Enterprise Wi‑Fi profile, Extensible Authentication Protocol (EAP) is used.
Wi-Fi type Basic
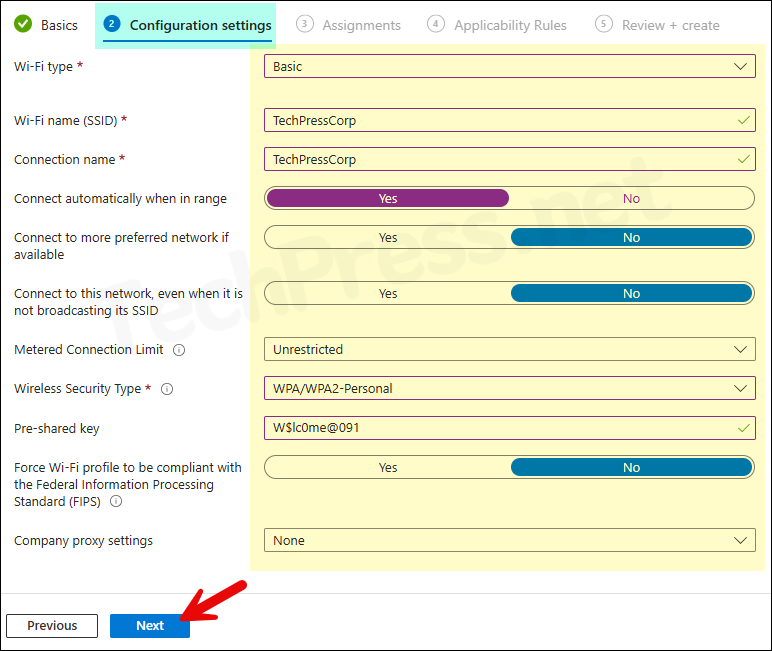
You can configure the following settings for a basic Wi-Fi profile. I have used the recommended settings to create a basic Wi-Fi profile for my network. For detailed information about each setting, refer to the following link: Basic profile.
- Wi-Fi type: Basic
- Wi-Fi name (SSID): Actual wireless network name that devices connect to. For example, I will provide TechPressCorp.
- Connection name: User-friendly name of the Wi-Fi. I will keep the same as SSID: TechPressCorp. You can put something like Building 5 network, Block A network etc.
- Connect automatically when in range: Yes (Devices will connect to this network automatically when in range).
- Connect to more preferred network if available: Select No.
- Connect to this network, even when it is not broadcasting its SSID: No
- Metered Connection Limit: Unrestricted
- Wireless Security Type: WPA/WPA2-Personal (recommended).
- Pre-shared key (PSK): create a complex PSK value. This value is same for all the devices where you will deploy this Wi-Fi profile. Therefore, store PSK value in a secure place.
- Company proxy settings: None
Wi-Fi type Enterprise
Enterprise Wi-Fi profiles are designed for organizations that require stronger security and more advanced authentication options. Unlike basic profiles, which typically rely on a simple password, Enterprise profiles use the Extensible Authentication Protocol (EAP) and security settings to verify Wi-Fi connections.
| Feature / Criteria | Basic Wi‑Fi Profile | Enterprise Wi‑Fi Profile |
|---|---|---|
| Authentication Method | Pre‑shared key (password) | Extensible Authentication Protocol (EAP) |
| Security Level | Standard | High |
| Certificate-Based Authentication | ❌ Not supported | ✅ Supported |
| Setup Complexity | Easy | Advanced |
| Best Suited For | Guest or small office networks | Corporate networks requiring strong authentication |
| Example Use Case | Guest Wi‑Fi for visitors | Internal staff Wi‑Fi with certificate-based access |
Basic Settings
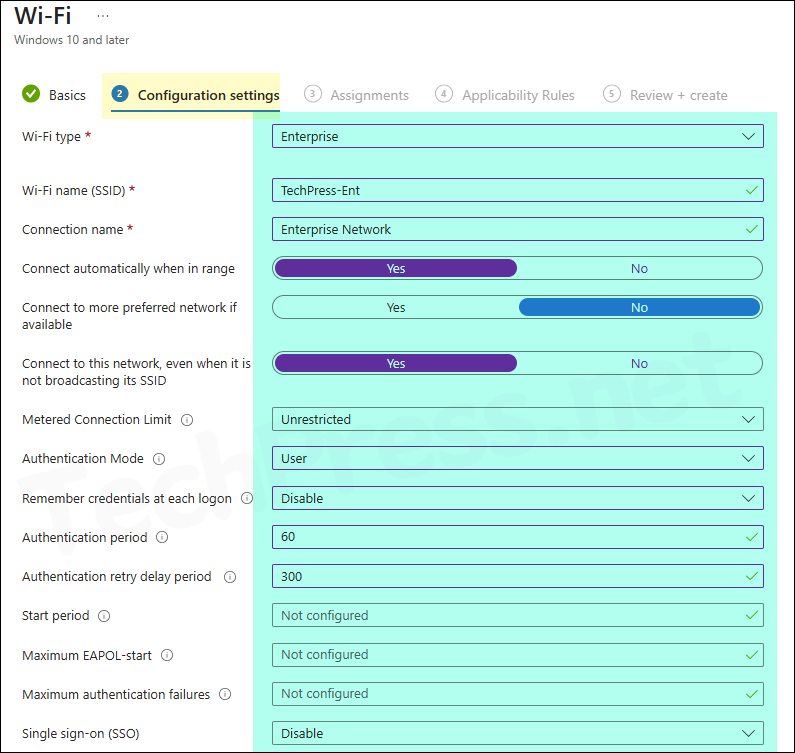
- Wi‑Fi type – Select Enterprise.
- Wi‑Fi name (SSID) – The real name of the wireless network.
- Connection name – A user-friendly name displayed to users.
- Connect automatically when in range – Yes.
- Connect to more preferred network if available – No.
- Connect even when SSID is hidden – Yes.
- Metered connection limit – Unrestricted
- Authentication mode – User
- Remember credentials at each logon – Disable
- Authentication period – 60
- Authentication retry delay – 300
- Start period – Not Configured
- Maximum EAPOL‑Start messages – Not Configured
- Maximum authentication failures – Not Configured
- Single sign-on (SSO) – Disable
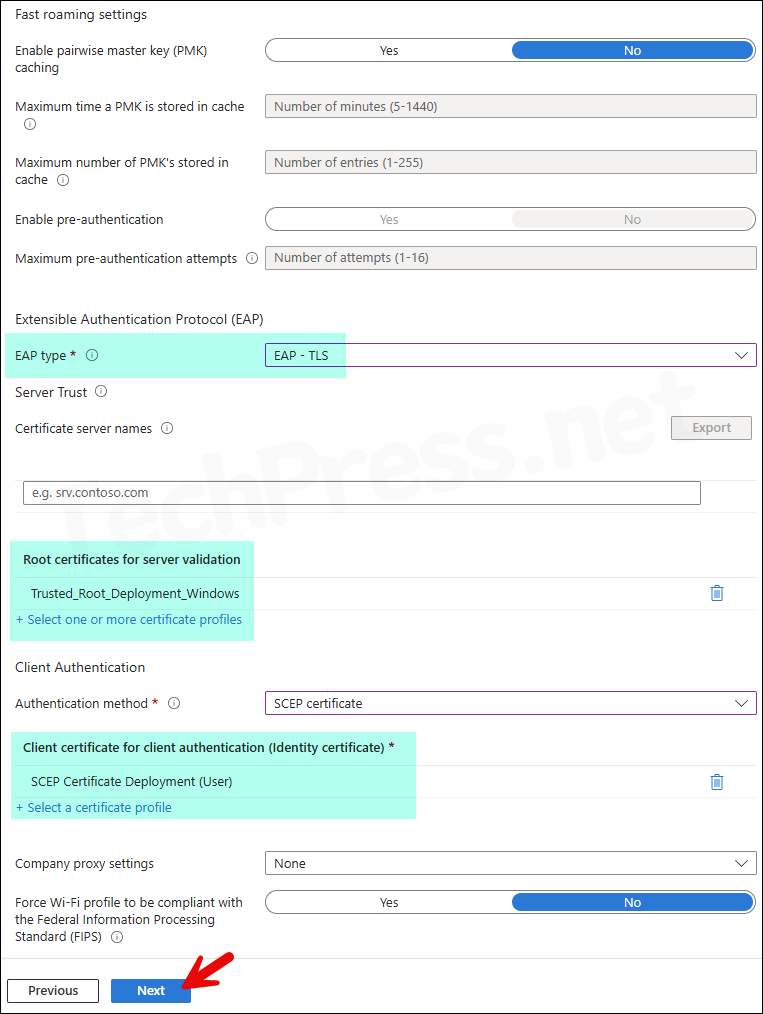
Fast roaming settings
- Enable pairwise master key (PMK) caching – Not Configured
Extensible Authentication Protocol (EAP)
- EAP type – EAP-TLS
- EAP-TLS
- Certificate server names
- Root certificates for server validation
- Authentication method – SCEP certificate, PKCS certificate, or Derived credential
- EAP-TTLS
- Certificate server names
- Root certificates for server validation
- Authentication method – Username/Password, SCEP, PKCS, or Derived credential
- Non-EAP method – PAP, CHAP, MS-CHAP, MS-CHAP v2
- Identity privacy (outer identity)
- Protected EAP (PEAP)
- Certificate server names
- Root certificates for server validation
- Perform server validation – Yes/No
- Disable user prompts for server validation – Yes/No
- Require cryptographic binding – Yes/No
- Authentication method – Username/Password, SCEP, PKCS, or Derived credential
- Identity privacy (outer identity)
Additional Settings
- Company proxy settings – None, Manual (IP & Port), or Automatic (PAC file URL).
- Force FIPS compliance – Yes/No.
Every organization has unique requirements for creating a Wi-Fi profile, therefore I will recommend reading the information on the link: Enterprise Profile. It provides more detailed information about each setting. Below screenshots show an example of Enterprise type of Wi-Fi profile on Intune.
- Assignments: Assign this Wi-Fi profile to an Entra security group containing either users or devices. If you assign it to a user group, the profile will be created on all devices associated with those users. For more targeted deployment, assign the profile to a device group instead.
- Applicability rules: Create rules to apply the profile only to specific devices based on the OS edition or OS version. For now, I will skip this and proceed to the next step.
- Review + create: Review the Wi-Fi profile settings and click Create.
Sync Intune Policies
The device check-in process might not begin immediately. If you’re testing this policy on a test device, you can manually kickstart Intune sync from the device itself or remotely through the Intune admin center.
Alternatively, you can use PowerShell to force the Intune sync on Windows devices. Restarting the device is another way to trigger the Intune device check-in process.
End User Experience
When the device check-in process completes successfully, Intune will create the Wi-Fi profile on the user’s device as configured. You can verify this by navigating to Settings > Network & internet > Wi‑Fi and checking if the new profile is listed. If the deployed Wi-Fi profile does not appear, wait for some time or restart the device and check again. If there are still issues, refer to the following troubleshooting guidance.
Wi-Fi Profile Deployment Troubleshooting
If your Wi‑Fi profile isn’t deploying as expected, start by reviewing the key points below. These checks will help you narrow down the possible causes and guide you toward resolving the issue.
- Check Event Logs: You can check event logs on the client device to find information about Wi-Fi deployment profile issue. Launch Event viewer> Application and services logs> Microsoft > Windows > device management-enterprise-diagnostics-provider> Admin. Right-click on Admin folder > Filter Current log. Filter it using Event ID 814 and go through the logs to find logs related to a particular Intune deployment.
- Collect Intune logs: You don’t need to sign in to the device or ask the user to export Intune logs. You can use device remote actions from Intune admin center to collect the logs remotely. For more information, refer to the guide: Collect Intune logs from Windows devices.
- Wi-Fi profile not getting deployed: Check and confirm if the user or device is a part of the entra group targeted for the profile deployment.
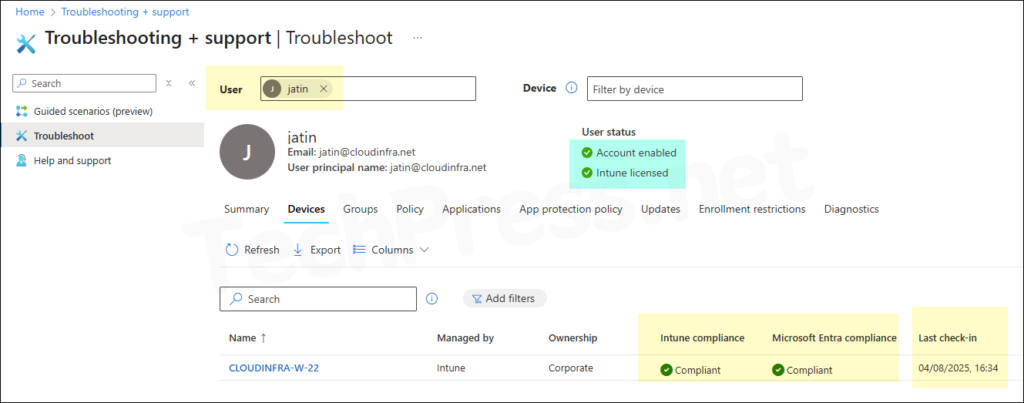
- Troubleshooting + support: On Intune admin center, navigate to Troubleshooting + support, review user and device status to Intune license, account enablement, and device compliance. Also, verify the last check‑in date.
- Certificate dependency: If your Wi-Fi profile is linked with Certificate deployment. For example: Trusted root certificate or SCEP certificate deployment. Check if those profiles are deployed successfully.
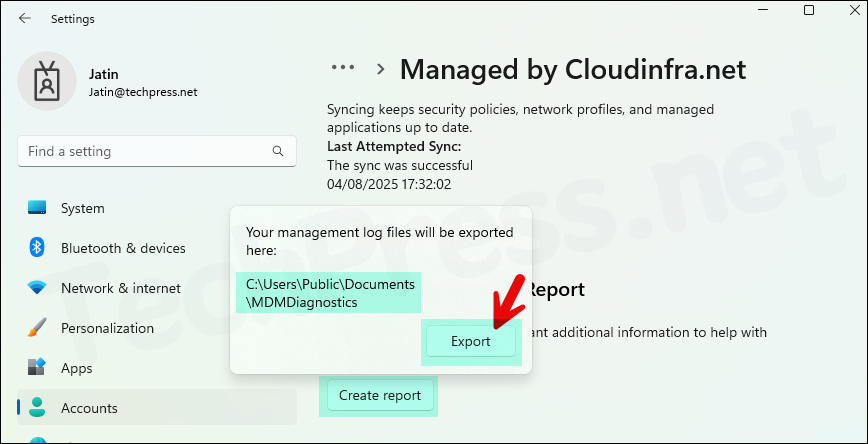
- MDM Diagnostic log: To generate MDM diagnostic log on a client device, Go to Settings > Accounts > Access work or school > Select your work or school account > Click Info button > At the bottom of the Settings page, select Create report.